Configuring User Impersonation in Microsoft SharePoint 2013 and 2016
It is possible to impersonate a YSoft SafeQ terminal user using a workflow that delivers to a SharePoint 2013/2016 type connector destination. If impersonation is configured correctly in Microsoft SharePoint, YSoft SafeQ will store scanned documents in SharePoint using a terminal user's credentials.
The YSoft SafeQ SharePoint 2013/2016 connector uses a mechanism of High Trust applications for impersonation on SharePoint. You can find detailed information on https://msdn.microsoft.com/en-us/library/office/jj945118.aspx and https://msdn.microsoft.com/en-us/library/office/jj945118.aspx.
To configure impersonation on a SharePoint 2013/2016 server:
Configure SharePoint to use server-to-server authentication. In short, that means adding users with appropriate user rights. For more information, you can consult this webpage https://msdn.microsoft.com/en-us/library/office/fp179923.aspx#Servertoserver.
Log in as an admin to Sharepoint Central Administration.
Go to Application Management.
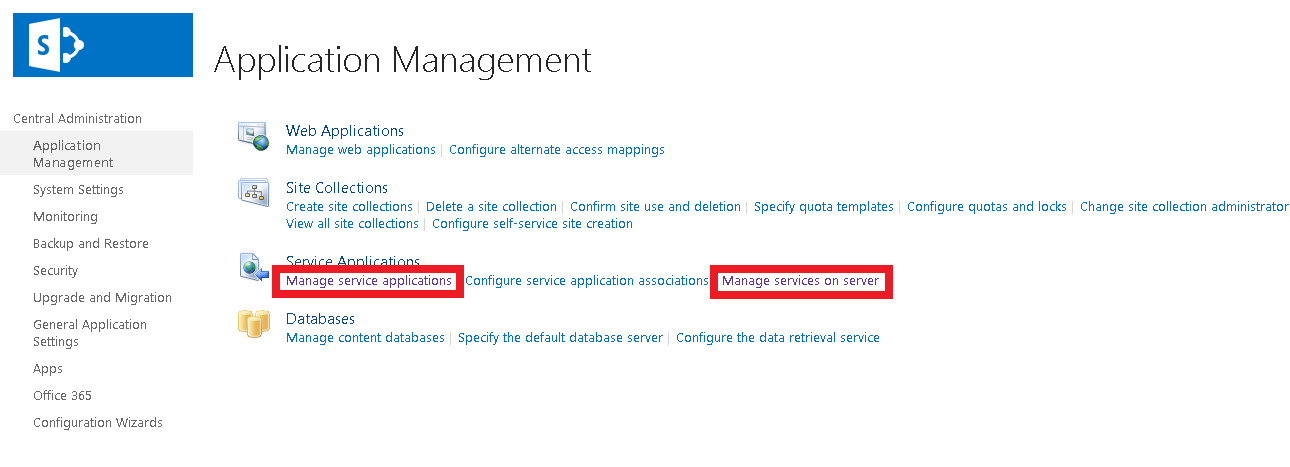
In the section Manage service application, verify that User Profile Service Application and App Management Service have started.
In the section Manage services on server, verify that the service User Profile Service has started.
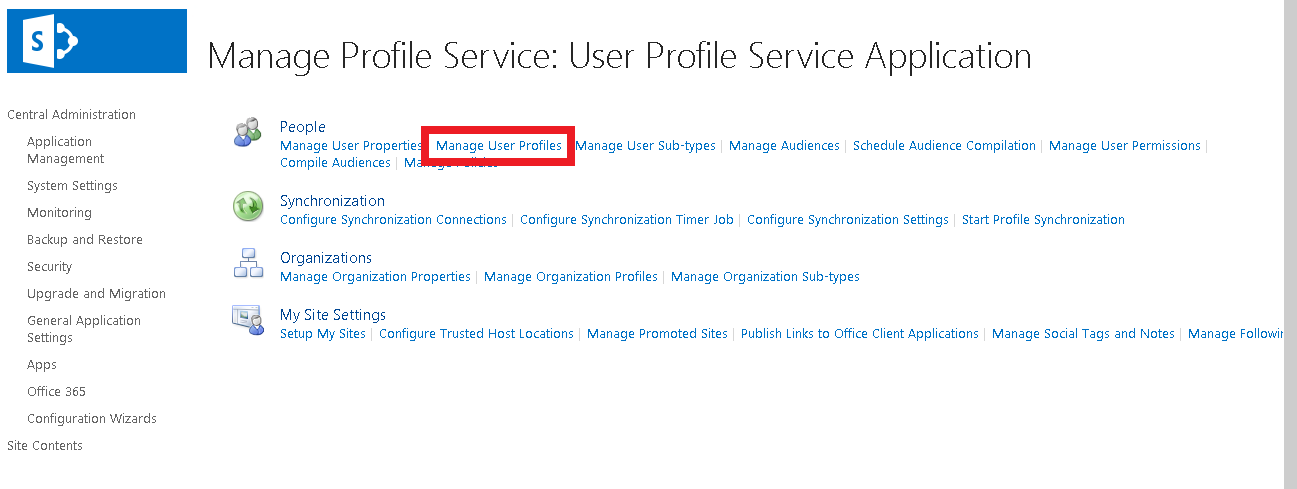
Then under Manage service applications, go to User Profile Service Application, and then under People, verify that you have two users. One user as the service account and one user to be impersonated.
For testing purposes, a self-signed certificate is enough. For more detailed information, you can consult https://msdn.microsoft.com/en-us/library/office/fp179901.aspx#Cert2.
Open Internet Information Services.
Double-click the Server Certificates icon.
Right-click inside the Server Certificates window and select Create Self-Signed Certificate.

Then export your certificate to a .pfx format, call it HighTrustCert and save it into c:\certs
When exporting, fill in the password, e.g., password.
To continue, you need to convert the .pfx into a .cer format.
Go to the add-in pool that servers IIS website, e.g., Sharepoint - 80
Double-click Server Certificates.
Double-click HighTrustCert.
In the details of the certificate, choose Copy to File.
Select do not export private key, and save it into c:\certs
Now you need to bind the SharePoint application with the certificate.
Run the following commands in the Sharepoint 2016 Management Shell.
Change issuerId and publicCertPath according to your needs
$publicCertPath ="C:\certs\HighTrustCert.cer"$certificate = New-Object System.Security.Cryptography.X509Certificates.X509Certificate2($publicCertPath)New-SPTrustedRootAuthority -Name"HighTrustNewAppCert"-Certificate $certificate$realm = Get-SPAuthenticationRealm$specificIssuerId ="33333333-3333-3333-3333-333333333333"$fullIssuerIdentifier = $specificIssuerId +'@'+ $realmNew-SPTrustedSecurityTokenIssuer -Name"High Trust New App Cert"-Certificate $certificate -RegisteredIssuerName $fullIssuerIdentifier –IsTrustBrokeriisreset$serviceConfig = Get-SPSecurityTokenServiceConfig$serviceConfig.AllowOAuthOverHttp = $true$serviceConfig.Update()
Register a SharePoint add-in for use by YSoft SafeQ.
Register an add-in by navigating to http://<SharePointWebsite>/_layouts/15/AppRegNew.aspx on the tenancy or farm.

In the form that appears:
Generate ClientId, keep this value as it is needed for the next step.
Generate client secret, it is not used by the add-in, however, it needs to validate the form.
Enter a descriptive Title, for example, "SafeQConnector".
Enter a site URL in the app domain field. It is not needed for the add-in, but the field is validated for the format and it will be on the app link.
Redirect URL can be left blank on SharePoint 2013 (on SharePoint 2016, set it for example, to the localhost address).
You can find more information on https://msdn.microsoft.com/library/jj687469.aspx.
For SharePoint 2016, you need to specify the add-in permissions via an XML description.
Visit the permission assignment page http://<SharePointWebsite>/_layouts/15/AppInv.aspx .
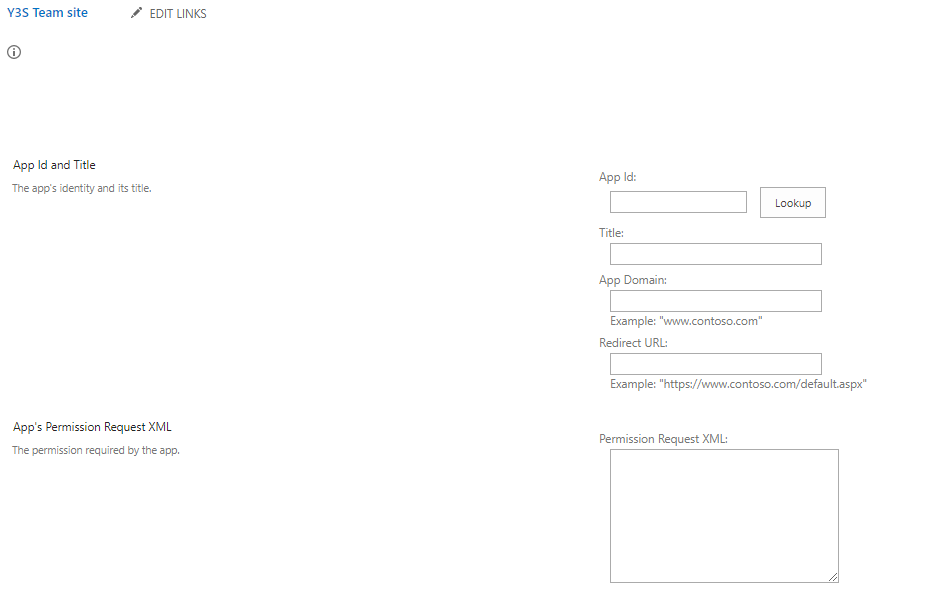
Enter the ClientId from the step 5.c.i. and click lookup.
The values from the previous form should load automatically.
Enter permissions for the application:
<AppPermissionRequestsAllowAppOnlyPolicy="false"><AppPermissionRequestScope="http://sharepoint/content/sitecollection"Right="FullControl"/><AppPermissionRequestScope="http://sharepoint/content/sitecollection/web"Right="FullControl"/><AppPermissionRequestScope="http://sharepoint/content/sitecollection/web/list"Right="FullControl"/></AppPermissionRequests>
And update the permissions.
You can find more information on https://msdn.microsoft.com/en-us/library/office/fp142383.aspx.
The SharePoint part of the setup should be done by now. Now it is necessary to setup YSoft SafeQ6 to work with SharePoint.
Install the self-signed certificate generated previous steps on the WPS machine. The proper destination for the certificate is localMachine/personal.
In the YSoft SafeQ tenant system settings (please refer to Scan Workflow-related System Settings), modify the following configuration keys:
sharepointClientId – ClientId – the Id generated in step 3.
sharepointClientCertificateThumbprint – the thumbprint of the certificate generated in step 2. You can find Information on how to obtain the thumb-print on the following link https://msdn.microsoft.com/en-us/library/ms734695(v=vs.110).aspx. Copy-pasting of the thumbprint code is NOT RECOMMENDED. As the code in certificate detail contains an invisible symbol at the beginning of the string (more detail on http://stackoverflow.com/a/9382783).
sharepointIssuerId – the GUID assigned to the certificate in step 3.
