Configuring Microsoft OneDrive for Business or SharePoint Online with user based access
To configure OneDrive/SharePoint with user-based access, the following steps are needed.
Register new application in Microsoft Azure.
Create a new client secret.
Update configuration in the management interface.
Steps are described in more detail in the chapters below.
In case you have any troubles, please refer to the troubleshooting section of the edit connector documentation.
For more information on registering applications, see https://docs.microsoft.com/en-us/azure/active-directory/develop/quickstart-register-app.
Registering new application
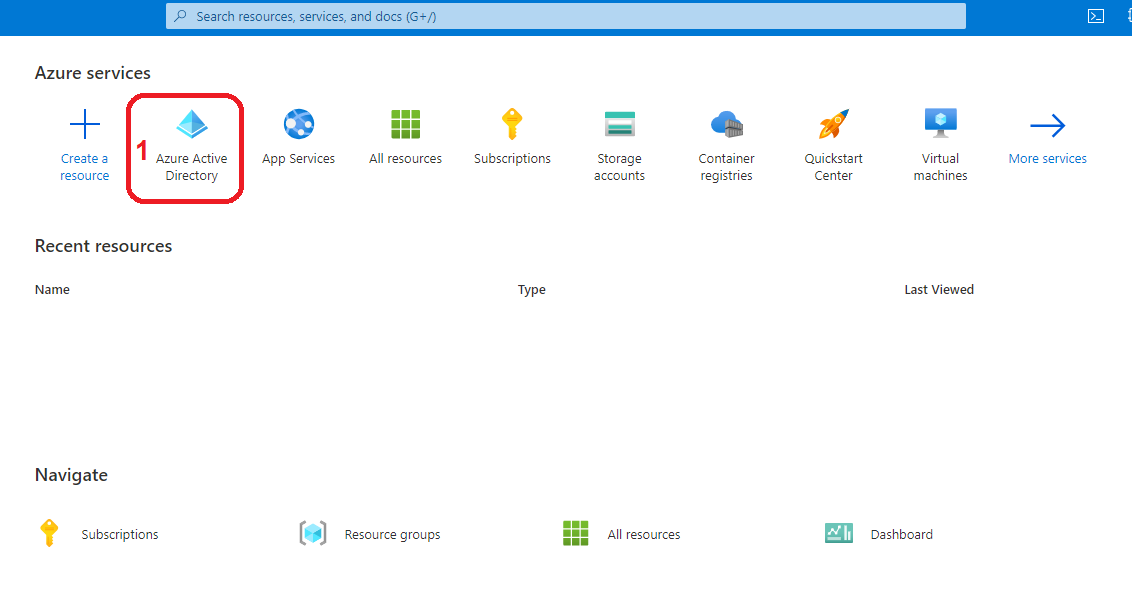
Go to the Microsoft Azure portal https://portal.azure.com/
Login with Microsoft account that will be used for application registration.
If you have logged into the Microsoft Azure portal for the first time, you will need to configure your subscription first.
Click on the Azure Active Directory.
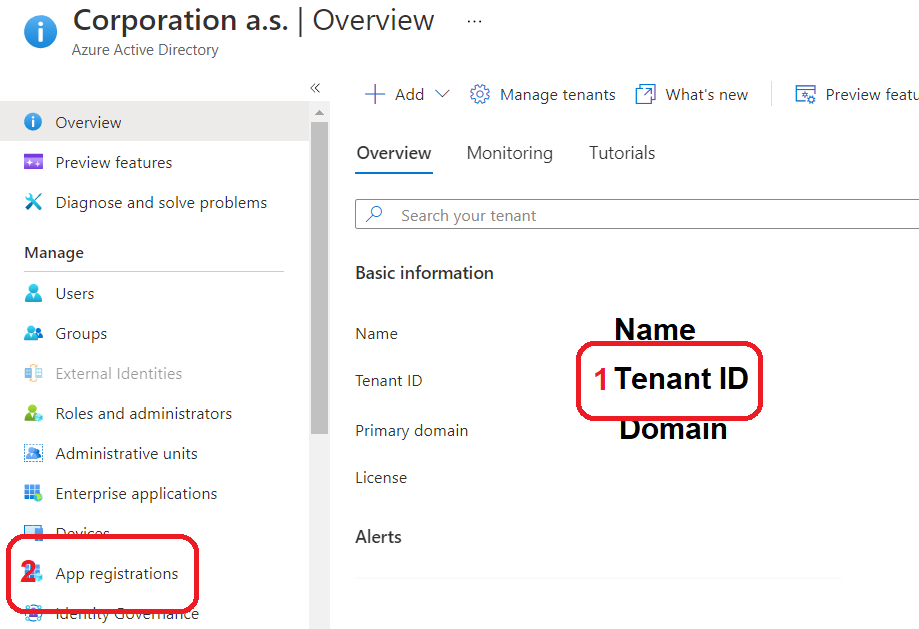
In the Azure Active Directory, we can see Tenant ID – this ID will be later used on the Configuration page in the management interface. Save this ID for later and proceed to the App registration.
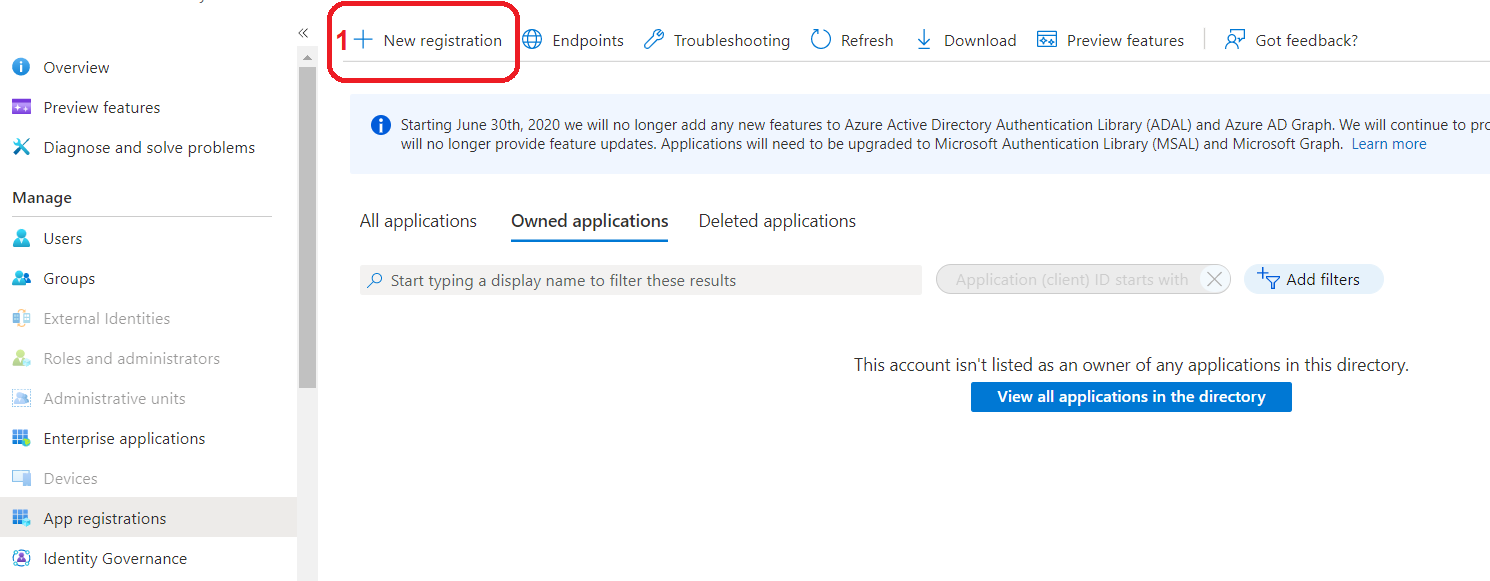
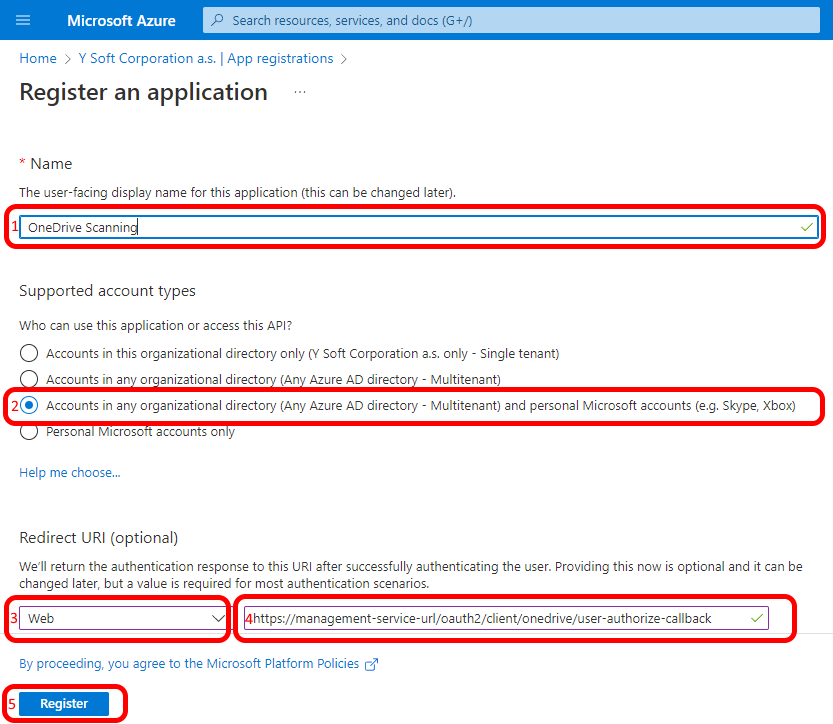
Create new registration.
Fill in
Application name e.g. "OneDrive Scanning" resp. "SharePoint Scanning".
Supported account types select an option according to customer needs. If the application is created only for one customer, the first option is enough.
Redirect URI select Web and in the text box fill in the address where the application requesting the authorization is accessible e.g. https://< Management Service URL> /oauth2/client/onedrive/user-authorize-callback (for OneDrive) resp. https://< Management Service URL> /oauth2/client/sharepoint/user-authorize-callback (for SharePoint). Ensure the Management Service URL is accessible.
Click Register
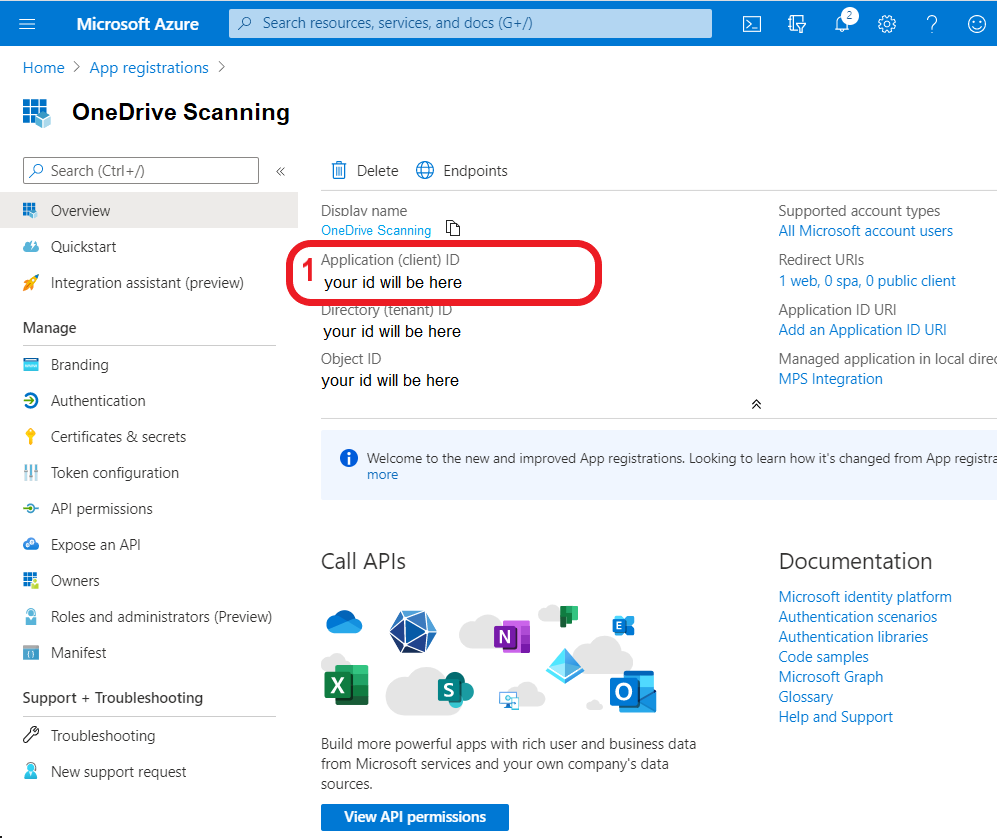
A new application will be created. On the Overview page, we can see Application (client) ID, save this value for later. Application (client) ID will be used on the Configuration page in the management interface.
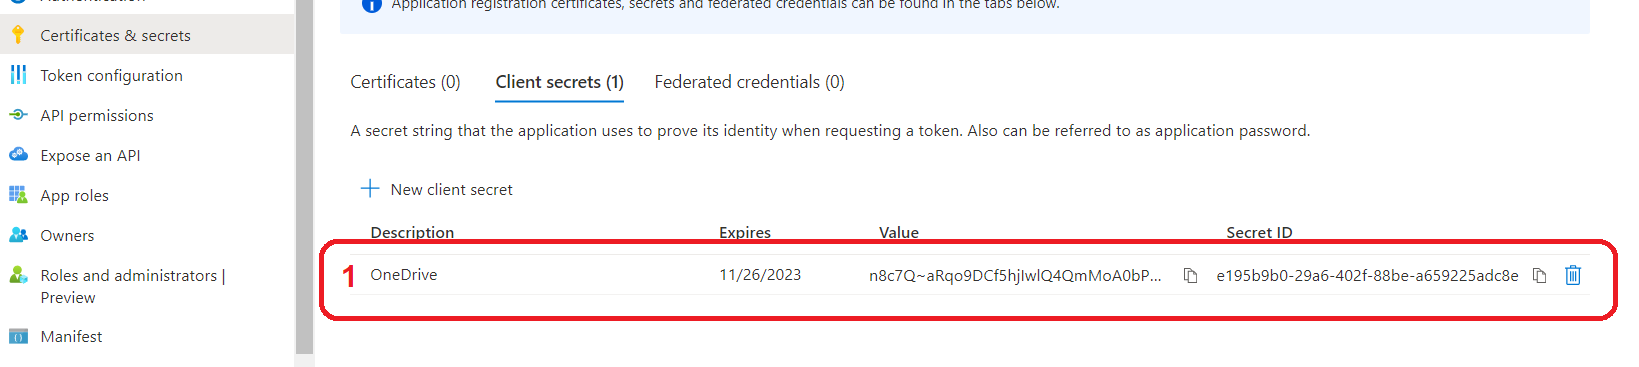
Creating client secret
Prerequisite: Follow instructions for Registering new application.
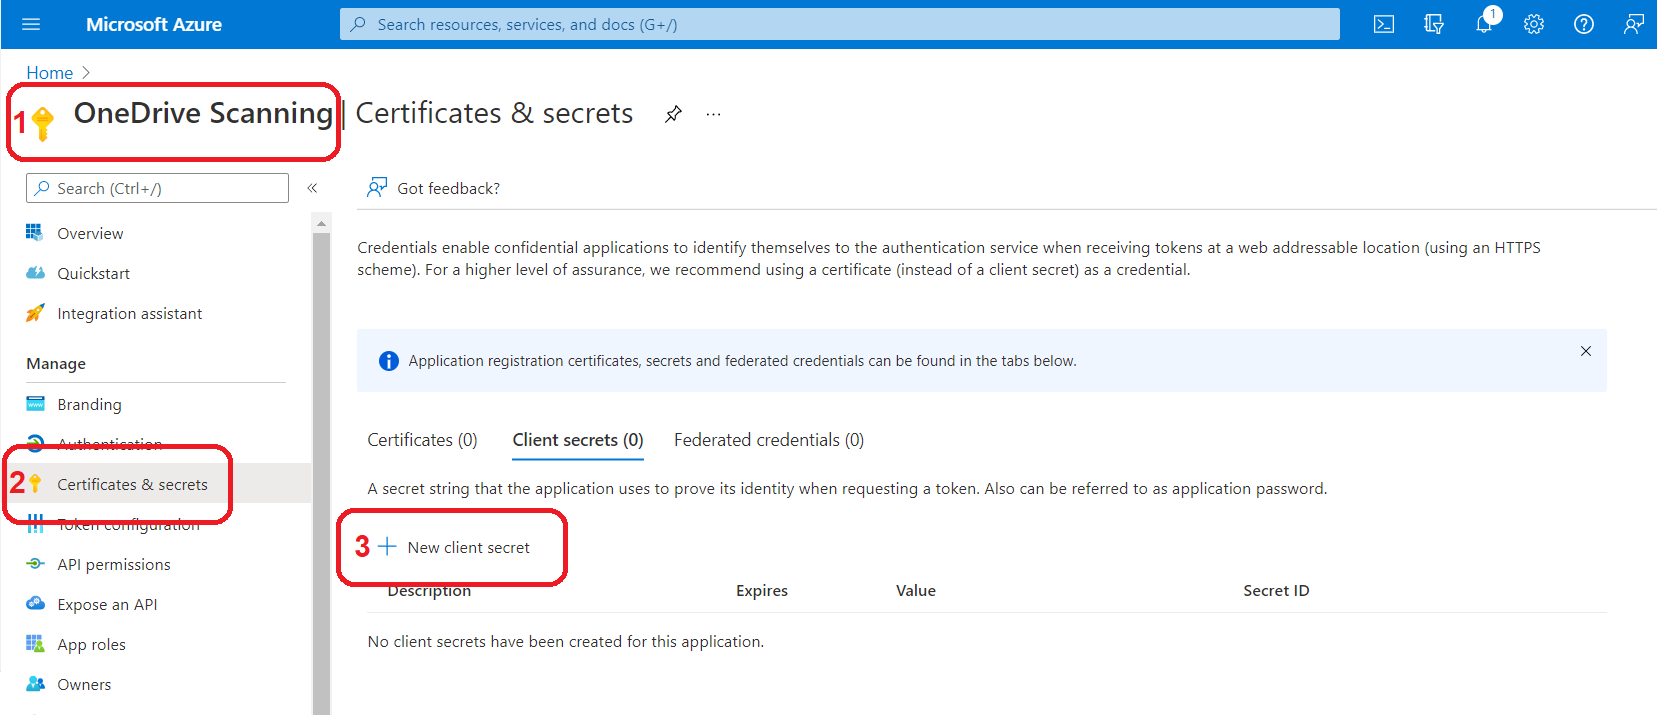
Make sure you are in the correct application.
Navigate to the Certificates & secrets using the sidebar menu.
Click on New client secret.
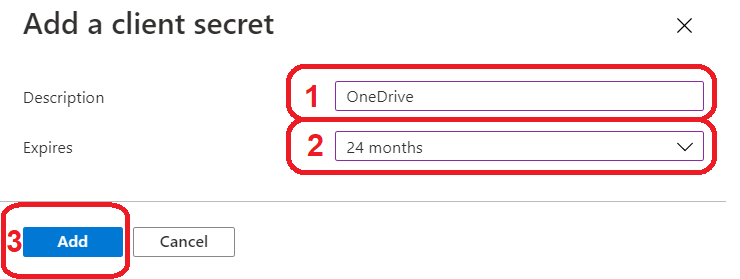
Fill in
Description e.g. OneDrive resp. SharePoint
Expires select expiration time of the secret
Click Add
A new client secret will be created. Copy your secret value to some temporary file as you will be not able to view it after you leave this page. Client secret will be later filled on the Configuration page in the management interface.
Updating the configuration in the management interface
Prerequisite: Follow instructions for Registering new application, Creating client secret
Log in to the management interface using an account with administrator rights.
Navigate to System > Configuration.
Change the settings level to EXPERT.
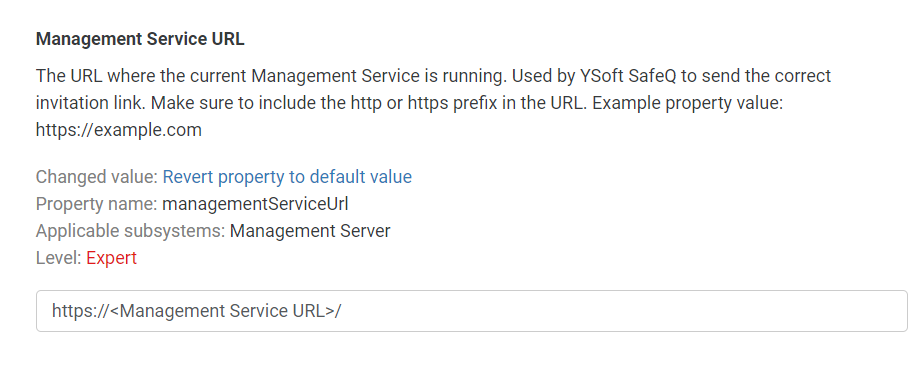
Configure "managementServiceUrl", Management Service URL needs to match the URI filled in Azure Application registration
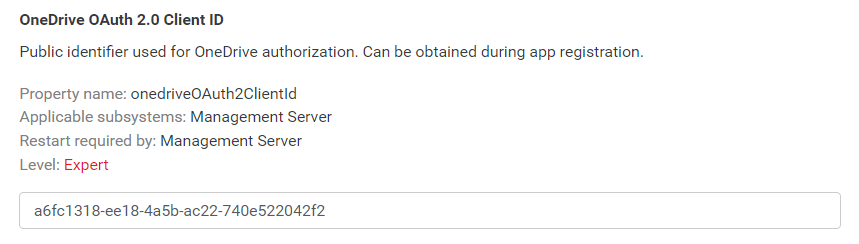
Fill in "onedriveOAuth2ClientId" (for OneDrive) resp. "sharepointOAuth2ClientId" (for SharePoint) configuration with Application (client) ID obtained from application registration
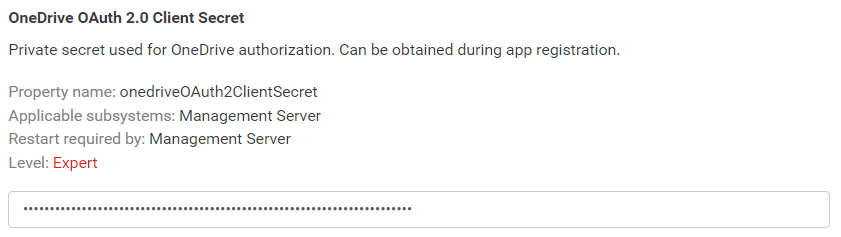
Fill in "onedriveOAuth2ClientSecret" (for OneDrive) resp. "sharepointOAuth2ClientSecret" (for SharePoint) configuration with Client secret obtained from creating client secret
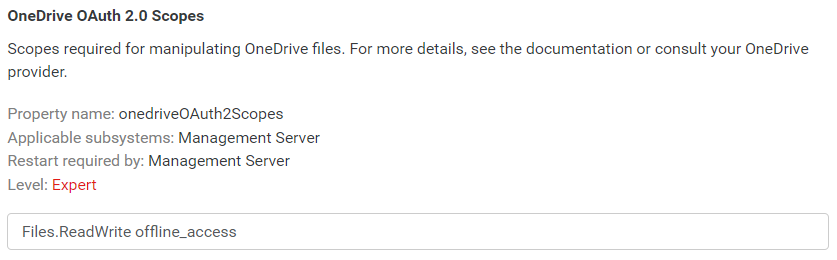
Check "onedriveOAuth2Scopes" configuration is set to Files.ReadWrite (for OneDrive) resp. "sharepointOAuth2Scopes" configuration is set to Sites.ReadWrite.All (for SharePoint). The offline_access scope is also recommended, it eliminates necessity of repeated authorizations.