Description
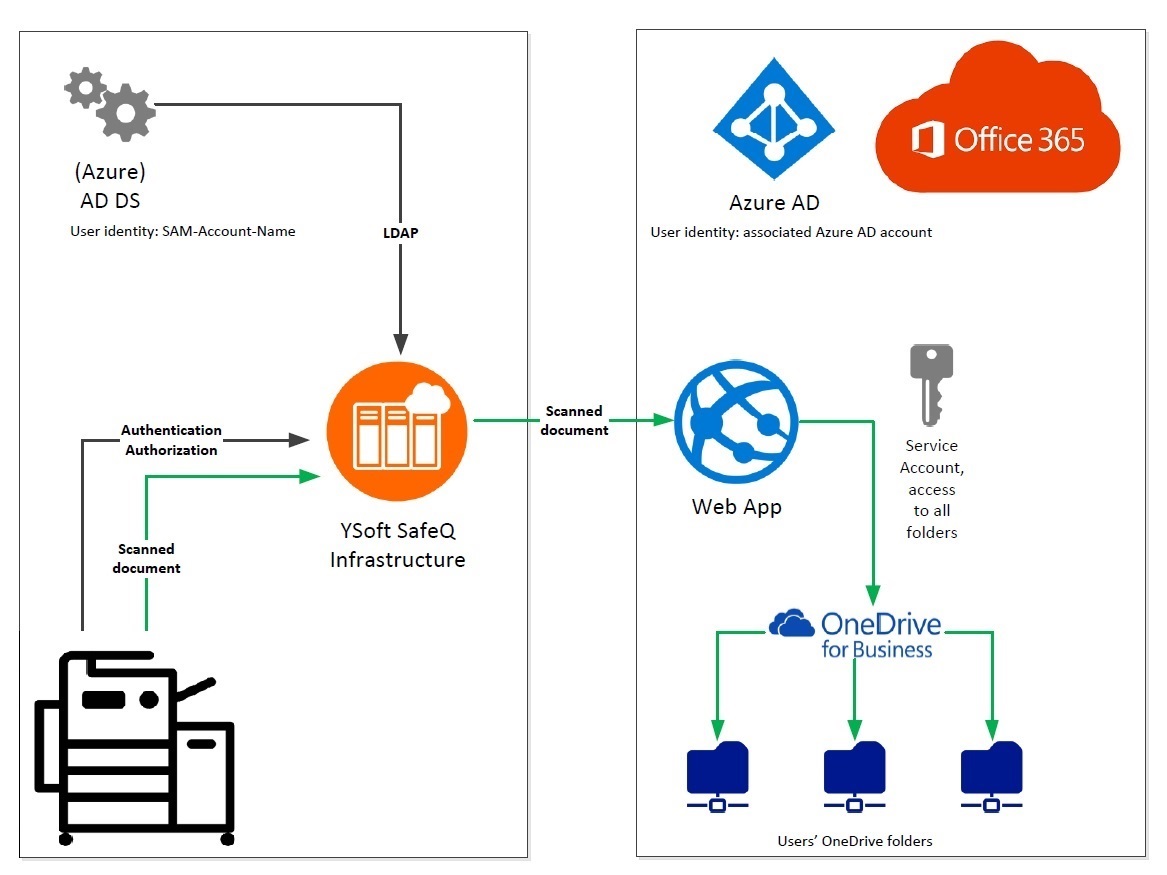
For centralized document storage and workflow processing YSoft SafeQ can deliver scanned files to SharePoint Online or OneDrive for Business. In Azure Active Directory the application must be registered, permissions granted, and a certificate authorized for authentication.
Summary
Required from YSoft SafeQ Administrator
Optional: Name of application to be registered in Azure Active Directory.
The name is fully up to you. But it is a good idea to name it the way, indicating that the app is being used by YSoft SafeQ. e.g.: Y Soft - OneDrive and SharePoint Application.
Create certificate to authorize application in Azure Active Directory.
Exported public certificate file for import into Azure Active Directory.
File format: PEM or base-64 encoded X.509 (.CER file).
Optional: Exported public certificate file, including private key, if the certificate needs to be imported into YSoft SafeQ Workflow Processing System servers.
File format: PKCS#12 file containing
public certificate and private key (.PFX file).
Required from Azure Administrator
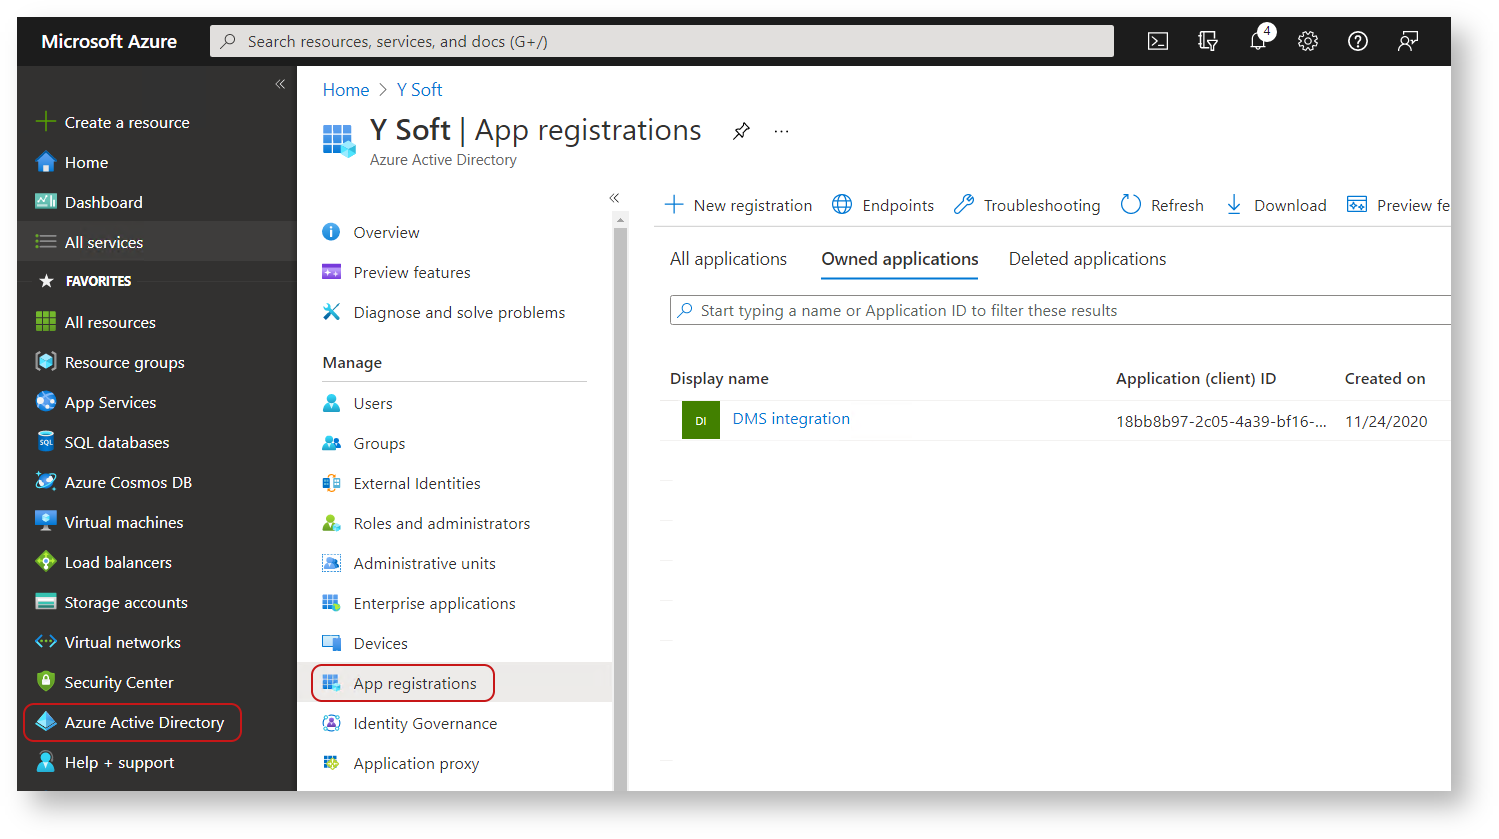
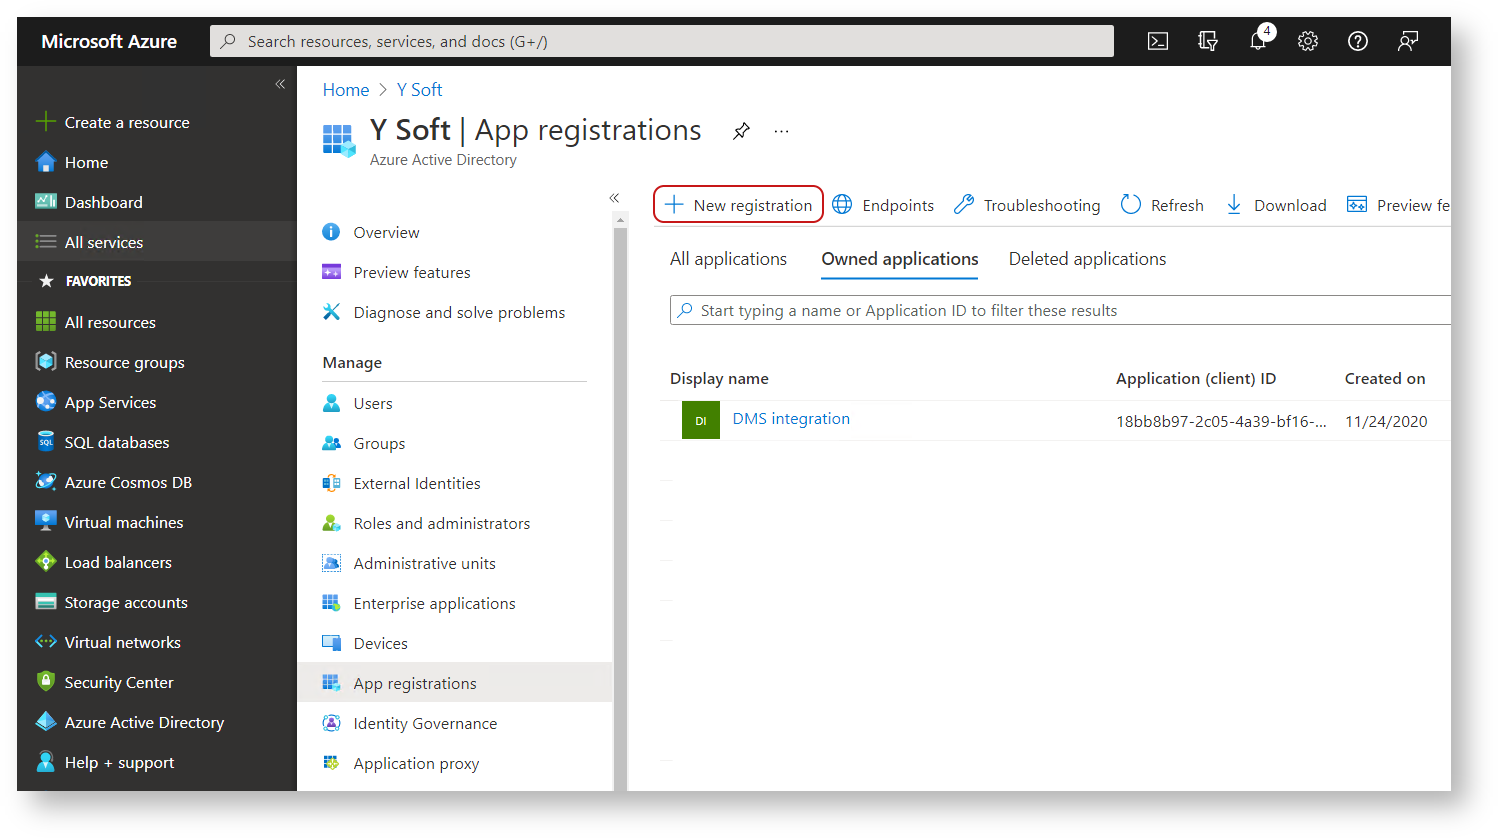
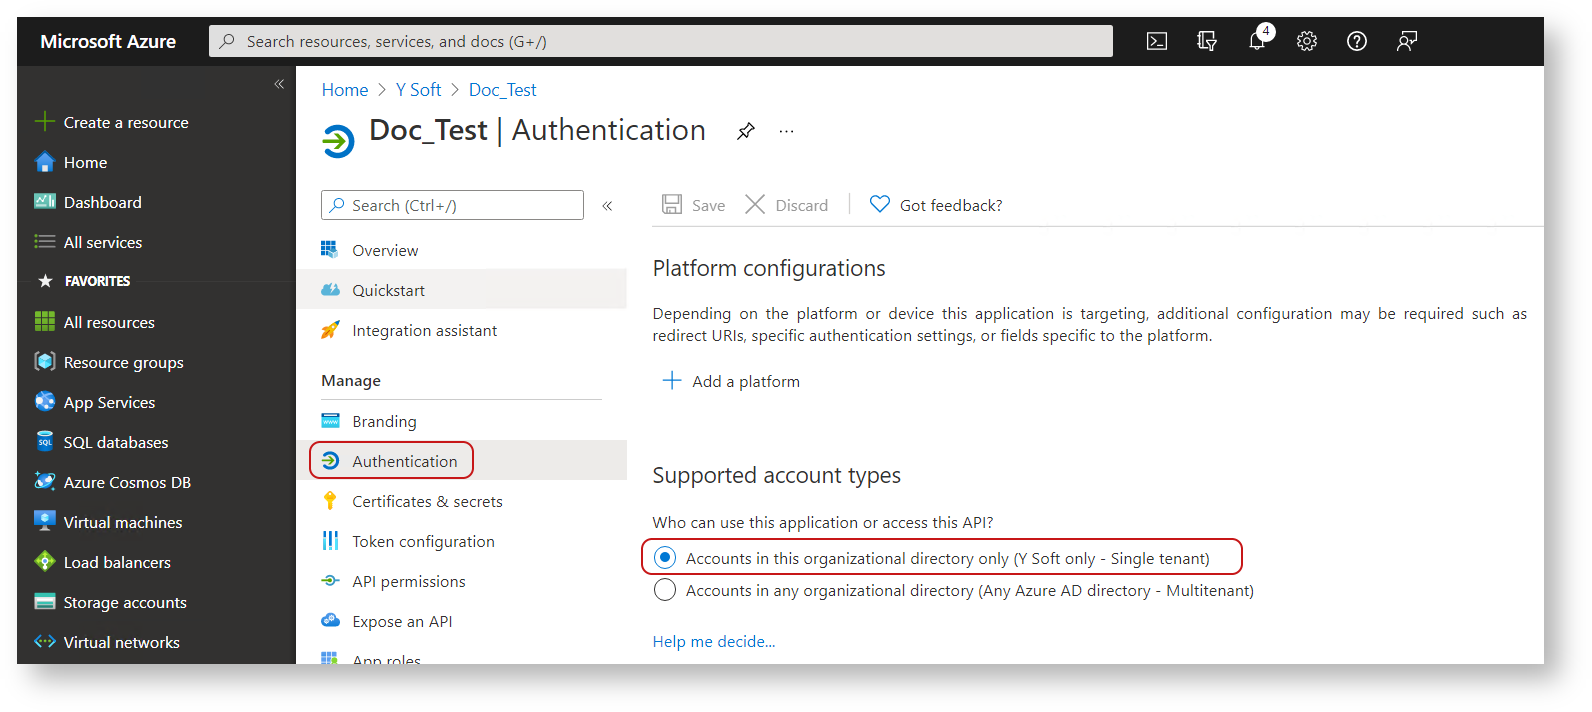
Register the application in Azure Active Directory.
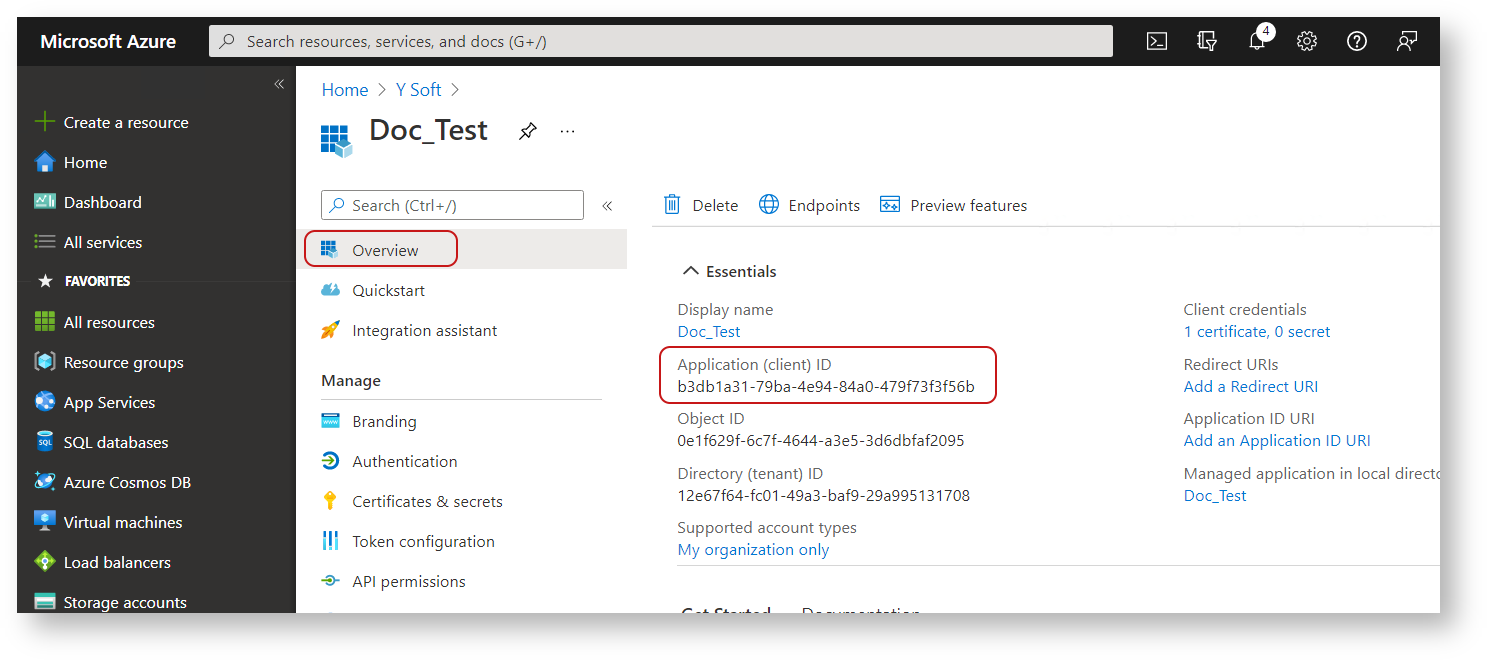
Provide the Azure Active Directory
registered application Application ID for YSoft SafeQ workflow connector setting Client Id.
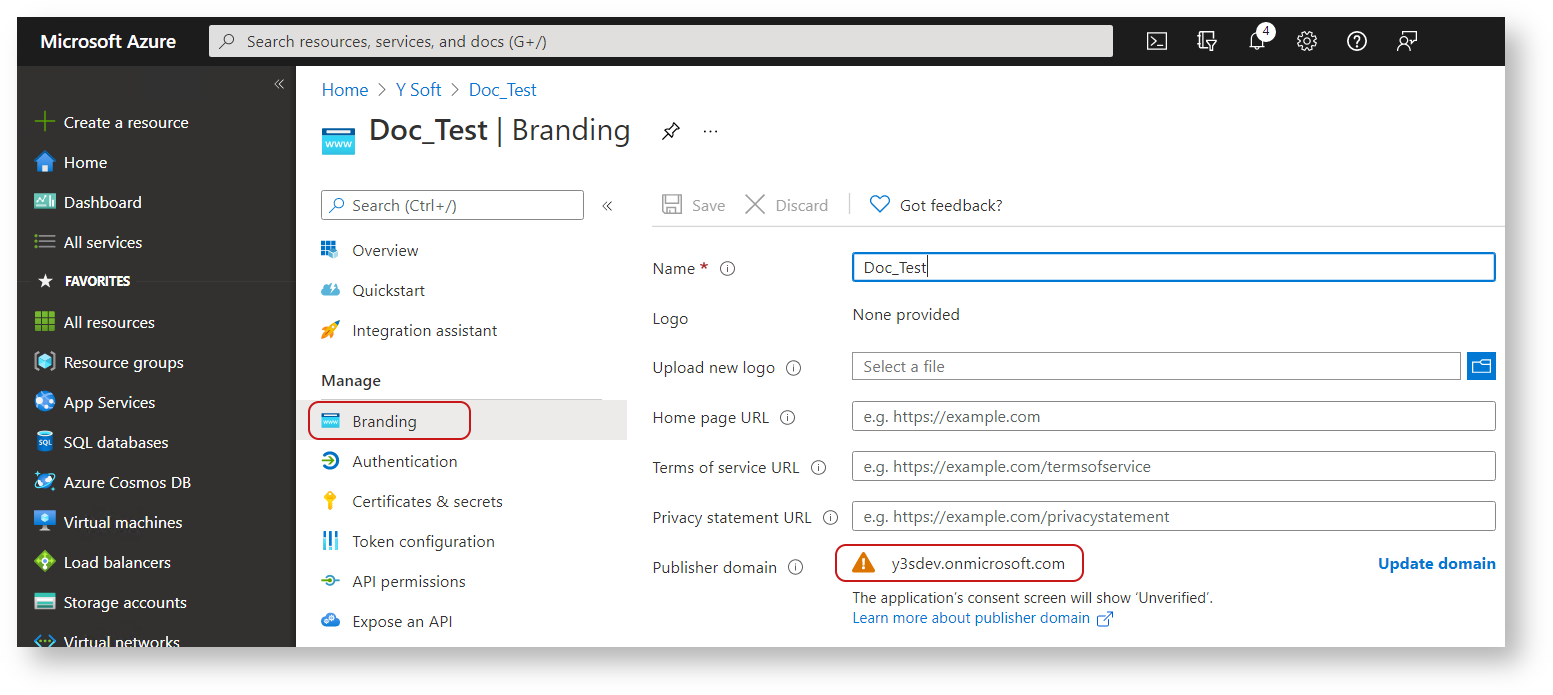
Provide the Azure Active Director
registered application Publisher Domain for YSoft SafeQ workflow connector setting Tenant Name.
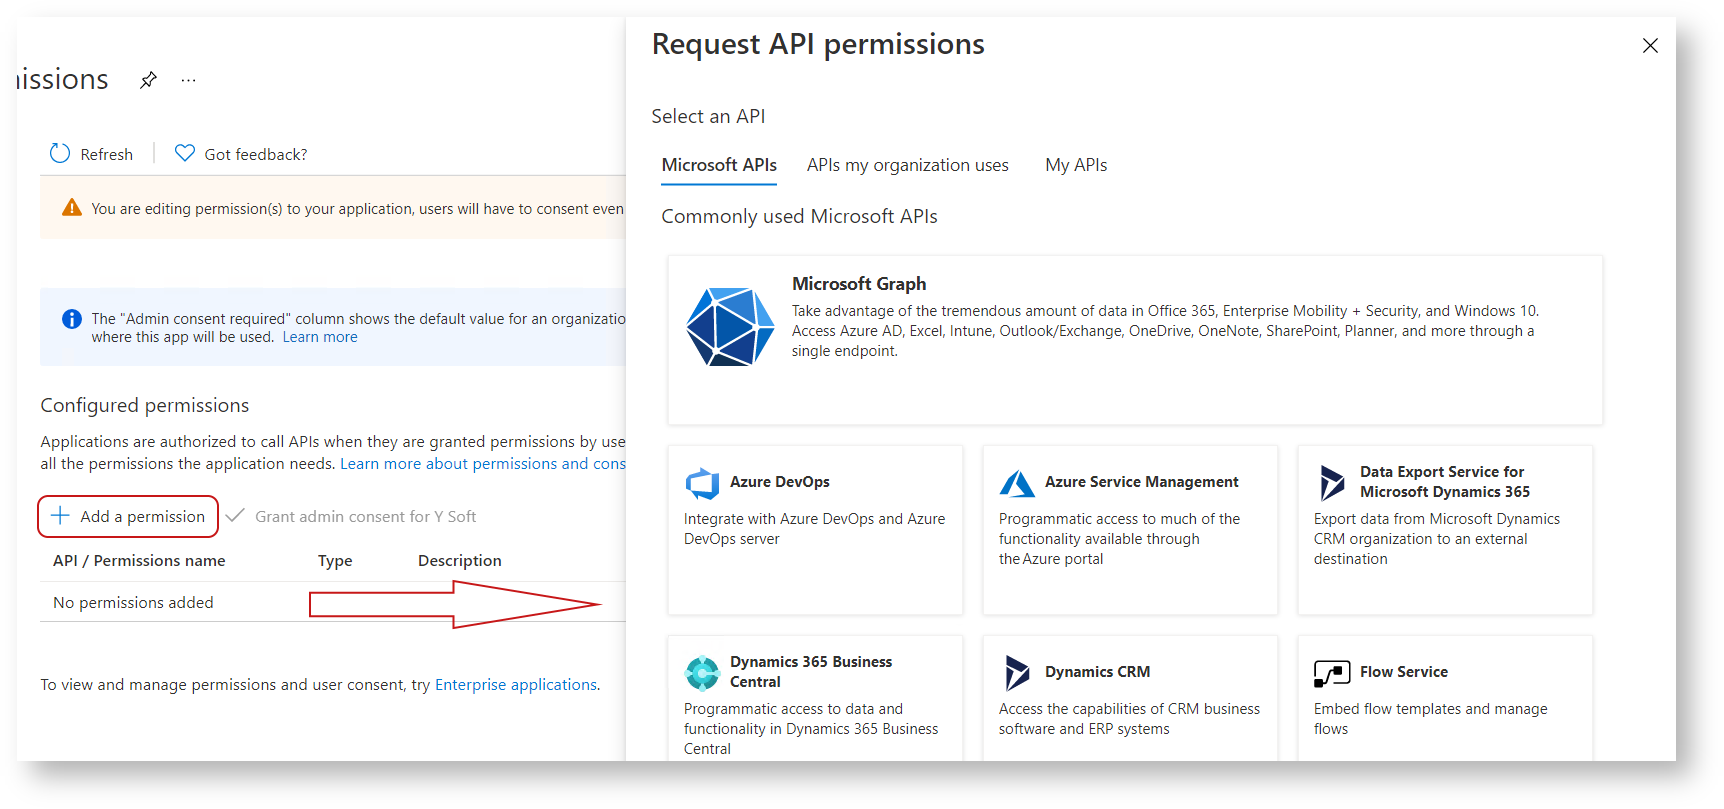
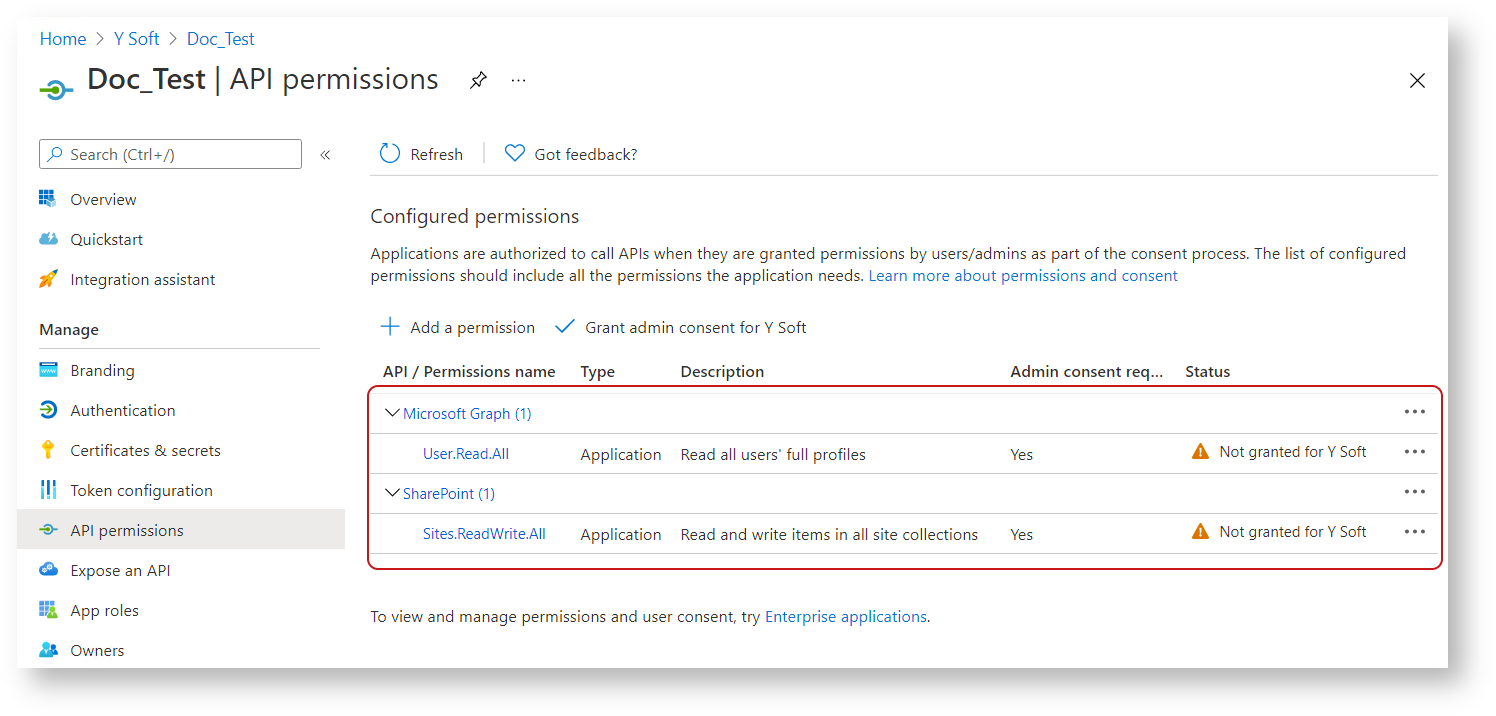
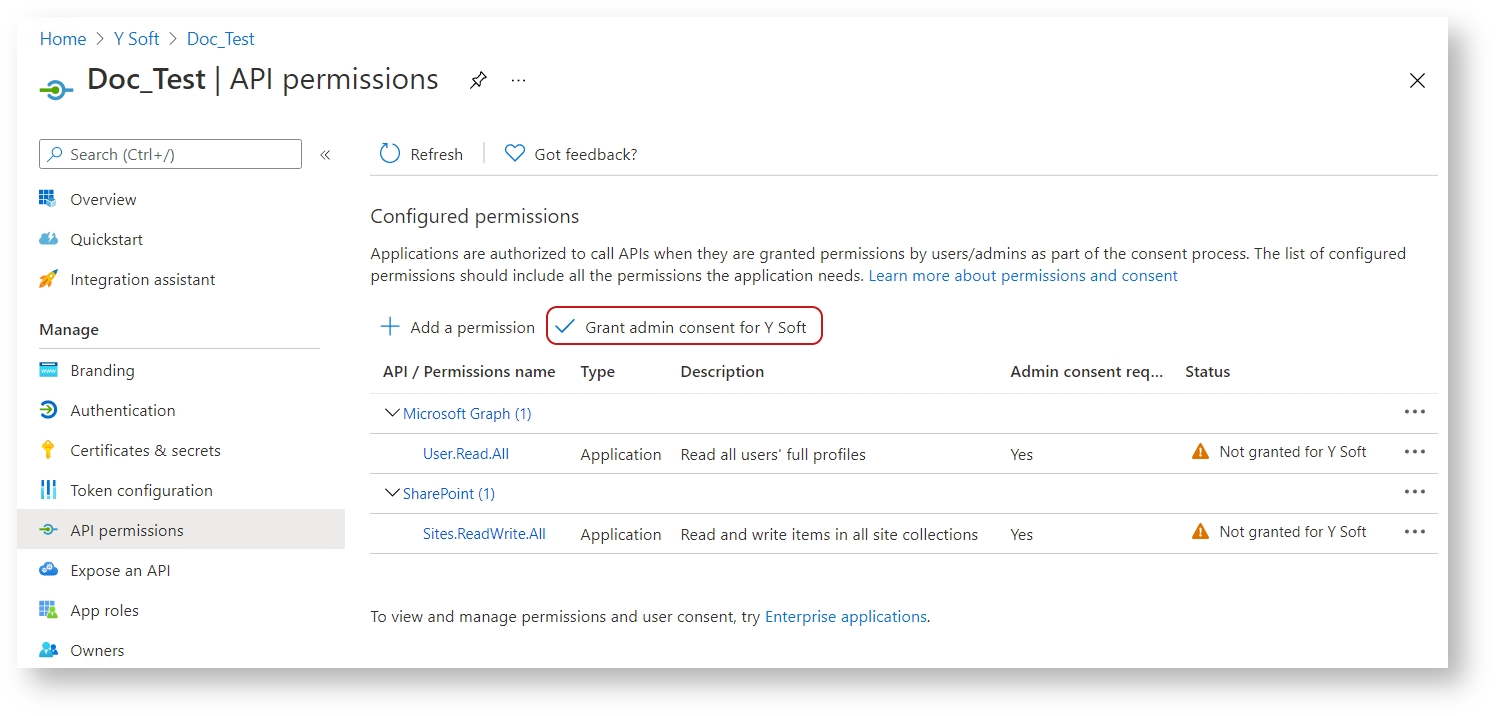
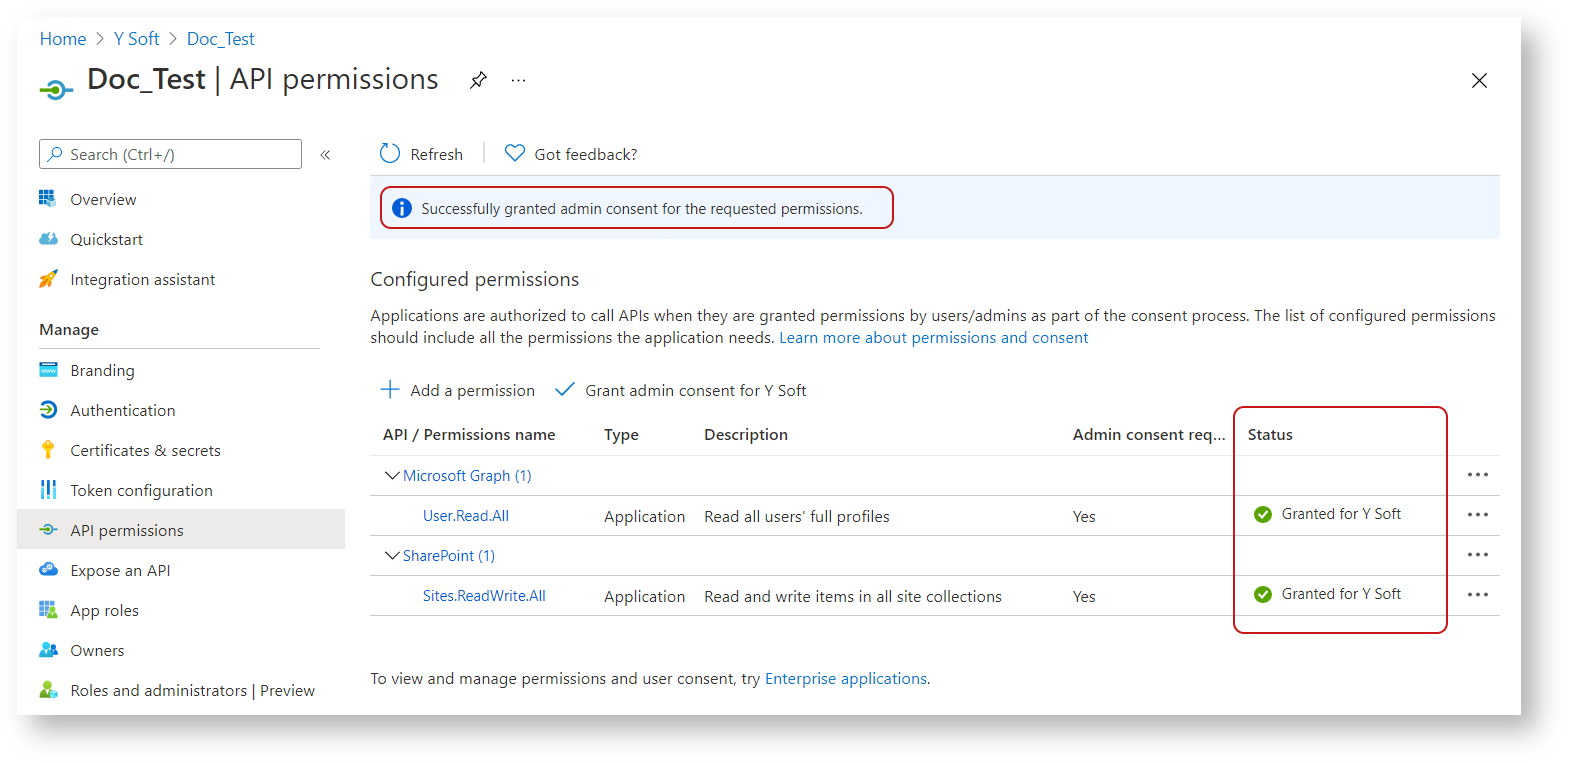
Add Application permissions.
API | Type | Group | Name | Description | Explanation |
Microsoft Graph | Application | User | User.Read.All | Read all users' full profiles | Necessary to identify user’s OneDrive for Business drive in order to be able to upload scanned documents to OneDrive for Business |
SharePoint | Application | Sites | Sites.ReadWrite.All | Read and write items in all site collections | Write access is necessary to be able to upload the scanned document. Read access is necessary to be able to browse target folder on MFD terminal, or to specify behavior in case the document with defined filename already exists (append to it, replace it, keep both files) - if specified in Scan workflow definition by YSoft SafeQ Administrator. |
The above mentioned Application permissions are necessary in order to allow YSoft SafeQ to upload scanned documents to OneDrive for Business or SharePoint Online. Impersonation of terminal user (available e.g. for SharePoint 2016 connector – see Edit Connector section Microsoft SharePoint 2016) which would use terminal user's access rights to access OneDrive for Business or SharePoint Online folder structure and preventing him from accessing folders which she or he is not entitled to see is not available.
This means that YSoft SafeQ application cannot limit terminal user’s access to browse folders which she or he doesn’t have access to in OneDrive for Business or SharePoint Online. This must be specified by YSoft SafeQ Administrator on the level of Scan workflows access definition.
It also means that all documents scanned and uploaded by YSoft SafeQ will have the name of the Azure Active Directory application filled in the field “Modified by” in OneDrive for Business or SharePoint Online (instead of name of the user as it would be with Impersonation functionality).
Best practice is to assign access to OneDrive for Business scan workflows and SharePoint Online scan workflows only to users who have also access to company’s OneDrive for Business or SharePoint Online – you can refer to Edit Workflow section User Access for details about scan workflows user access definition. And also to allow terminal user to browse only target directories which they have access for in OneDrive for Business or SharePoint Online - this can be specified in Edit Workflow section Microsoft OneDrive for Business - in fields Target OneDrive path and Additional OneDrive path.
Regarding the information about the author of document (which is not available in the field "Modified by”), YSoft SafeQ Administrator can use e.g. workflow variable %userUsername% (for more information see Edit Workflow section as part Workflow Variables) of the Filename or in case of OCR processing step and searchable PDF output format (see Edit Workflow section Options Available in Advanced Workflows) as part of the metadata field “Author” to have the information about author of the document available.
Below are more detailed examples to prevent any misunderstanding of possible undesired effects of Application permissions.
Example of potentially wrong setup:
If user John does not have access to company’s OneDrive for Business at all but YSoft SafeQ Administrator will allow John to see scan workflow “Scan to OneDrive with folderbrowsing” on the MFD → John will be able to browse company’s OneDrive for Business folder structure (starting in the folder specified by the YSoft SafeQ Administrator in the scan workflow definition) and scan document to selected folder even though John doesn’t officially have access to company’s OneDrive for Business. This is caused by the Application permissions granted to YSoft SafeQ and by YSoft SafeQ Administrator making this workflow accessible to John.
Example of recommended setup:
If user John does not have access to company’s OneDrive for Business at all, YSoft SafeQ Administrator should specify user access to scan workflow "Scan to OneDrive with folderbrowsing” in a way that it won’t be available to John at all - there’s no point in allowing John to see workflow "Scan to OneDrive with folderbrowsing” if he shouldn’t have access to company’s OneDrive for Business.
At the same time if user Jane has access to some shared part of company’s OneDrive for Business, YSoft SafeQ Administrator can either setup the scan workflow to not allow Jane to browse folder structure at all (not allowing her to access the non-shared part of company’s OneDrive for Business) or specify the scan workflow destination to start browsing in the shared part of company’s OneDrive for Business which is available for Jane (not allowing her to access the non-shared part of company’s OneDrive for Business)
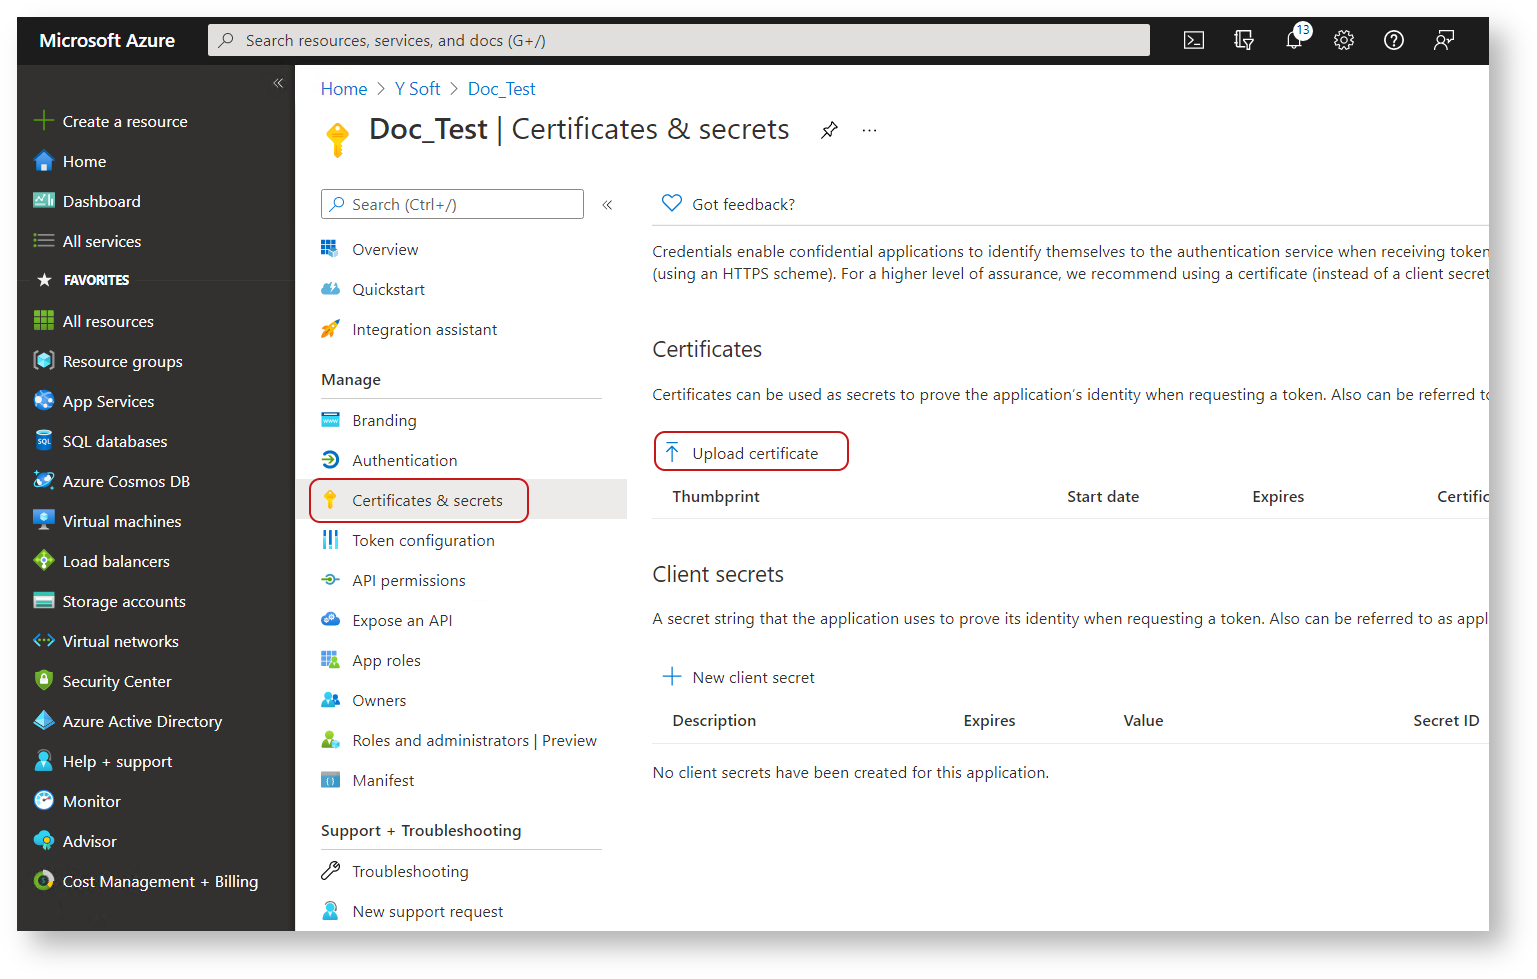
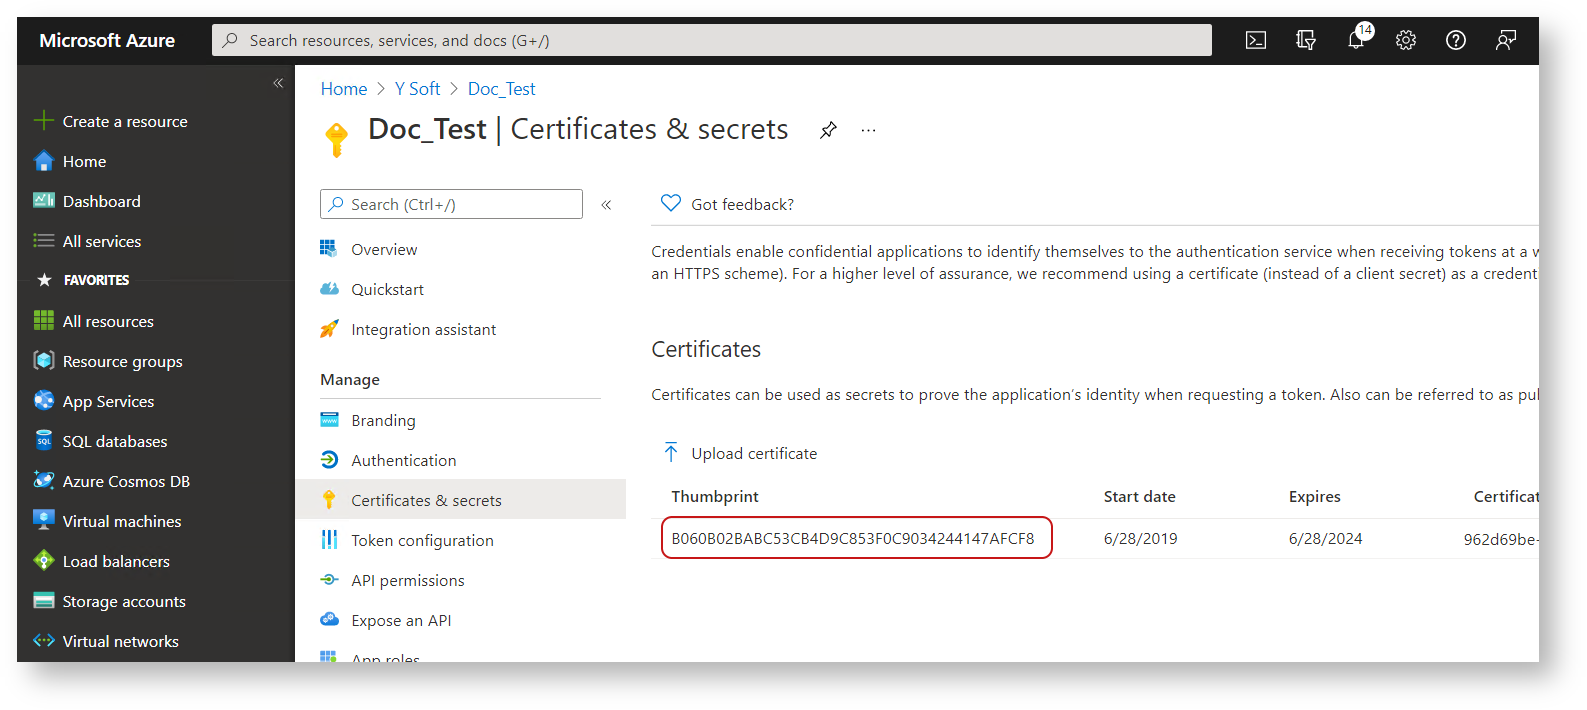
Authorize application public certificate
Provide the Azure Active Directory application registration
certificate thumbprint for YSoft SafeQ management interface system setting sharepointClientCertificateThumbprint.
Certificate Requirements
The application certificate must be a unique X.509 certificate with private key. The certificate should use RSA signature algorithm with SHA-256 hash function. The key length should be at least 2048 bits.
While we recommend using a certificate issued by the organization's trusted certificate authority, a self-signed certificate can also be created using the guide in section Optional: Generating a Self-signed Certificate below.
Note
For client credential authorization access to Azure AD each Workflow Processing System server must have the application certificate installed. The application certificate, including private key, must be installed on each Workflow Processing System server in the Windows Local Computer/Personal certificate store.
Security of authentication by certificate
YSoft SafeQ authenticates to Azure application by signing assertions using the configured X.509 certificate and its corresponding private key. The certificate is managed by Windows system and its private key is stored securely using cryptographic provider configured in the system, which is a standard way commonly used by applications. The private key never leaves the server during authentication, it is only used to sign a time-limited token sent to Azure to authorize access to data. This mitigates the risk of leakage of the key compared to traditional password-based authentication.
Certificate thumbprint configured in YSoft SafeQ is only used to locate the correct certificate in Windows certificate store, which is then used as described above. In contrast to private key, the thumbprint does not need to be kept confidential as it is not used as authentication secret but just as identifier.
In case of a suspected security breach of the server with YSoft SafeQ, the access can be easily revoked in Azure so that the certificate becomes useless to the attacker.
Optional: Generating a Self-signed Certificate
Create Self-signed Certificate
To generate a self-signed certificate, you can use the PowerShell console. Run the console as an administrator and make sure that PowerShell is at least version 5.0+.
Copy/paste following command into PowerShell window and modify placeholders as needed:
MyCompanyName
MyAppName
This command will only work on newer versions of the operation system (Win-10,Win-2016 server) by default or you need to install * Windows Management Framework 5.0* to make it work on an older OS
.
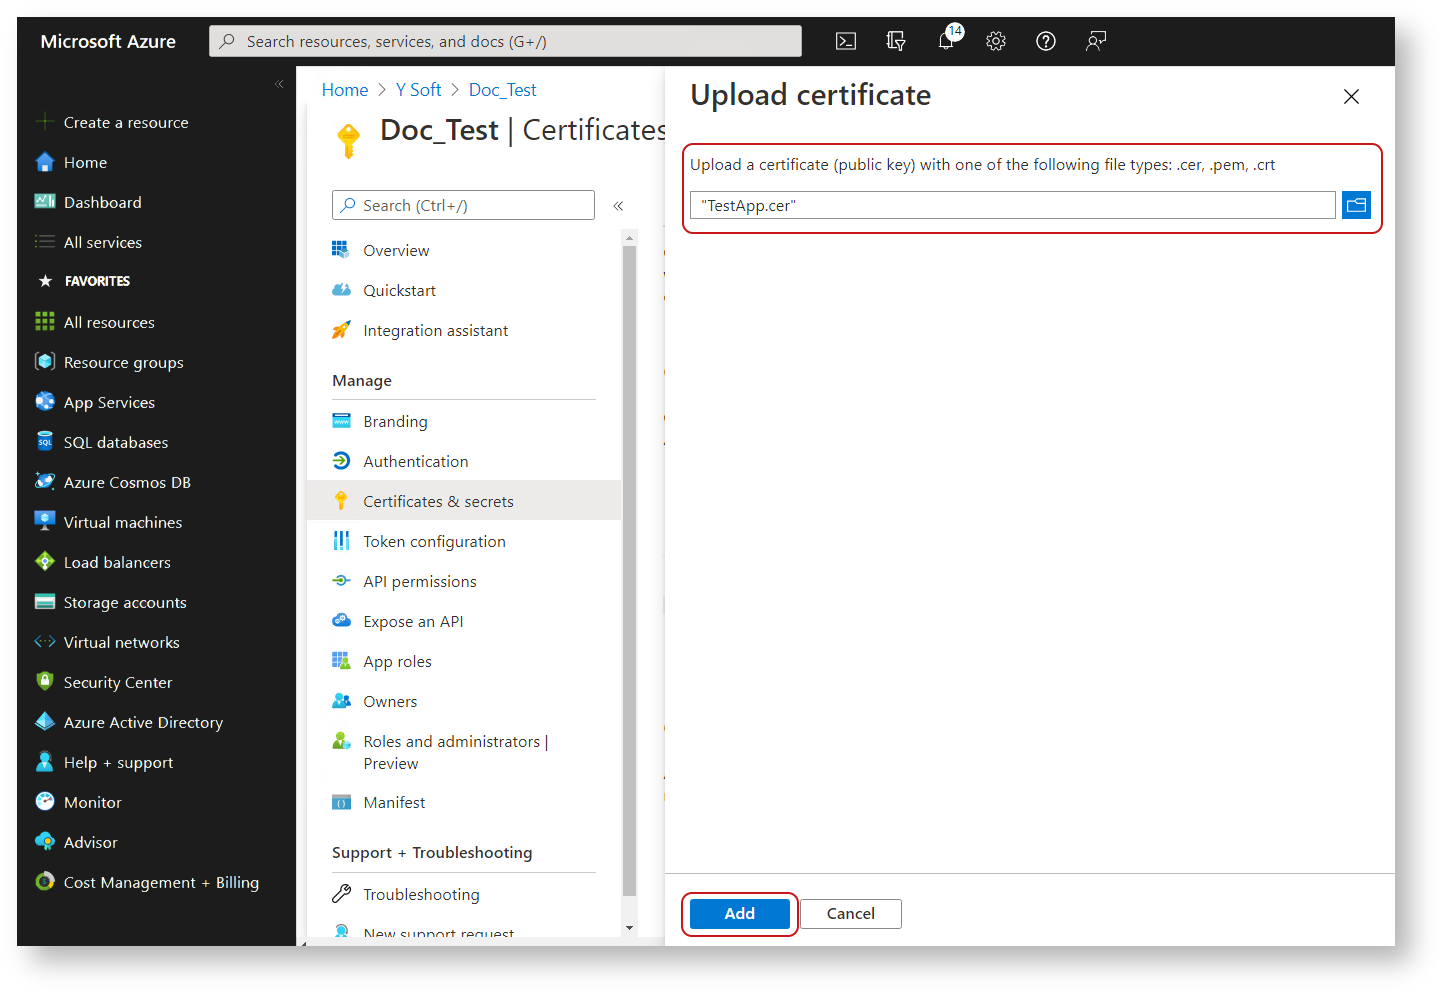
Export Public Certificate
Export the application public certificate for import into Azure Active Directory. The public key must be in base-64 encoded export format (.CER file).
Run certlm.msc and press Enter.
Navigate to Local Computer/Personal certificates and locate the certificate (using the values that you defined for MyCompanyName and MyAppName).
Right-click the certificate and from the popup menu, select All Tasks and then Export...
Select not to export the private key.
Choose Base-64 encoded X.509 (.CER).
Enter the file name of the exported certificate and finish the export.
Export Public Certificate with Private Key for Import to all Workflow Processing System Servers
If you did not generate the application certificate on the server with YSoft SafeQ Workflow Processing System the certificate and private key will need to be exported. Import the application certificate containing the private key on all servers with YSoft SafeQ Workflow Processing System.
Export the certificate to a .PFX file with private key included.
Additional details: https://technet.microsoft.com/en-us/library/cc754329(v=ws.11).aspx
Import the .PFX file into all YSoft SafeQ Workflow Processing System servers in the Windows Local Computer/Personal certificate store.