Configuring Ricoh for 2nd Gen. SOP Embedded Terminal
Reboot of the MFD can take up to 10 minutes (usual time is around 5 minutes). For remote reboot: Login to Web Image Monitor (WIM) and go to Device Management > Reset the Machine.
For limitations of Ricoh SOP terminal, please refer to Requirements and Known Limitations of YSoft SafeQ Embedded Terminal for Ricoh SOP.
Follow all these steps to configure the MFD in order to allow installation of YSoft SafeQ Embedded Terminal. It is highly recommended to go sequentially through these instructions.
If you encounter any issues, please refer to Troubleshooting YSoft SafeQ Embedded Terminal for Ricoh SOP.
Configuration based on device generation (G2/G2.5)
Most of the configuration steps on the Smart Operations Panel will either require no authentication application to be installed (configuring before installing Ricoh SOP terminal), or being logged in as Machine administrator (configuring with Ricoh SOP terminal already installed).
Refer to Configuring Ricoh SOP - Recommended configuration for enabling Machine administrator (if it is not already enabled)
Refer to Logging in on Ricoh SOP as admin when Terminal Embedded is installed for details on how to log in as Machine administrator
G2.5
Most configuration steps are done automatically
G2
G2 devices that come with preinstalled Java (for list of these devices, please refer to the official SDK/J Compatibility chart provided by Ricoh), can be remotely configured only with Java enabled (limitation of the devices)
If Java is not turned on, the admin will be notified about this during the installation
G2 devices that have preinstalled Java, need to have it turned on during the installation. Otherwise remote configuration of the device is impossible and will need to be done manually according to Configuring Ricoh SOP - Automated configuration steps.
For details on how to enable Java on the MFD, please refer to Configuring Ricoh SOP - Enabling Java on G2 devices.
If Ricoh TE was previously installed, this should be turned on by default
Using 3rd party card readers
If 3rd party card readers are used, and the following configuration will not be performed, it will result in the card reader not working after terminal installation/reinstallation. In case of multiple Terminal servers, it must be performed on every one
Card reader configuration is done automatically during the installation process. By default, this process sets up the MFD to use YSoft issued card reader. If some 3rd party card readers are being used, the following configuration must be added to the Terminal Server configuration file located at <install_dir>\SPOC\terminalserver\TerminalServer.exe.config within the <appSettings> tags.
ricohSopSkipCardReaderConfiguration
By default this value is set to false.
When set to true, step for configuring the card reader will be skipped during installation. This is suggested when different card readers are used across Ricoh SOP MFDs.
ricohSopCardReaderVid
This references vendor ID of used card readers. The default value is 214C
This serves as a possible override, when one type of card reader is used across all Ricoh SOP MFDs
ricohSopCardReaderPid
This references product ID of used card readers. The default value is 0202
This serves as a possible override, when one type of card reader is used across all Ricoh SOP MFDs
This configuration will affect all Ricoh SOP MFDs installed from the configured Terminal server. Other vendor MFDs are not affected by this configuration.
Manual configuration steps
Time settings
This step ensures, that the time of the device matches the time of the YSoft SafeQ server. If you are positive, that the device has the same time as server, you can skip this step. In opposite case, accounting and billing codes will be negatively affected by this mismatch.
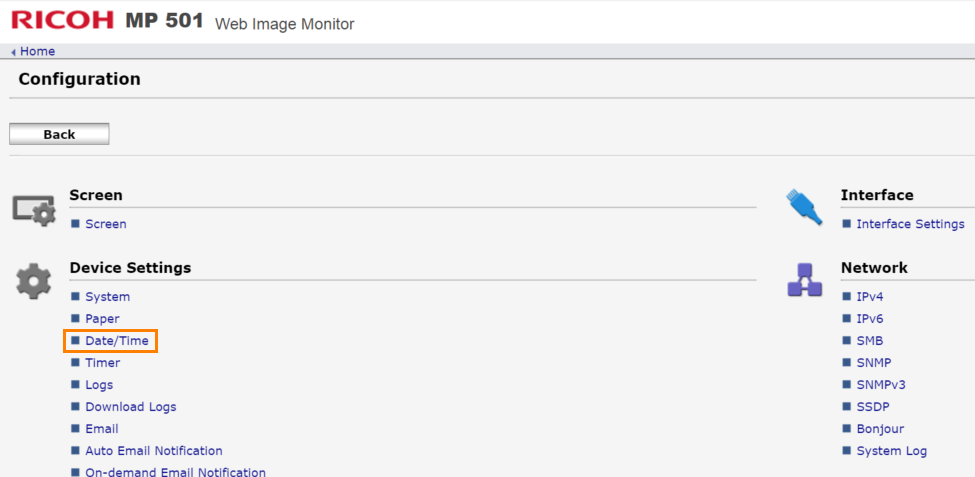
1. Go to the Ricoh MFD web interface (Web Image Monitor).
2. Login as the Machine Administrator.
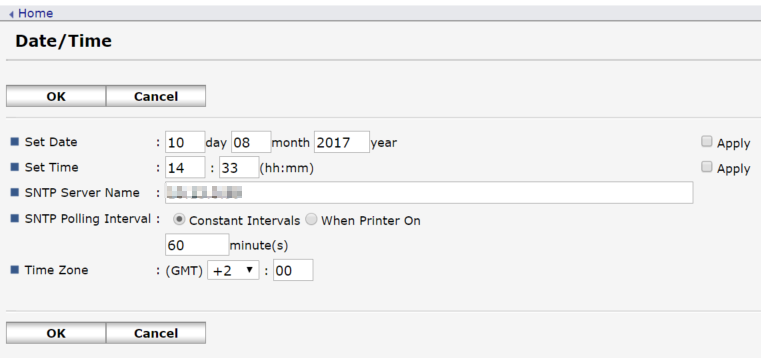
3. Go to Configuration > Date/Time.
4. Set the time to match the YSoft SafeQ server time or specify automatic time configuration via NTP server.
This step currently cannot be automated due to bug in the Ricoh rxop implementation
Create an MFD certificate on Ricoh devices
If the device was previously already used, you can skip this step, unless some issues appear, or if you want to use your own certificate.
Go to device web interface (accessible via device IP address)
Log in as an administrator
Default credentials admin/keep password field empty
Navigate through Device Management → Configuration → Device Certificate
Certificate setup
If you have your own certificate
Click Upload button
Fill up the form
Click Upload button
If you don´t have your own
Click on Create button
Fill up the certificate details
Recommended to prolong the validity period
Click OK button
The machine will restart itself, and the certificate will be ready for us
Setup card reader to be available from sleep mode
Navigate to the Screen Features menu within Settings (as machine admin).
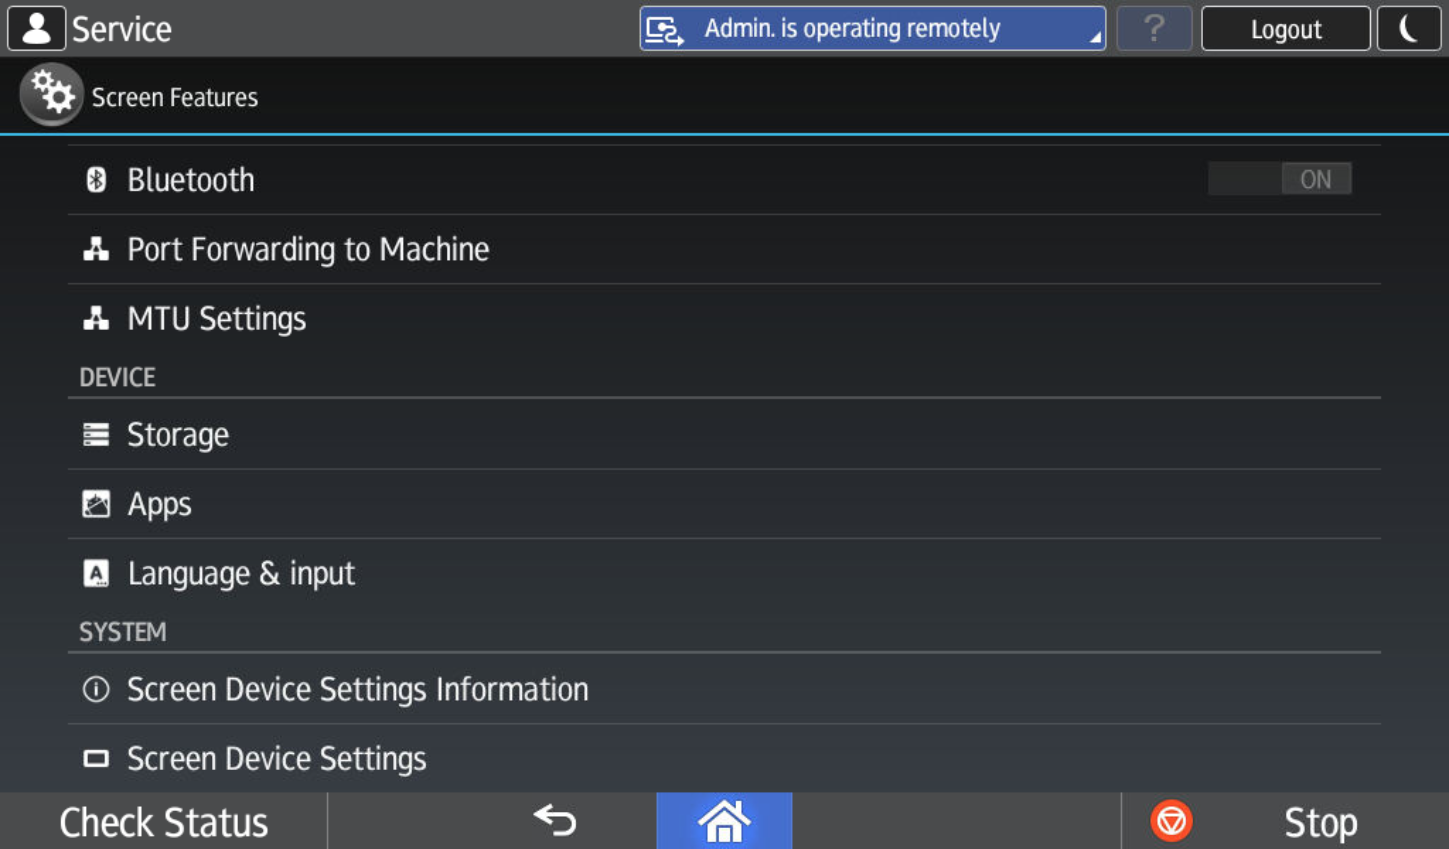
Navigate to Screen Device Settings
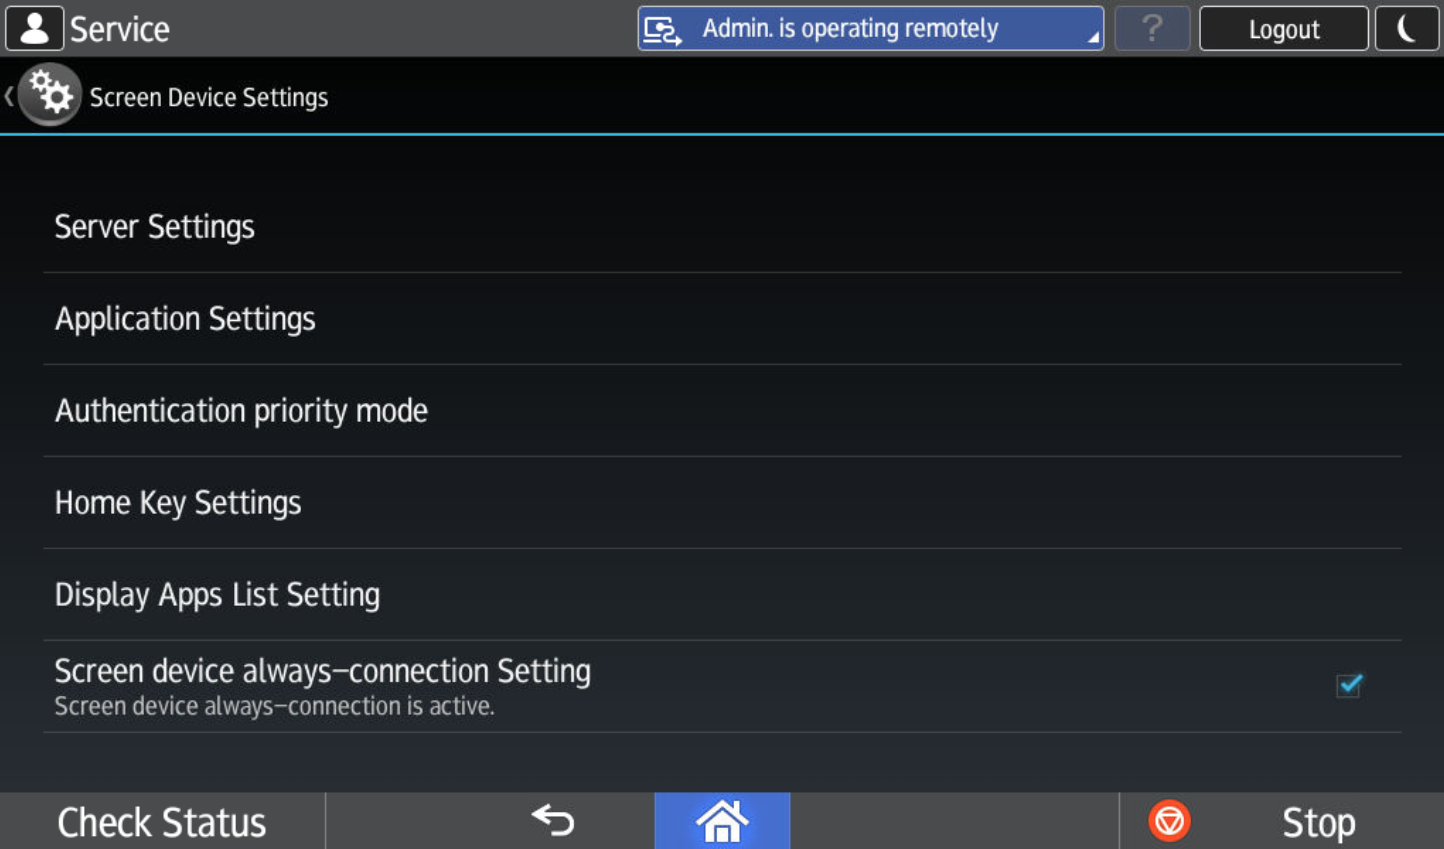
Turn Screen device always-connection Setting to true
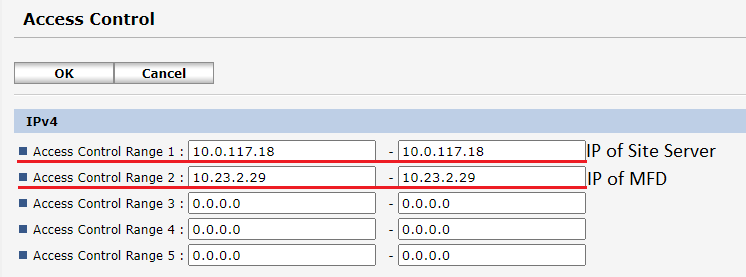
Setting up Access Control
If the MFD is configured to accept web traffic only from permitted IP addresses and networks (that can be set up in the Access Control panel on the device), in addition to adding the Site Server IP address the address of the MFD needs to be added as well. Otherwise, the installation will fail.