Using YSoft SafeQ Mobile Integration Gateway to Print from iOS or OS X
A step-by-step description on how to print natively from OS X and iOS devices. All jobs will be sent to the user's secure queue in YSoft SafeQ, available to be printed at any connected printer.
Send a Print Job to a Secure Queue on Devices with a Mac OS X Operating System
Print a document from any application. You can either use a pre-configured printer (set by your administrator) or select from nearby printers (the name depends on the configuration, for example, "YSoft SafeQ 6").
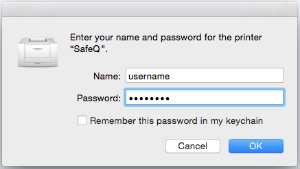
Enter your credentials. The print job will be sent to a secure queue in YSoft SafeQ 6.
Send a Print Job to a Secure Queue on Sevices with an iOS Operating System
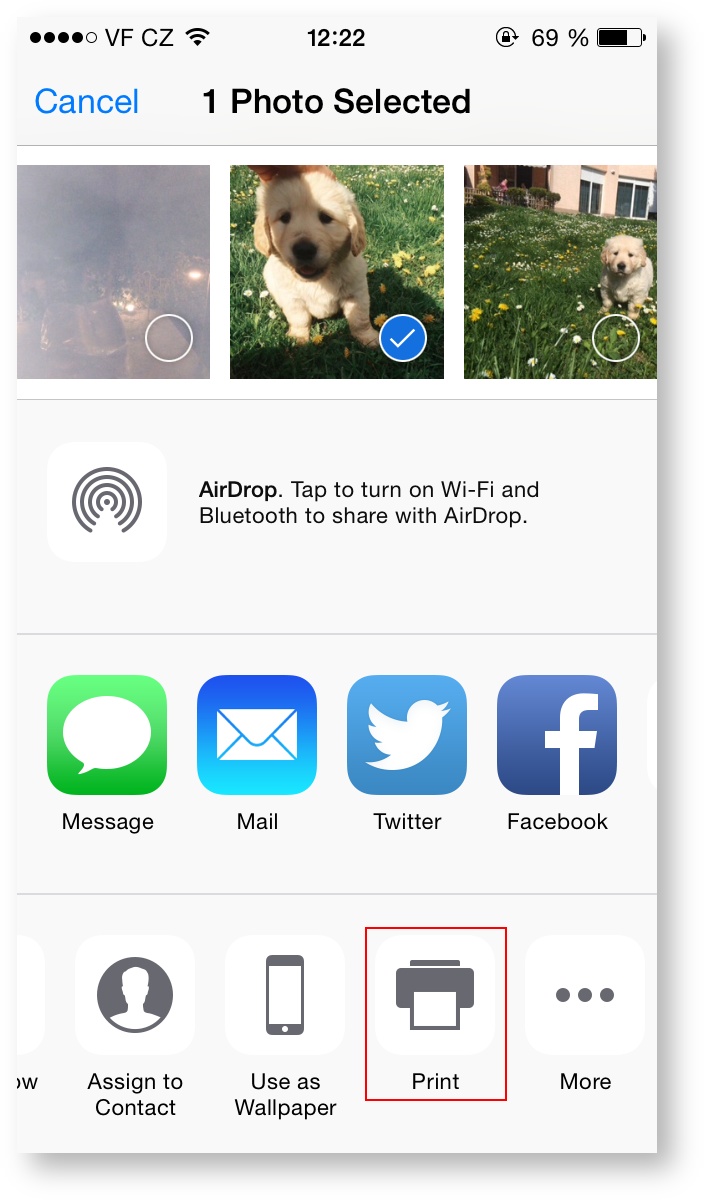
Open the document you want to print, and click the "Print" icon.
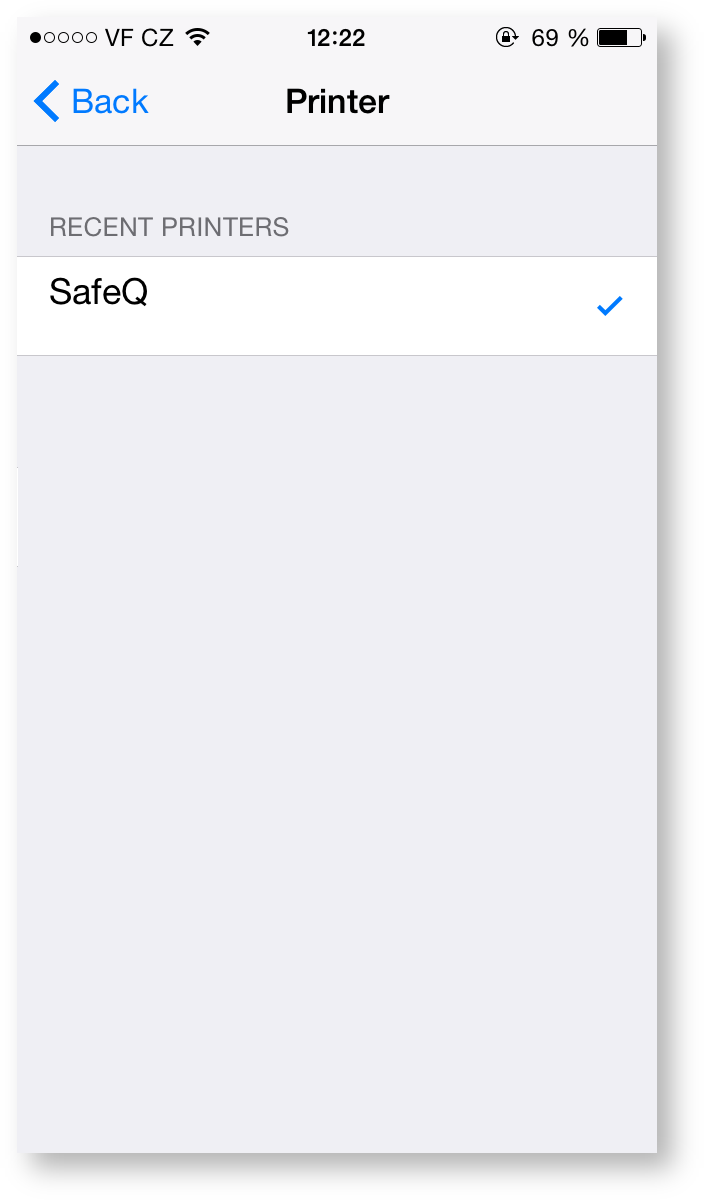
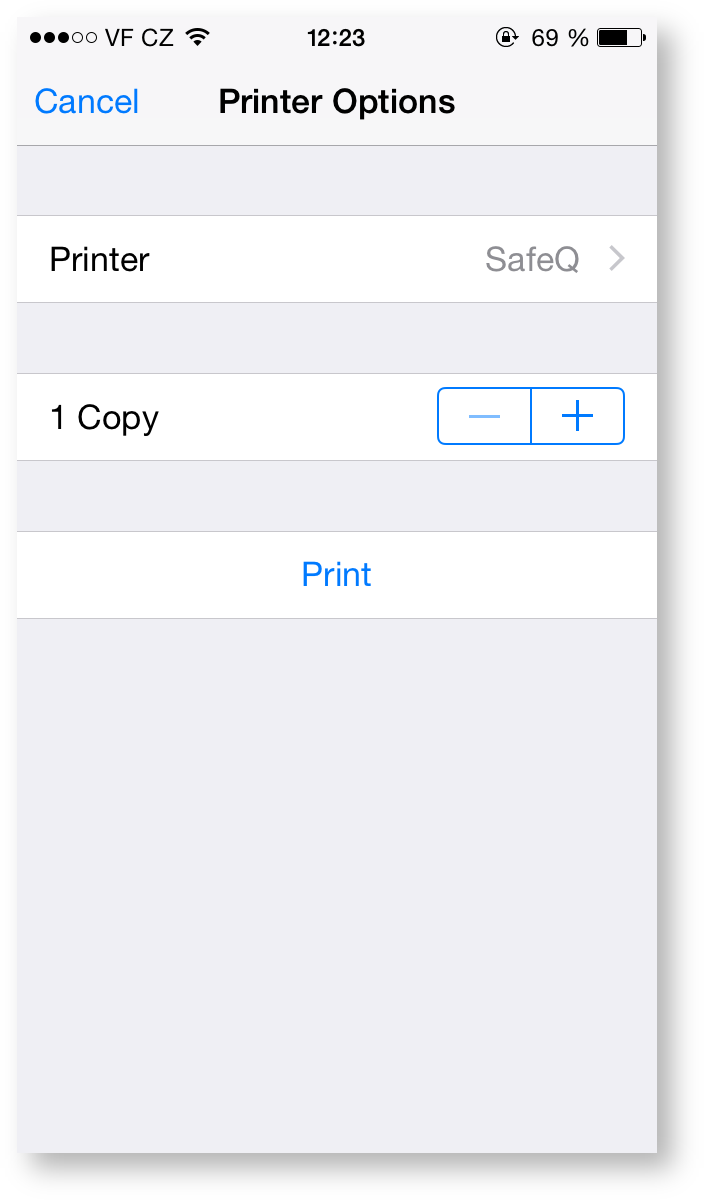
Select the printer with the name set in YSoft SafeQ 6.
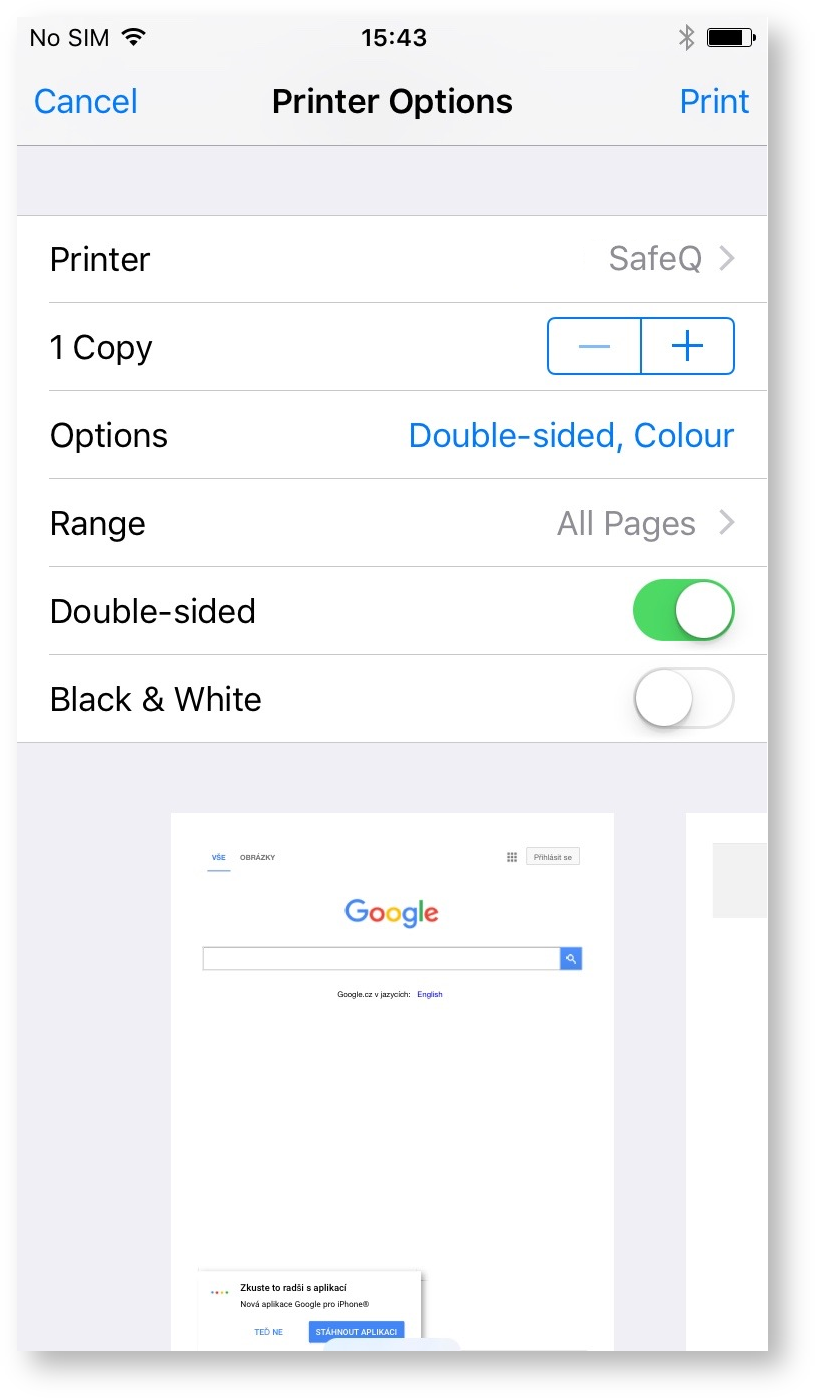
Confirm the print job by clicking the "Print" button. The print job is sent to a secure queue in YSoft SafeQ 6.
You can also see additional printer options, which allow you to configure:
Single-sided/Double-sided printing
Color/Black & White print
Number of copies
Page ranges
Media size–A4 or Letter
If you are printing for the first time, enter the required credentials.
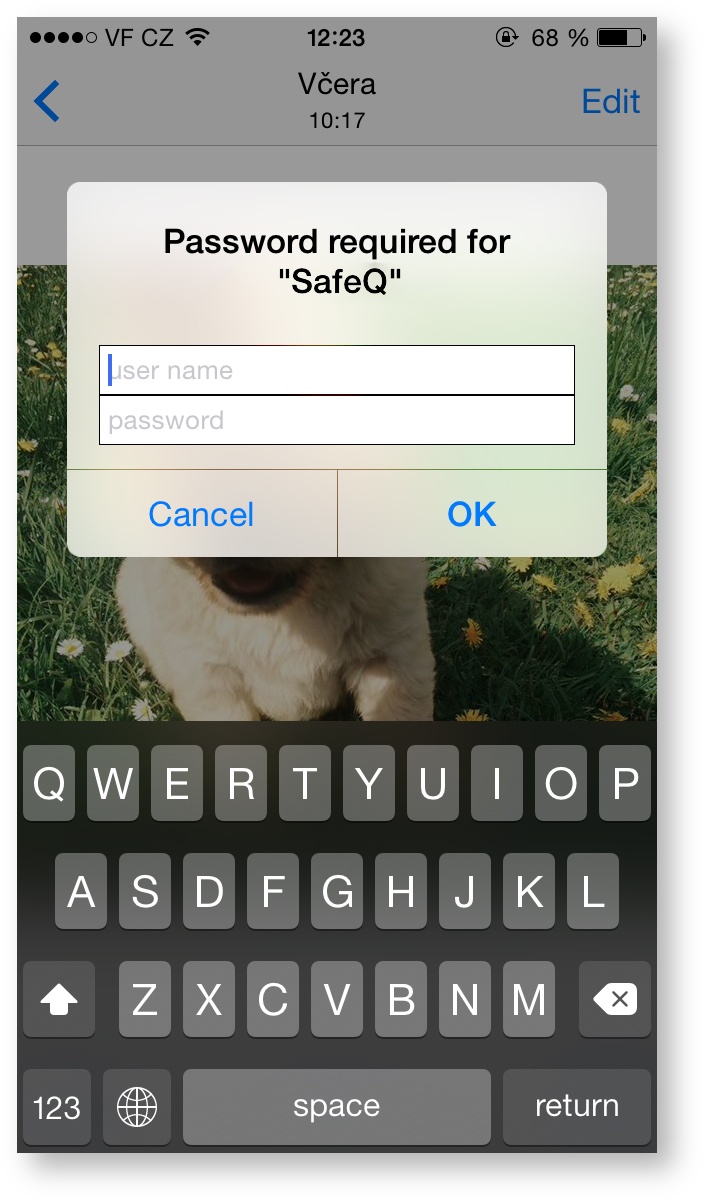
iDevices cache credentials. Subsequent print jobs will not require the re-entering of credentials.
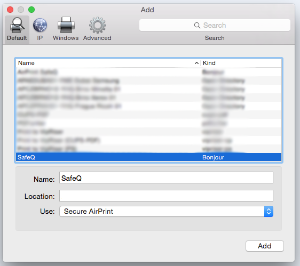
Configure a Printer on Mac OS X
Instead of discovering available printers ad-hoc on your Mac, you can configure a printer following the steps below.
Open System Preferences.
Open Printers & Scanners.
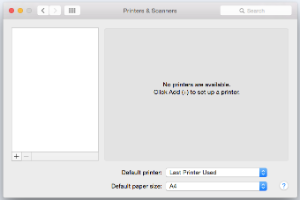
Click '+', click the printer with the name set in YSoft SafeQ Mobile Integration Gateway, and click the 'Add' button.