Deploying with Windows Authentication - Single sign-on
How to
Follow Deploying as Windows service.
Create domain account which will run the YSoft SafeQ Job Service. It has to be in the domain using which your users sign in. It needs to have the local administrative rights on the server.
Service Principal Names (SPNs) must be added to the user account running the service (not the machine account!).
Execute in an administrative command shell (where myservername.mydomain.com is the hostname of the server where YSoft SafeQ Job Service runs and username is username of the user created in the step 2):
setspn -S HTTP/myservername.mydomain.com username
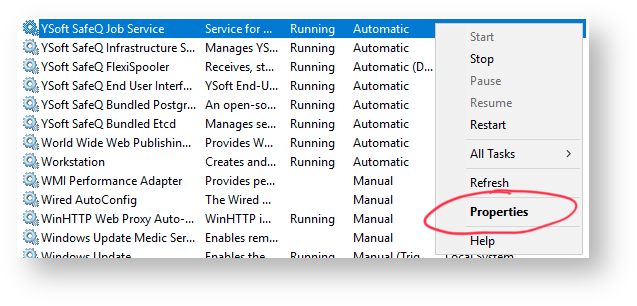
Go to services, right click YSoft SafeQ Job Service and select properties.
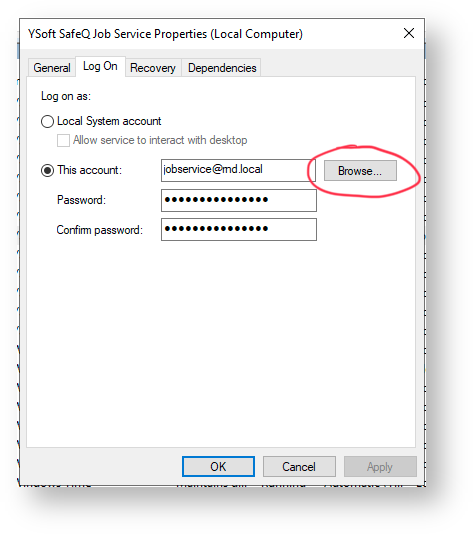
Go to Log On tab, select This account and click on Browse.
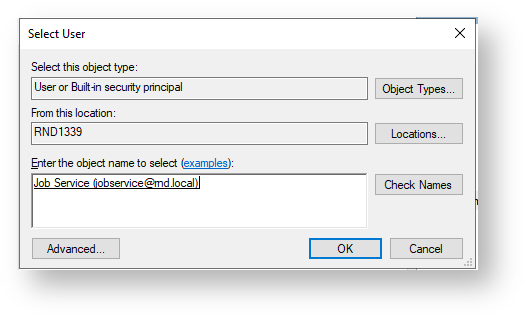
Select the user that you created in the step 2 (enter the name into Enter the object name to select and click on Check Names verify whether entered correctly).
In the Windows Services dialog, you should see your new user in the Log On As column.

Restart the YSoft SafeQ Job Service windows service.