Configuring a custom look of the login screen - Xerox
Some devices (i.e. Versalink series) may not support this configuration option.
It is possible to configure what a Xerox MFD displays on the login screen. For example, an administrator might use this to display the company logo and environment-specific user authentication instructions including contact to an internal help desk. This is a feature of the Xerox devices themselves.
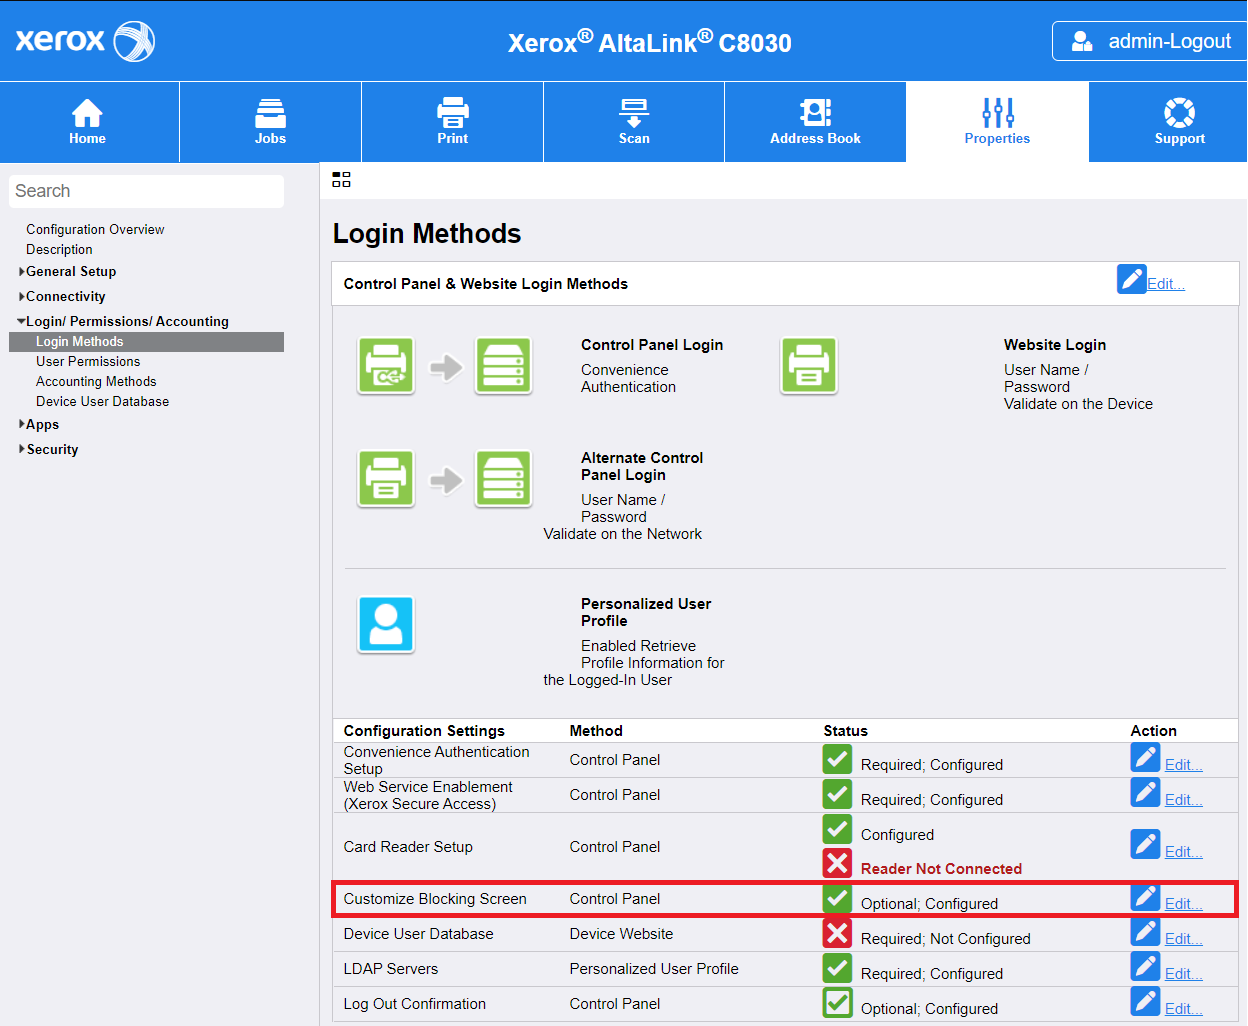
Configuration pages can be found on Properties → Login / Permissions / Accounting → Login Methods page in Customize blocking screen section.


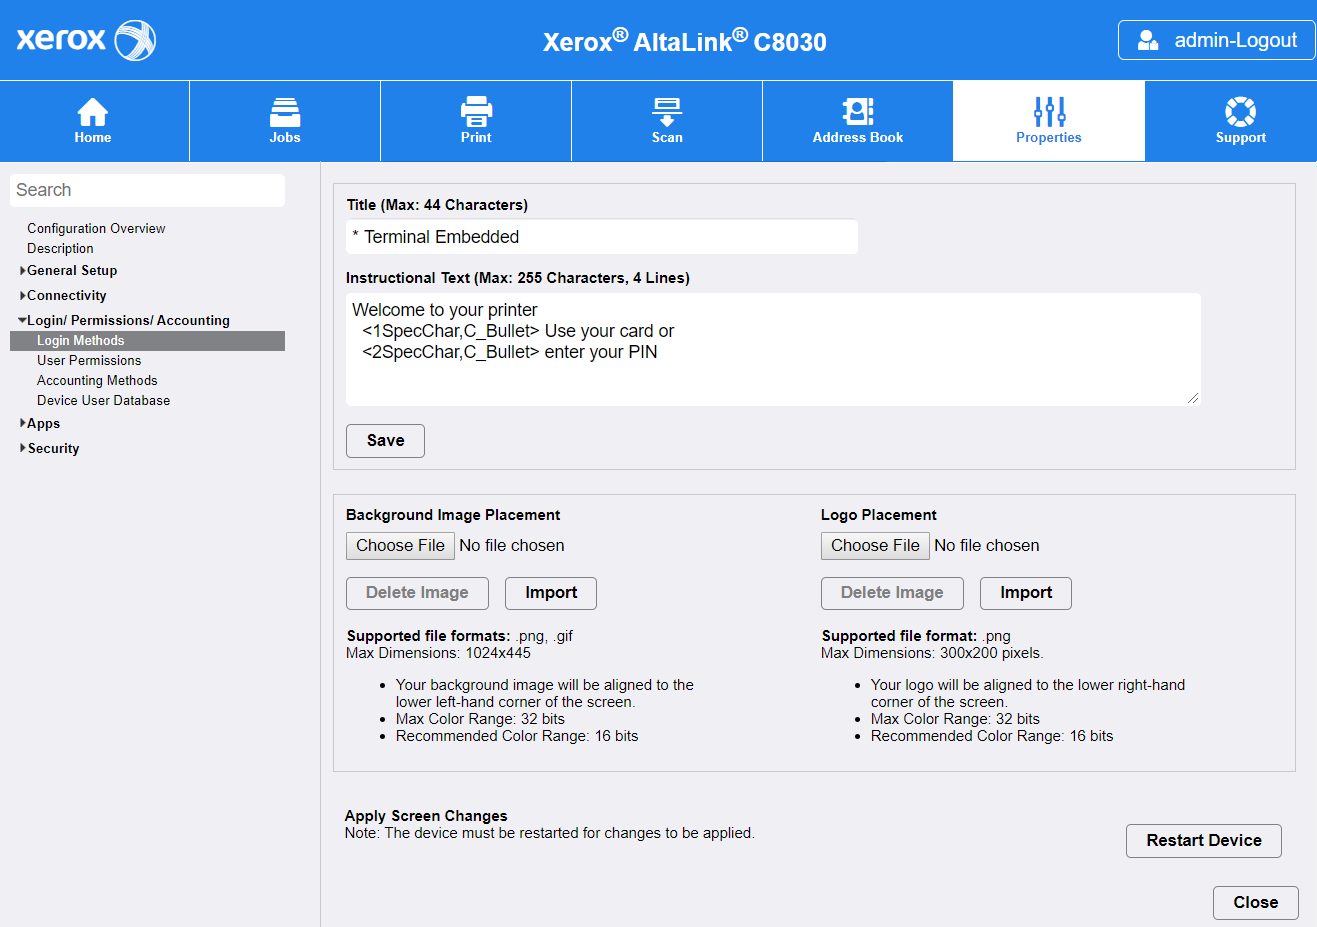
YSoft SafeQ configures its own Title and Instructional Text on the login screen when you install a Xerox embedded terminal.
However, in the default configuration, any manual changes made to these fields are overwritten any time a user selects a different language on the device, or the first time a user logs in after a server restart. This is done so that users can see login instructions in their own language. To customize the look, the administrator has two options:
Take advantage of a configuration option in YSoft SafeQ that allows defining custom Title and Instructional Text, or
Configure the custom look after terminal installation using Xerox tools, and disable the screen overwriting in YSoft SafeQ.
How to configure a custom Title and Instructional Text on the login screen
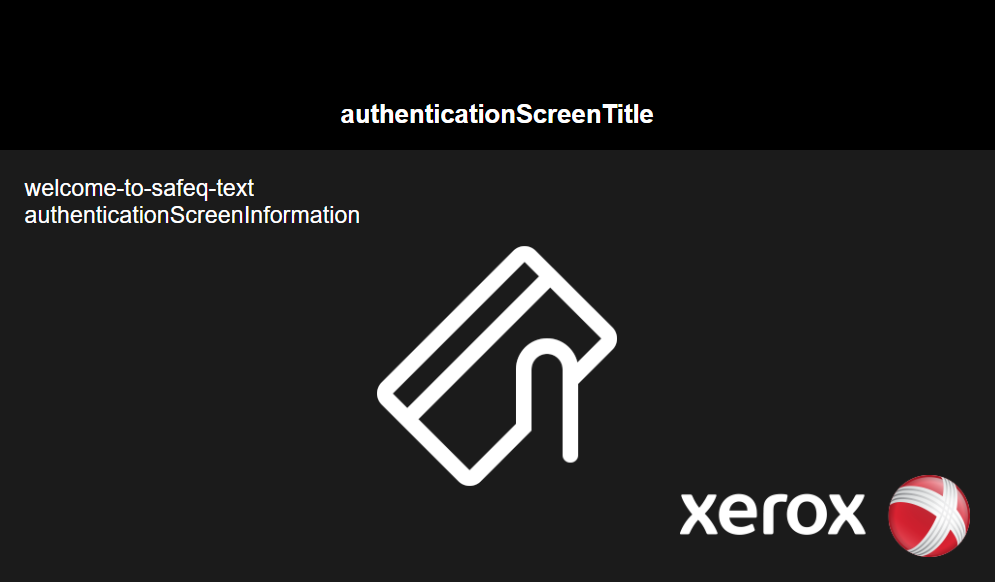
Use the configuration property authenticationScreenTitle, welcome-to-safeq-text and authenticationScreenInformation in
YSoft SafeQ System Configuration, in the Terminal UI category.

authenticationScreenTitle is placed on the top of authentication screen and is limited by device to 44 characters.
welcome-to-safeq-text is placed as the first line, authenticationScreenInformation as the next lines of Instructional text. Most Xerox devices allow usage of some basic HTML formatting like <b>, <br>, <font color=""> etc. Please keep in mind, that total length of text from both properties is limited by device to 255 characters.
For compatibility reasons welcome-to-safeq-text configuration property has to be filled to allow usage of authenticationScreenInformation.
How to disable login screen overwriting
Add the configuration property keepCustomXeroxLoginScreen with the value "true" to the <spoc_folder>\terminalserver\TerminalServer.exe.config configuration file (usually C:\<installation directory>\SPOC\terminalserver\TerminalServer.exe.config).