Configuring Sharp OSA5 and OSA6 Devices
Limitations can be found on page Requirements and known limitations of YSoft SafeQ Embedded Terminal for Sharp
Installing an Embedded Terminal
OSA5
On OSA 5 devices, the installation has the following limitations:
IC Card mode has to be set manually via the web interface.
Automatic uninstallation is not implemented, manual steps are needed.
Installation expects both EAX2 and EAX3 modules to be installed.
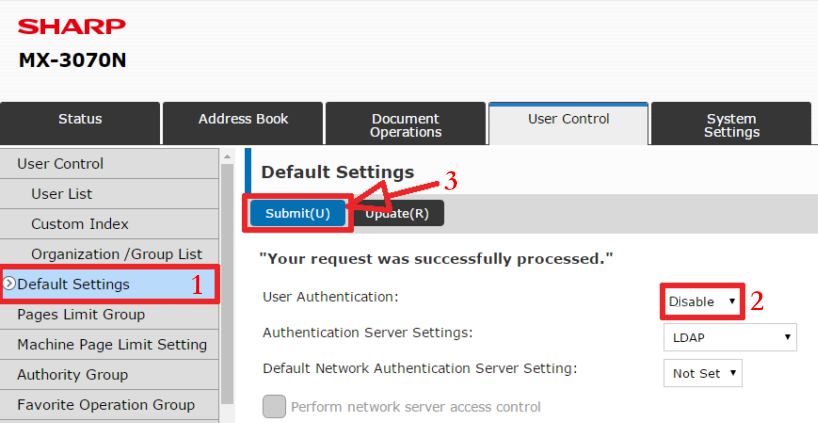
User Authentication setting (under User Control and its Default Settings), if present, has to be set to Disable.
If automatic installation fails, it is also possible to install the embedded terminal manually using the guide below.
OSA6
There are no known limitations.
Configuring IC Card Mode
When Sharp Embedded Terminal is installed with the authentication method containing Card (e.g., Card or PIN), and you want to use a card reader in IC Card mode, you have to configure it manually via the Sharp web interface.

Uninstalling Sharp Embedded Terminal
When you need to uninstall Sharp Embedded Terminal completely, you need to remove the terminal in the standard manner, and then remove YSoft SafeQ settings from the Sharp device.
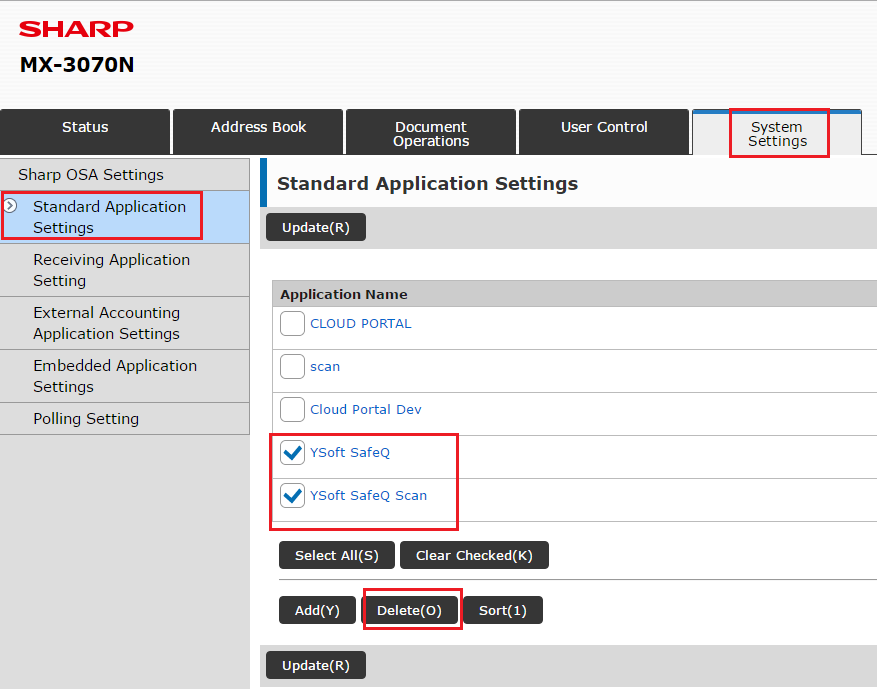
Remove all YSoft SafeQ applications: System Settings > Standard Application Settings. Select all YSoft SafeQ applications and click the Delete button.
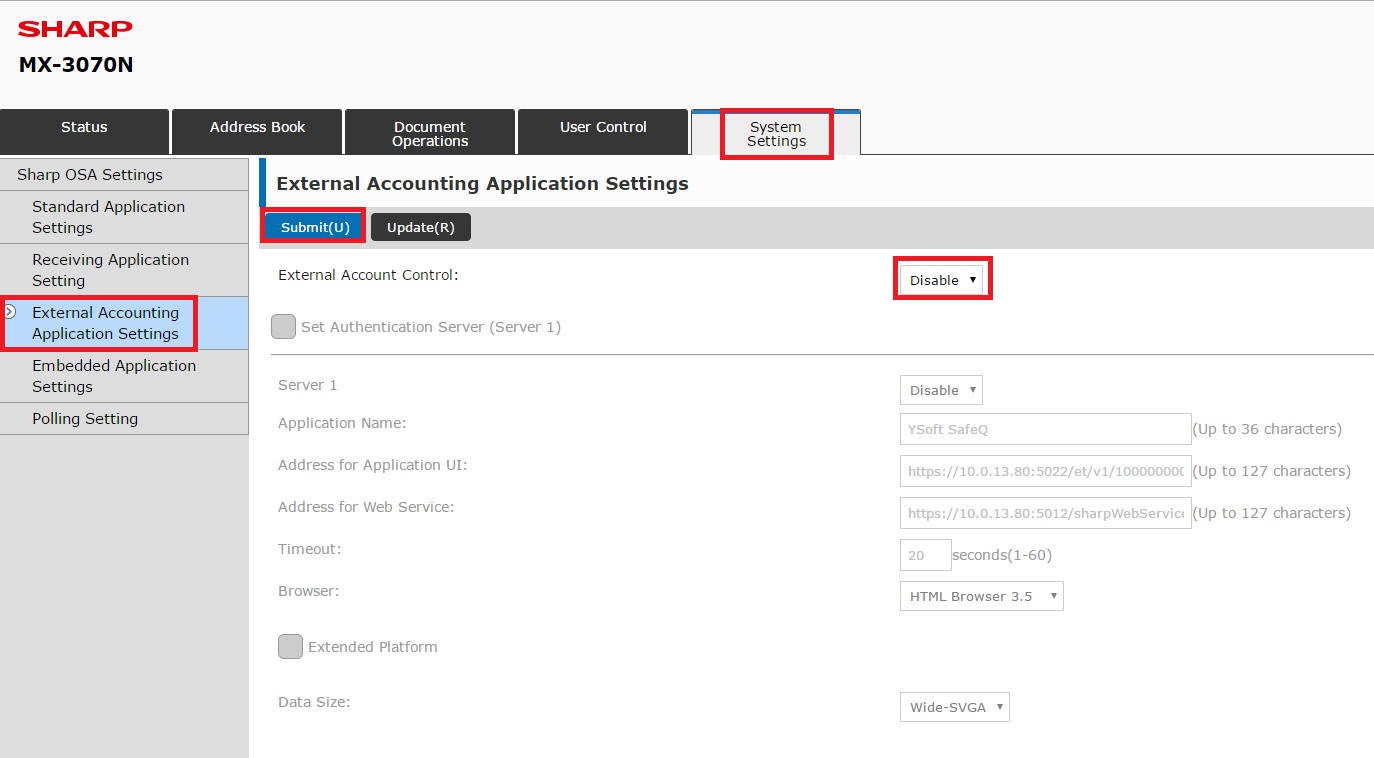
Remove the External Accounting application: System Settings > External Accounting Application Settings. Set External Account Control to Disable, and submit changes.
Manually Installing Sharp Embedded Terminal
When the automatic installation fails, you can still install Sharp Embedded Terminal, but installation contains several manual steps that have to be done.
Stop the Terminal Server service.
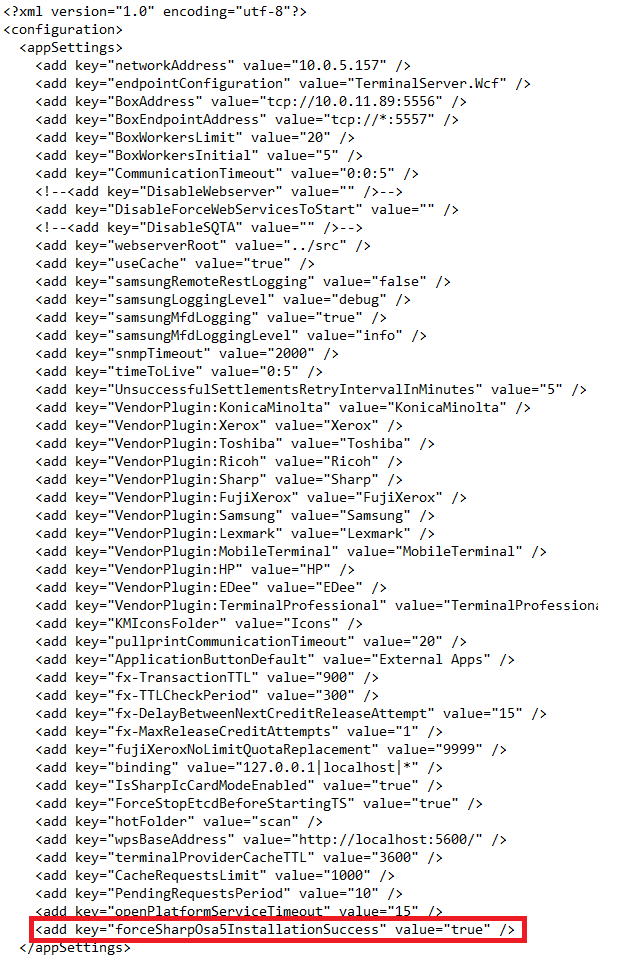
Insert <add key="forceSharpOsa5InstallationSuccess" value="true" /> before the tag </appSettings> to the TerminalServer.exe.config file.
Start the Terminal Server service.
Install Sharp Embedded Terminal.
The next steps contain placeholders <SQ_IP> and <terminalId>. Both of them have to be replaced by the correct value otherwise Sharp Embedded Terminal will not work properly. The placeholder <SQ_IP> has to replaced by the IP address of YSoft SafeQ and <terminalId> has to be replaced by the current Terminal ID which can be found in the Terminal Server log after the installation of Sharp Embedded Terminal.
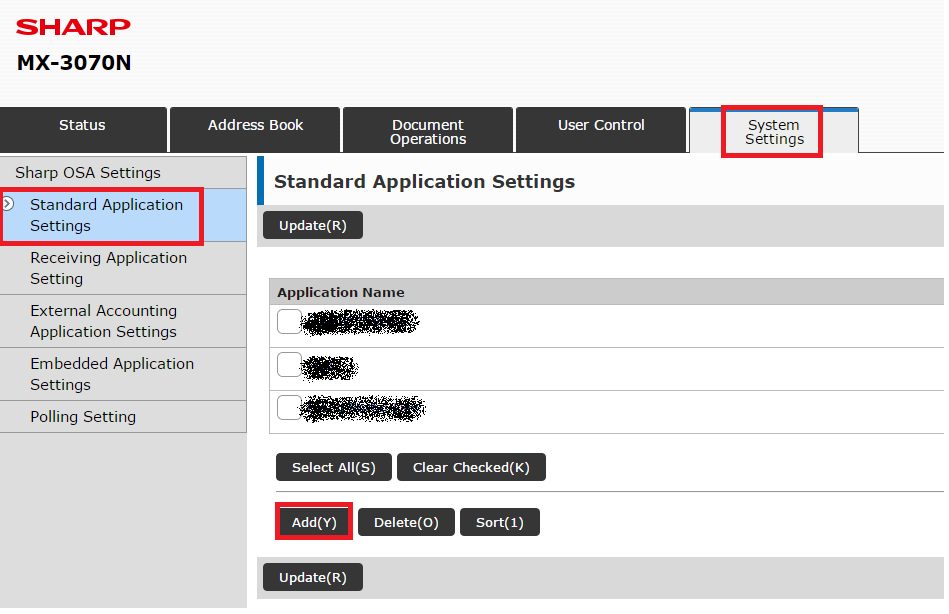
Register YSoft SafeQ and YSoft SafeQ Scan as the default application. Go to System Settings > Standard Application Settings > Add
For using YSoft SafeQ Terminal Application - 2st Gen. register the following:
Register printing application:
Application Name: SafeQ Print
Address of Application UI: https://<SQ_IP>:5022/et/v1/<terminalId>/jobs
Timeout: 20
Submit all changes.
Register scanning application:
Application Name: SafeQ Scan
Address of Application UI: https://<SQ_IP>:5022/et/v1/<terminalId>/scan
Timeout: 20
Submit all changes.
Register billing codes application:
Application Name: SafeQ Billing codes
Address of Application UI: https://<SQ_IP>:5022/et/v1/<terminalId>/billingCodes
Timeout: 20
Submit all changes.
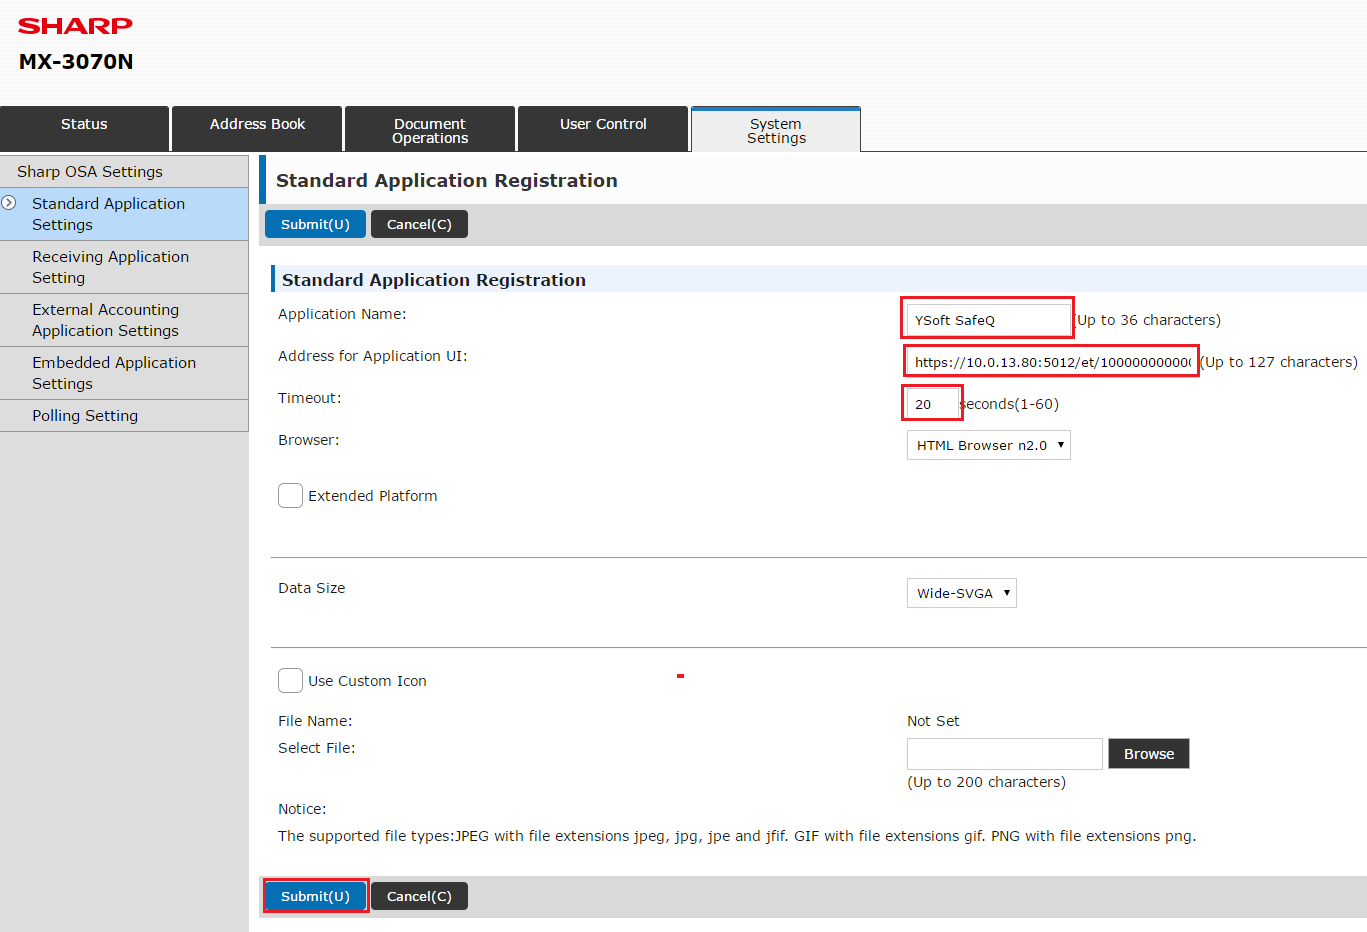
For YSoft SafeQ Terminal Application - 1nd Gen. register the following:
Register YSoft SafeQ:
Application Name: YSoft SafeQ
Address of Application UI: https://<SQ_IP>:5012/et/<terminalId>/default.ashx
Timeout: 20
Submit all changes.
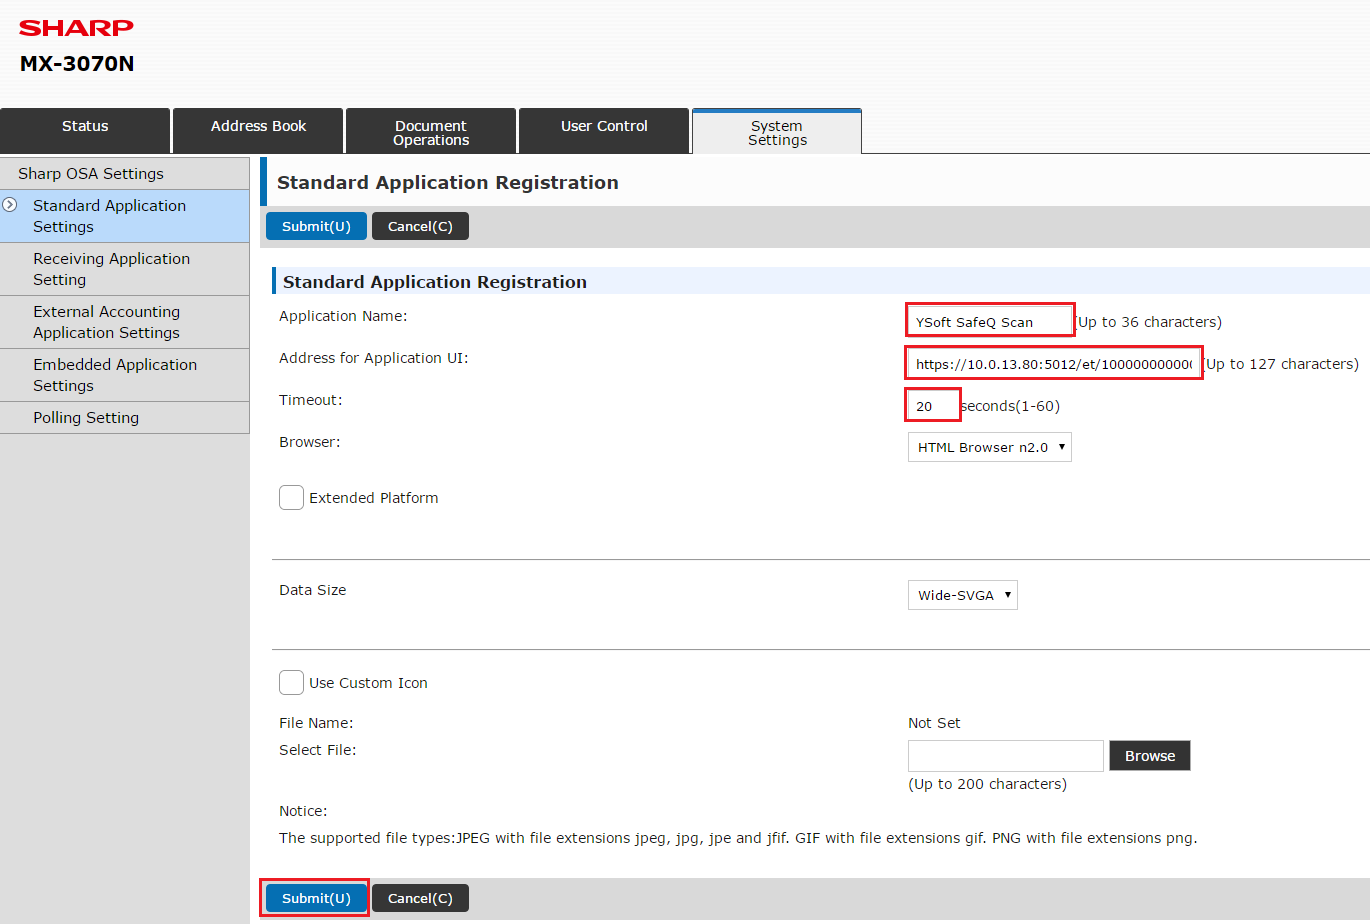
Register YSoft SafeQ Scan:
Application Name: YSoft SafeQ Scan
Address of Application UI:https://<SQ_IP>:5012/et/<terminalId>/scan.ashx
Timeout: 20
Submit all changes.
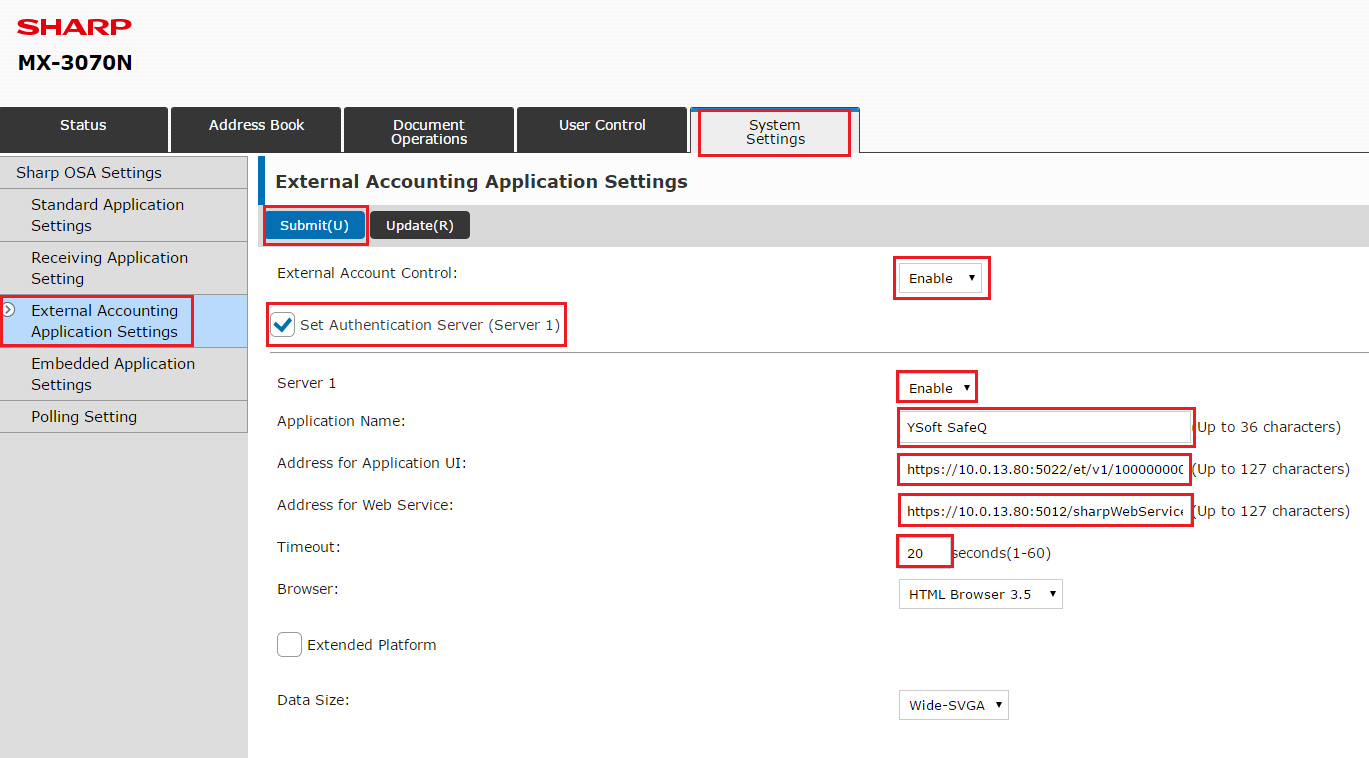
For all terminal register External Accounting Application:
Go to System Settings > External Accounting Settings
Application Name: YSoft SafeQ
Address of Web Service: https://<SQ_IP>:5012/sharpWebServices/<terminalId>/SharpExternalAuthorityService.asmx
Address of Application UI: https://<SQ_IP>:5022/et/v1/<terminalId>/auth
Timeout: 20
Submit all changes.
Disable User Authentication if present (settings may differ based on device line):
CR5 device line: System Settings, Authentication settings, and Default settings:
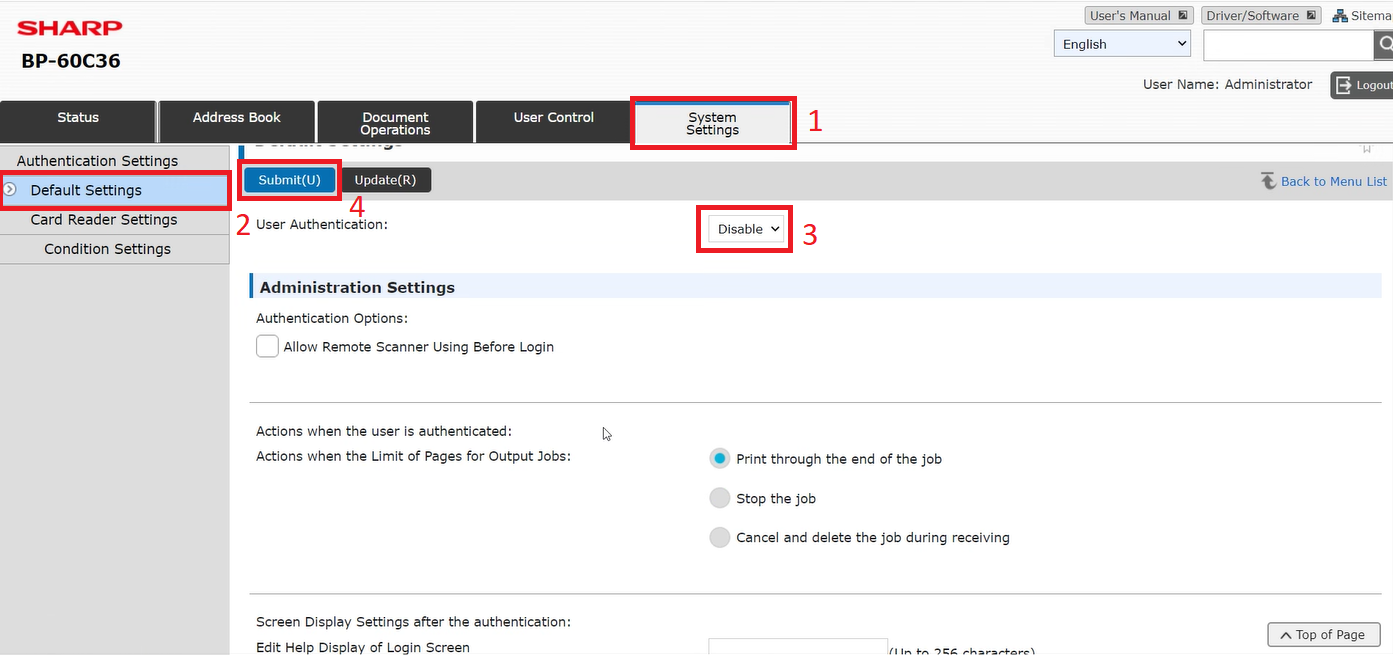
Other device lines: User Control and Default Settings:
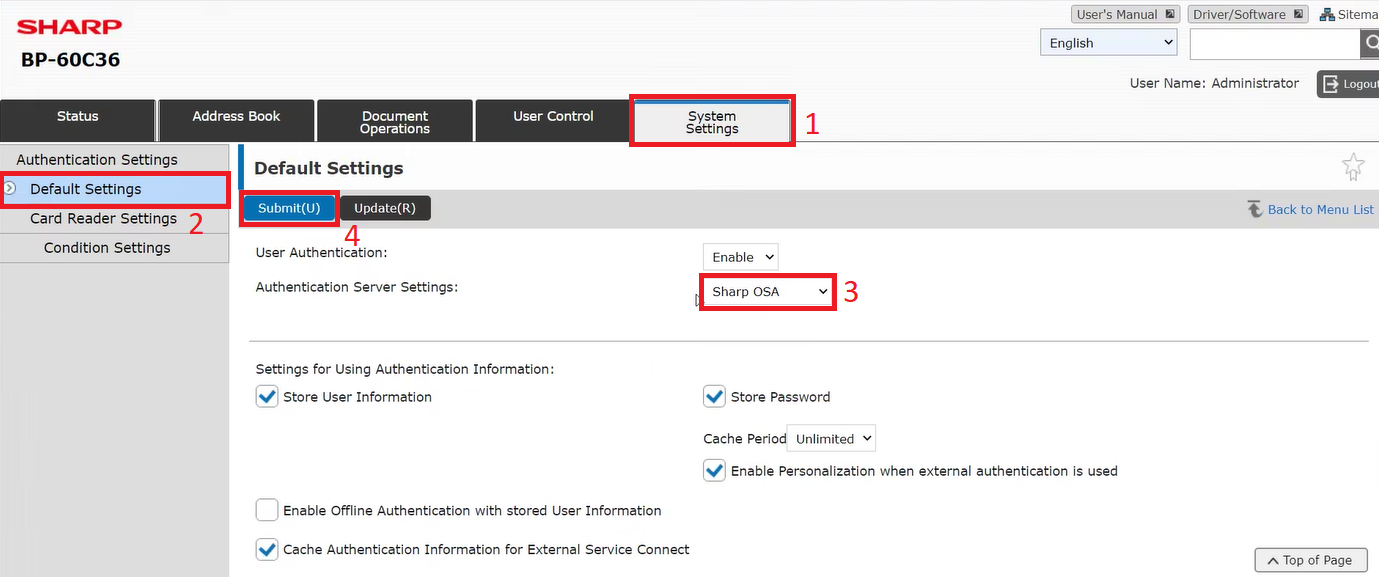
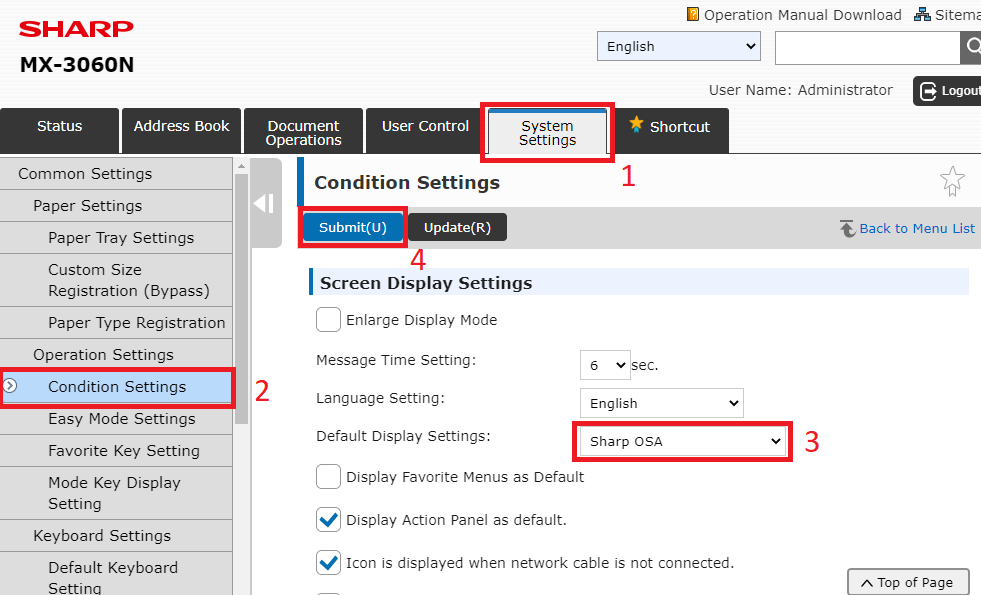
If you would like to use "To device" a uthentication mode, register YSoft SafeQ as the default application (settings may differ based on device line):
CR5 device line: System Settings, Authentication Settings, and Default Settings, set Authentication Server Settings to Sharp OSA
Other device lines: System Settings, Common Settings, Operation Settings, and Condition Settings, set Default Display Settings to Sharp OSA
Restart the Sharp device.