Configuring Document Store
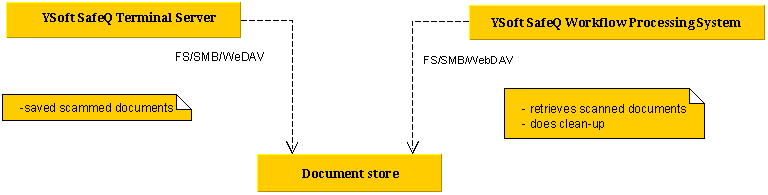
Document Store is used as a data storage for scanned documents. Documents are stored from MFD via Terminal Server and later retrieved by YSoft SafeQ Workflow Processing System for processing and delivery. When YSoft SafeQ Workflow Processing System is running on another computer a distributed repository visible to both Terminal Server and YSoft SafeQ Workflow Processing System must be used instead of default local storage.
Configuration can be set on different levels:
YSoft SafeQ Management Server – is applied to the whole tenant, all subsystems are affected but it has the lowest priority.
YSoft SafeQ Spooler Controller – overrides management server configuration for one branch, only subsystems connected to this Spooler Controller are affected. (Note: backslash character in spoc.conf acts as an escape sequence, if you would like to add it, you need to double it)
YSoft SafeQ Workflow Processing System / YSoft SafeQ Terminal Server – overrides management server and Spooler Controller configuration, only single subsystem is affected, it has the highest priority.
Please note, that Workflow Processing System and Terminal Server can be connected to only one document store. Different parts of YSoft SafeQ can use different Document Stores, but keep in mind that Workflow Processing System which is used for processing by Terminal Server must be configured to the same location.
Using local folder
The default setting, use this configuration when YSoft SafeQ Workflow Processing System and YSoft SafeQ Terminal Server are on the same computer. Data are stored locally into a temporary folder, the default location is <install_dir>\SPOC\terminalserver\scan, it is set in YSoft SafeQ Spooler Controller configuration during the installation process.
Using shared folder (SMB)
Used when YSoft SafeQ Workflow Processing System and YSoft SafeQ Terminal Server are on different (Microsoft Windows) computers.
It is not supported by SafeQube 2, use WebDAV server instead.
Settings on management interface
In the System settings, update the workflowStorageType, workflowStorageRoot, workflowRemoteStorageUsername, and workflowRemoteStoragePassword accordingly:
The workflowStorageType property has to be set to remote.
The workflowStorageRoot should be configured to \\server\shared_folder.
Insert the username and password for an account with read and write permissions into the workflowRemoteStorageUsername and workflowRemoteStoragePassword properties.
Troubleshooting
"[\servefolder$] Failed to initialize Document Store" in Terminal Server log when setting it in YSoft SafeQ Spooler Controller
Backslash character in spoc.conf acts as an escape sequence, so in order to make it working, you have to double all backslash characters, e.g. change '\\server\folder' to '\\\\server\\folder'.
Using WebDAV server
Used when YSoft SafeQ Workflow Processing System and YSoft SafeQ Terminal Server are on different (Microsoft Windows) computers. WebDAV server is not embedded into YSoft SafeQ, we are using Microsoft IIS instead.
Installation of server roles for IIS 10.0
To configure WebDAV on older version of IIS please follow https://www.iis.net/learn/install/installing-publishing-technologies/installing-and-configuring-webdav-on-iis#005. Procedure can be slightly different on older versions.
Open Server Manager application via bottom control panel or icon on desktop
In Server Manager, install server roles by opening Manage menu and selecting Add Roles and Features
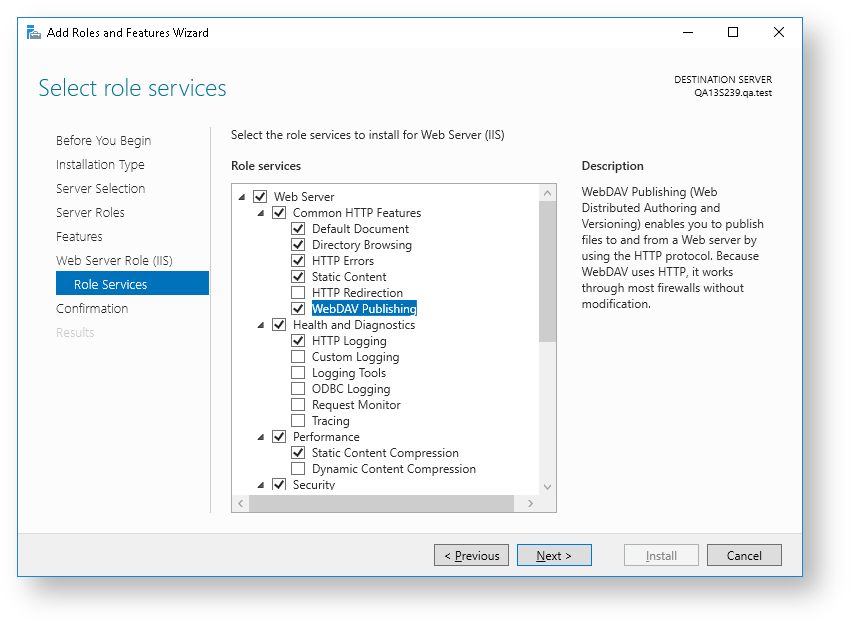
Go through the wizard to Server Roles menu. On Server roles check Web Server (IIS) and confirm Add feature. After that, left menu is expanded by Web server role.
In Role Services check:
Common HTTP Features > WebDAV Publishing.
Security > Basic authentication.
Click Next and finish installation.

Enabling webDAV and adding authoring rule
In Server Manager open IIS Manager by opening Tools menu and selecting IIS Manager. In the Connections pane, expand the Sites node in the tree, then create a new site.
Right click on Site icon and then select Add Website.
Enter a name for the site and select the physical path.
Enter port (for example 8099)
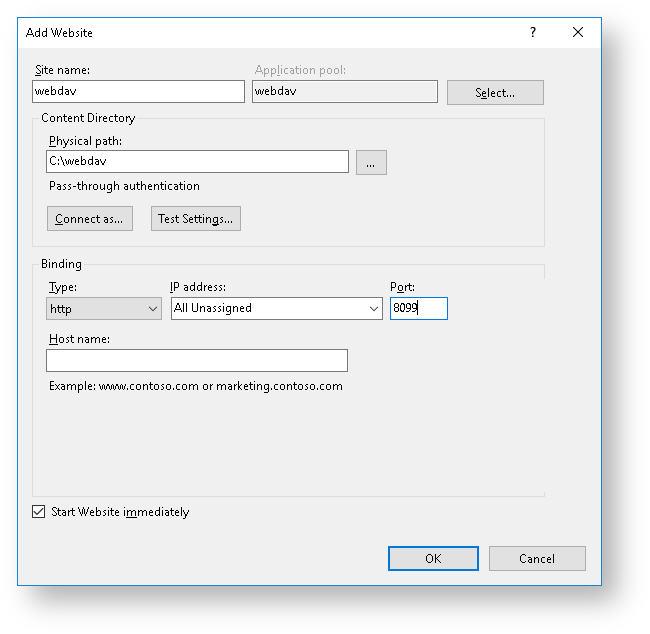
With HTTP binding type, data including password are not encrypted. It is recommended to use HTTPS binding. In this case, valid certificate issued by certification authority has to be used.
If you want to use unsecure channel, you must set property webdavSsl to Disabled
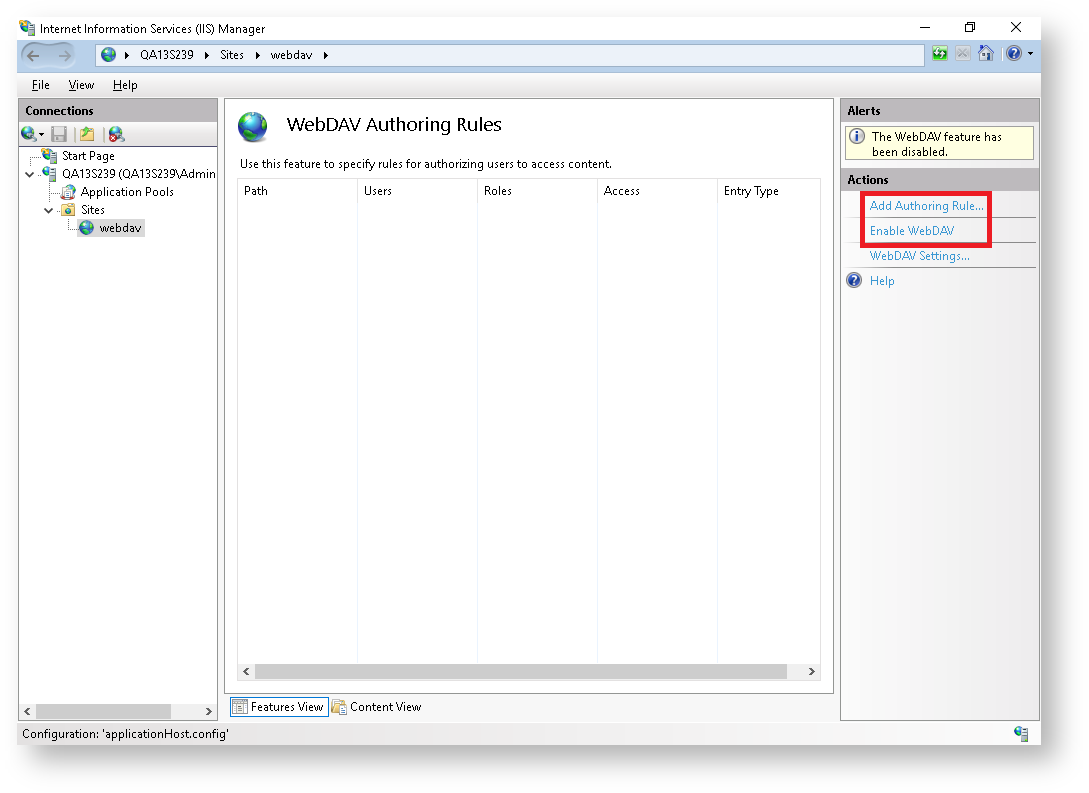
As shown in the image below, double-click the WebDAV Authoring Rules feature.
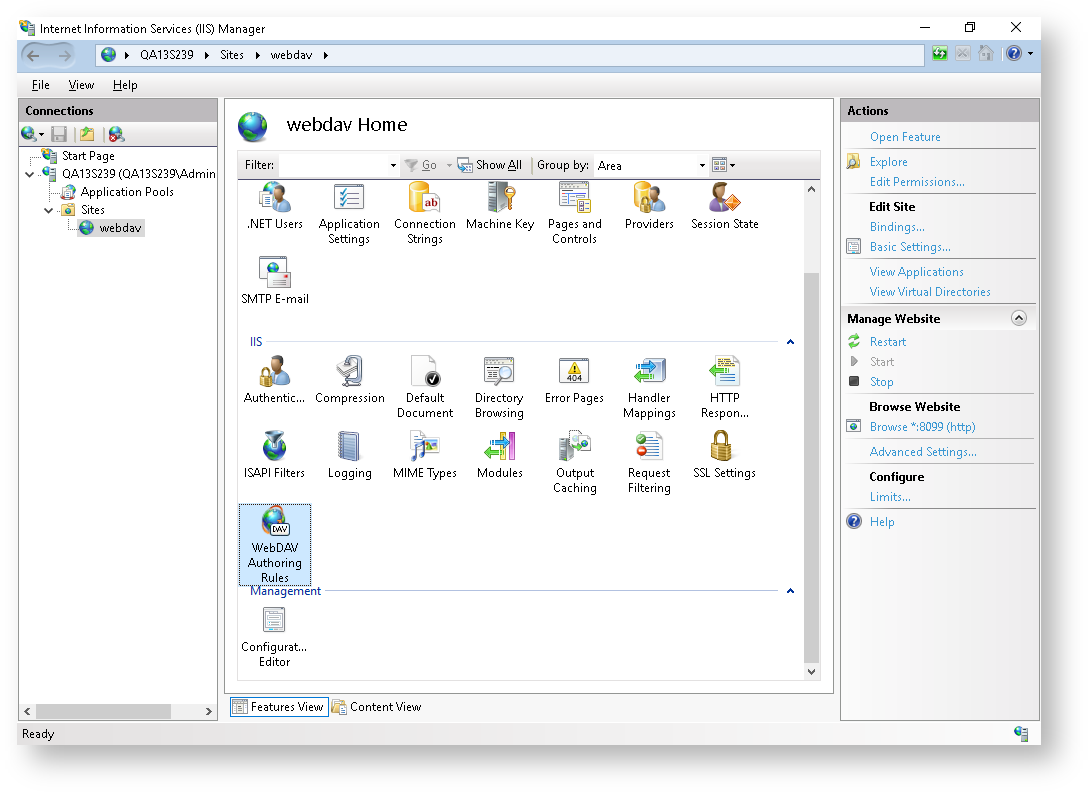
Enable webDAV in right panel and also Add Authoring Rule.
Grant access to the user used for authentication.
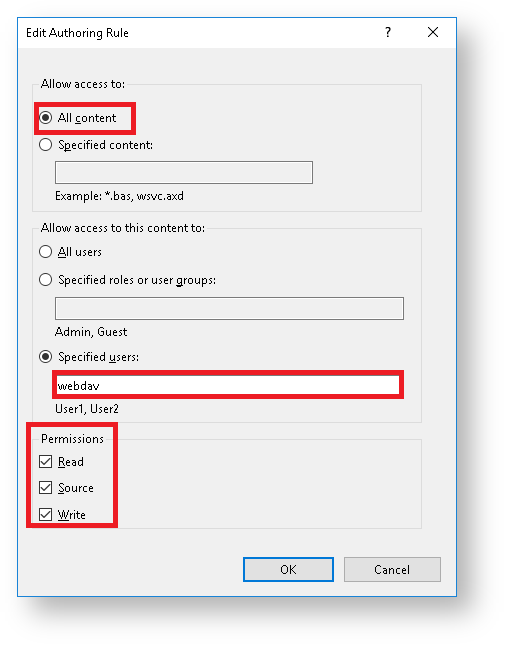
WebDAV users
Please note, that in this example we are granting access to a local user called 'webdav'. You can use an already existing account or create a new one, e.g. using Computer Management tool.
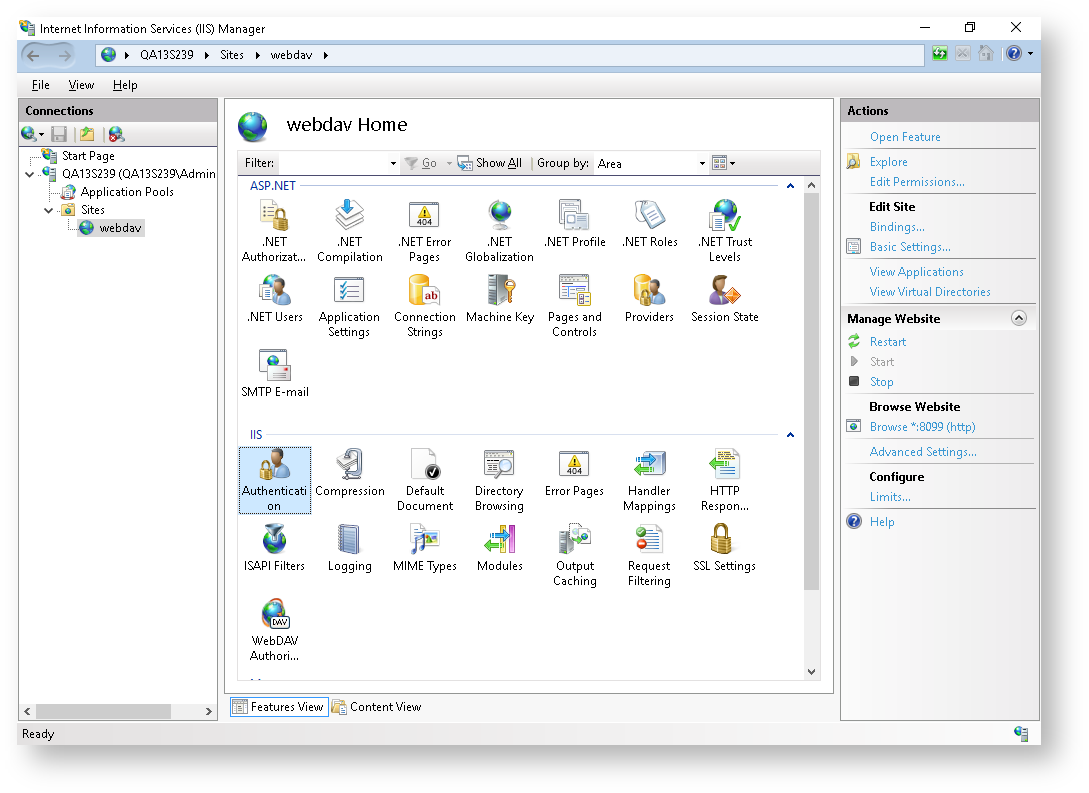
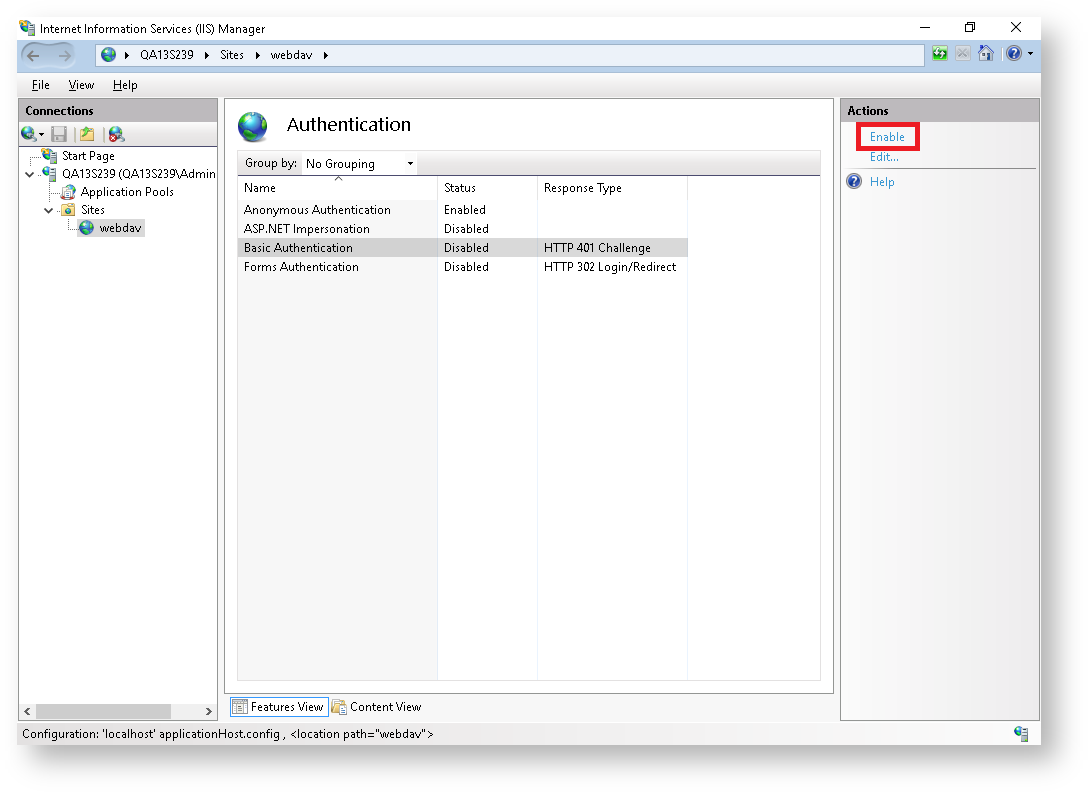
Select site again and enter Authentication settings and make sure that Basic authentication is enabled.
WebDAV server validation
In Sites find your created WebDAV site and choose Basic Settings... from them the right hand side menu.
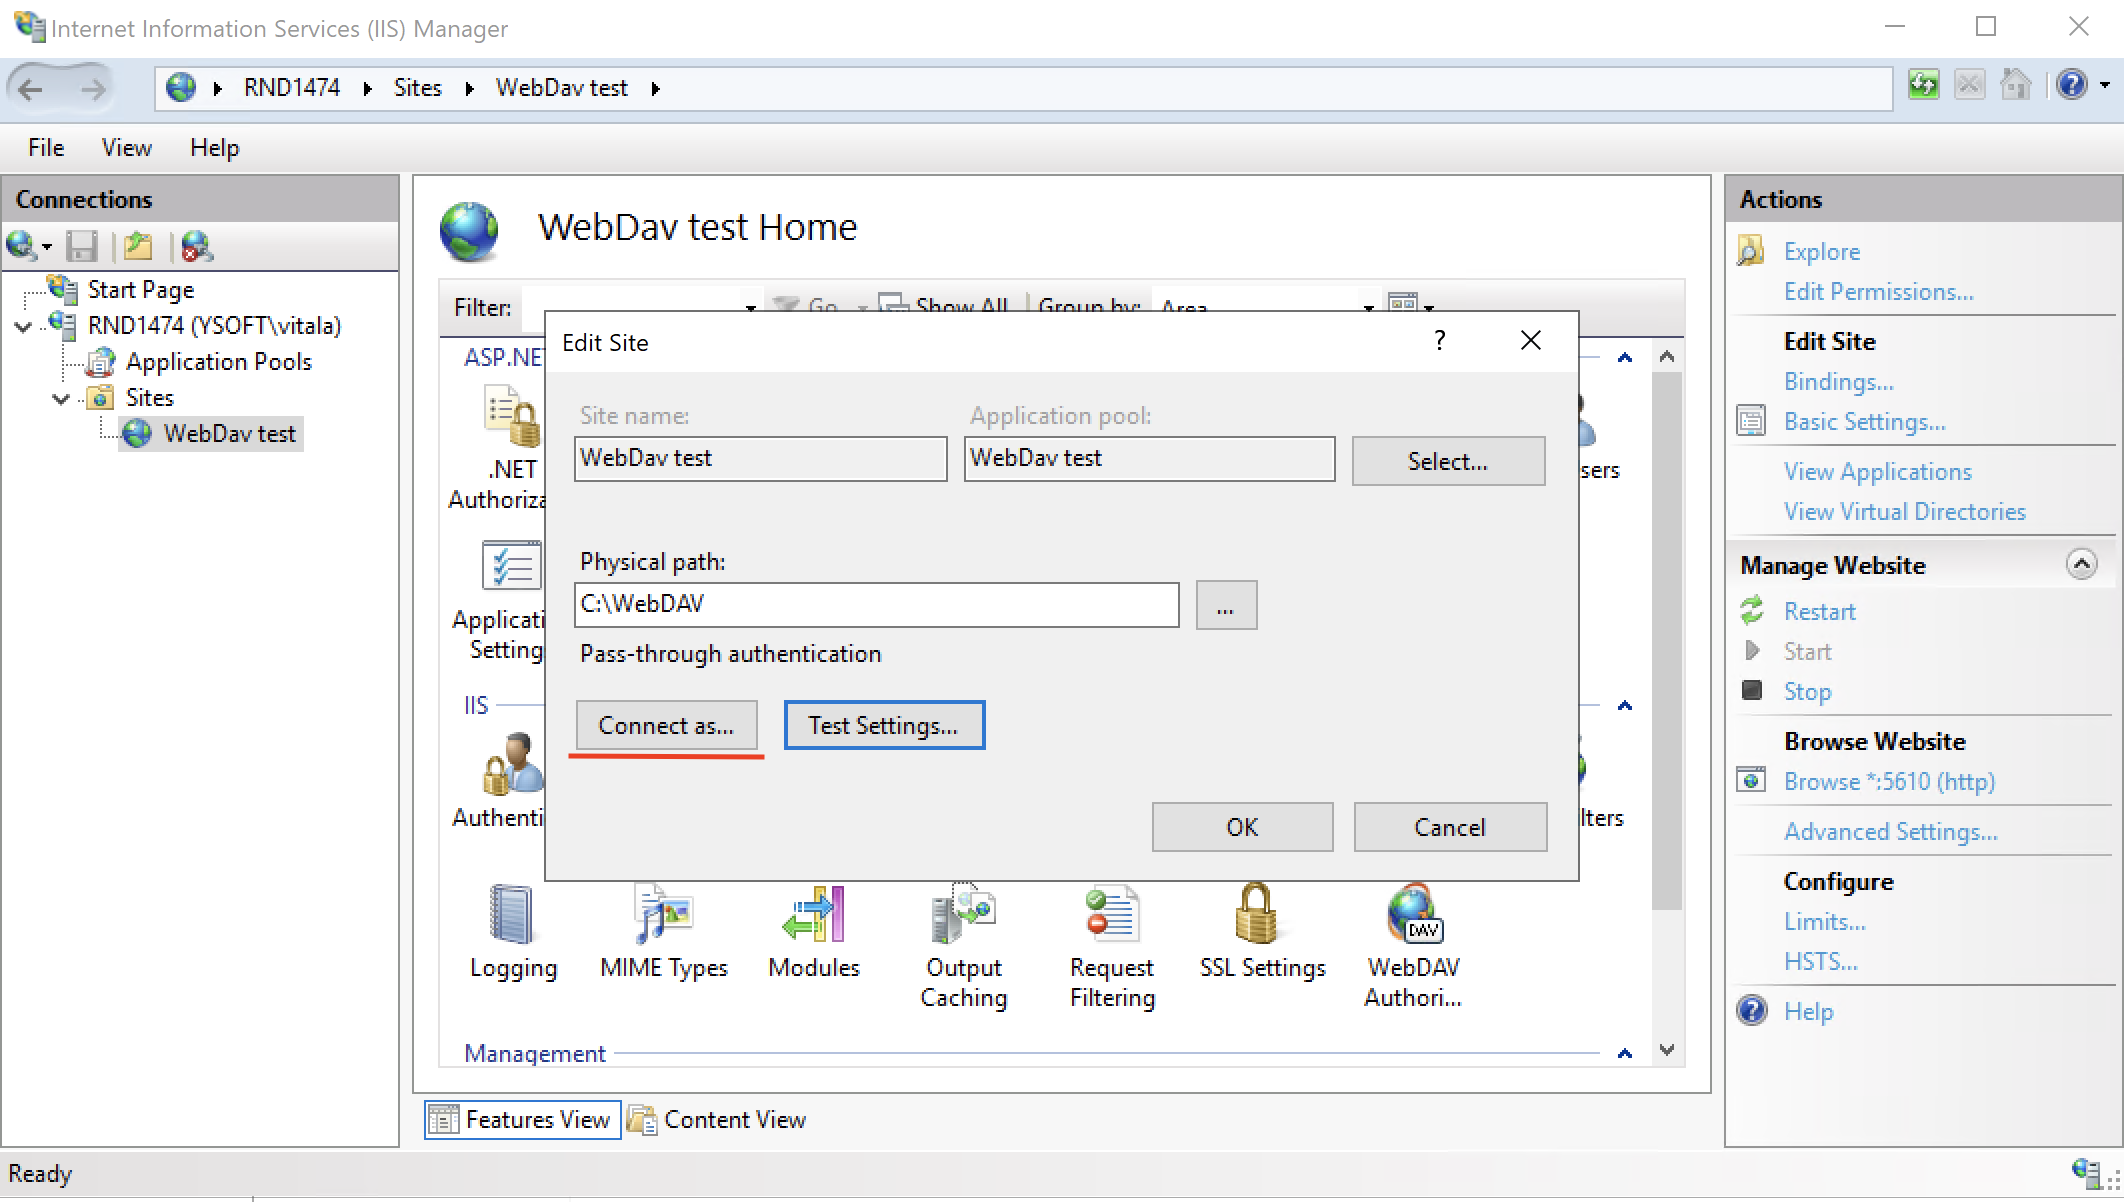
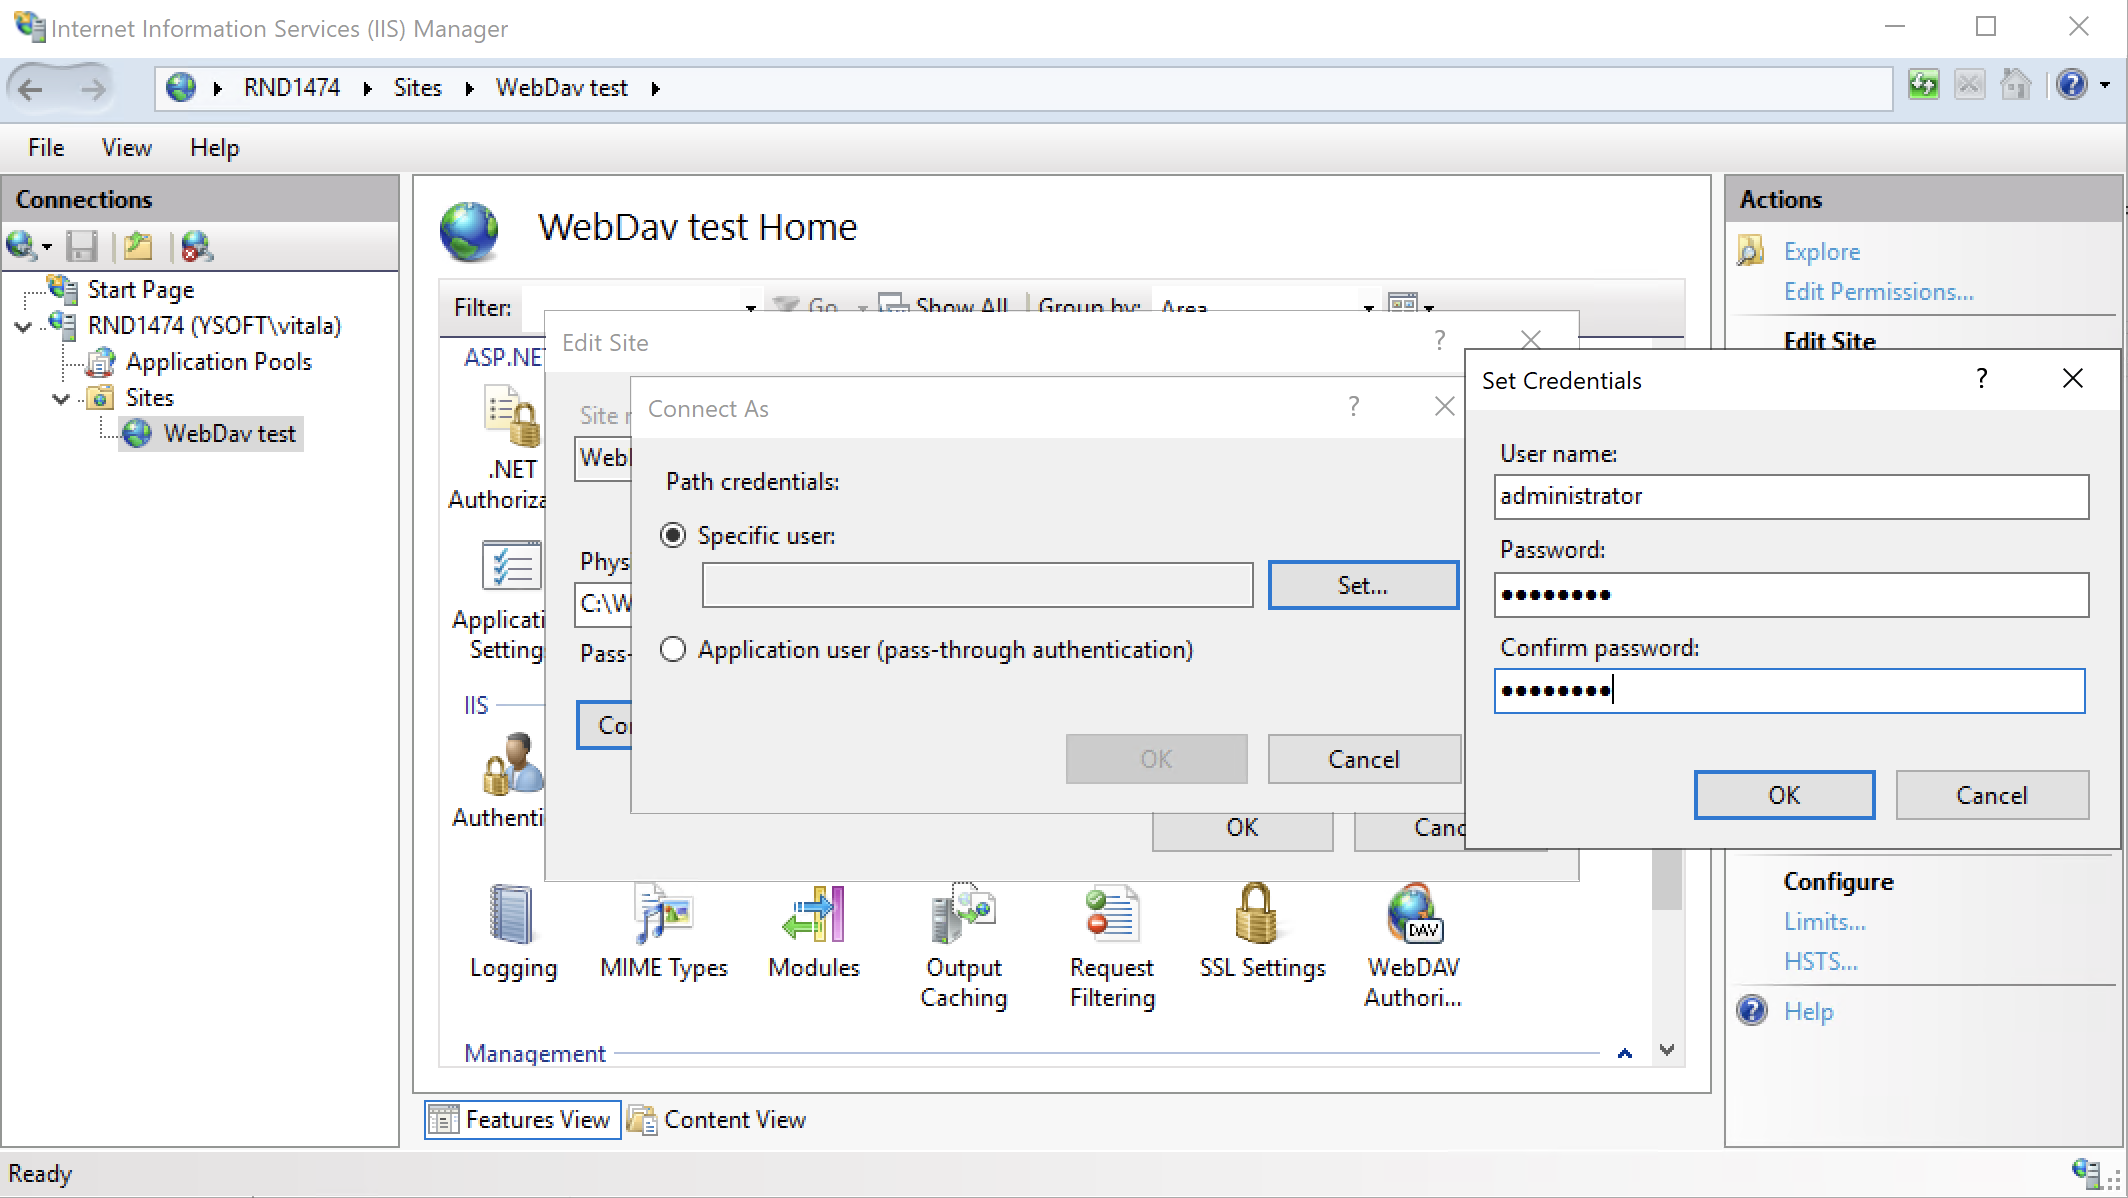
Choose Connect as... and fill in the user which exists on the machine and in YSoft SafeQ.
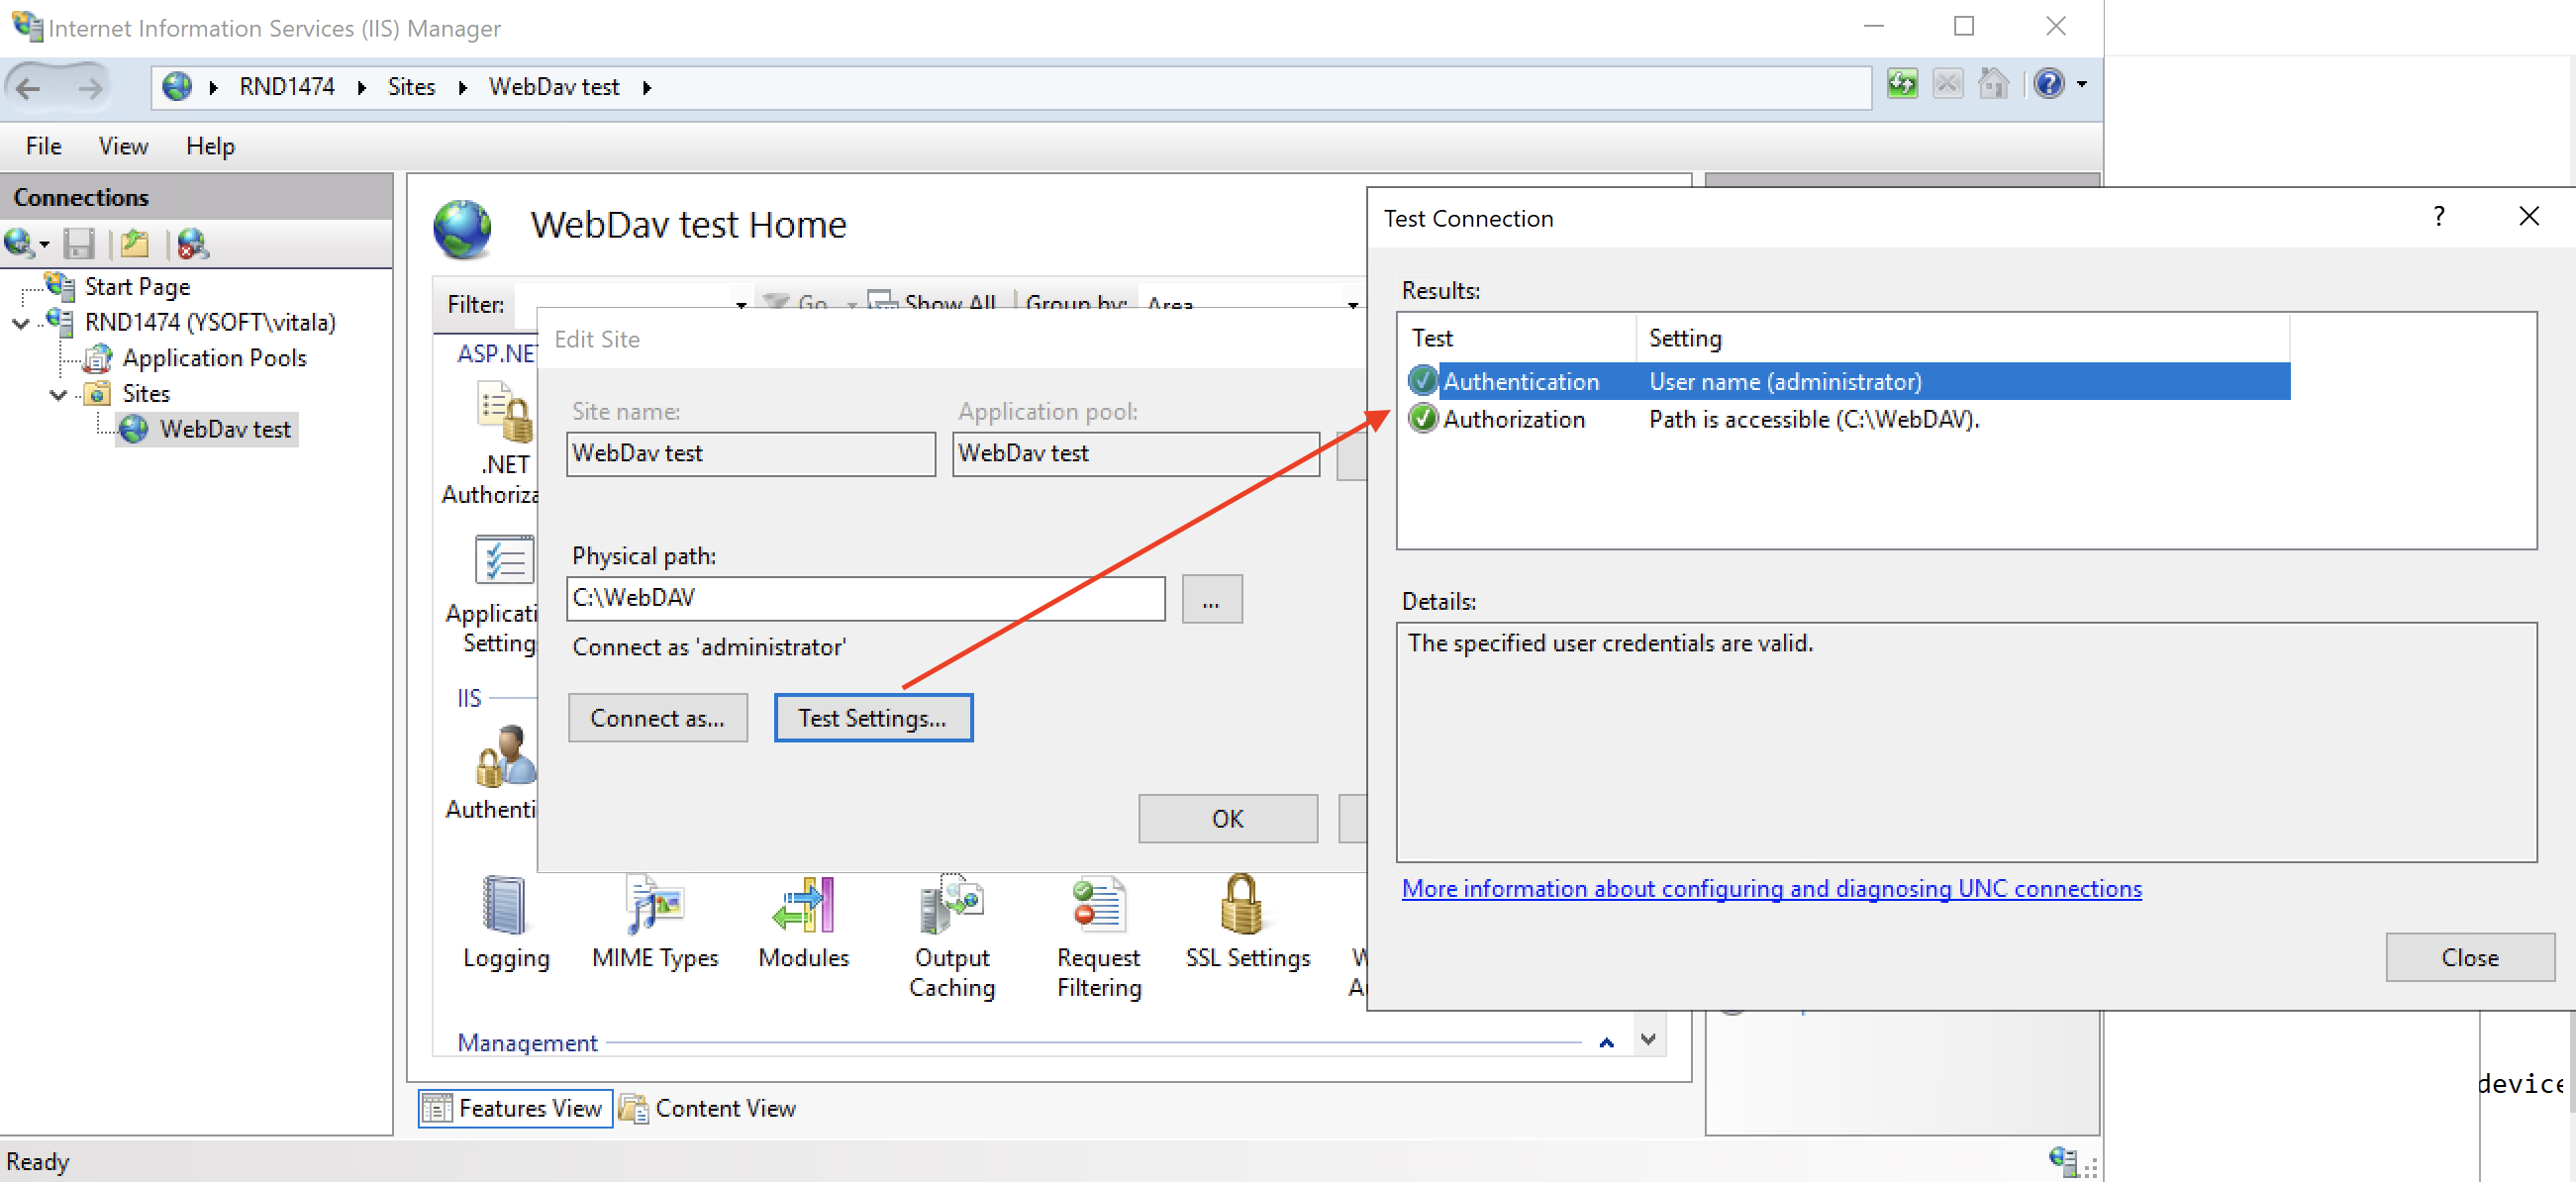
Click Test Settings... and check the errors (if any)
Settings on the management interface
In the System settings, update the workflowStorageType, workflowStorageRoot, workflowRemoteStorageUsername, and workflowRemoteStoragePassword accordingly:
The workflowStorageType property has to be set to webdav.
The workflowStorageRoot should be configured to http://webdav_ip:webdav_port/ (e.g. http://10.0.13.55:8099/).
Insert the username and password for an account with WebDAV permissions into the workflowRemoteStorageUsername and workflowRemoteStoragePassword properties.
You can test WebDAV server access (http://webdav_ip:webdav_port/ with username set in workflowRemoteStorageUsername option, password set in workflowRemoteStoragePassword). You can use WinSCP or another tool you prefer.
Optional settings
All those properties can be set on three different places.
In management interface where it is relevant to all subsystems but also has the lowest priority.
In spoc.conf – it is applied on all subsystems on the Spooler Controller. If it is set, it overwrite settings of management server.
In YSoft SafeQ Workflow Processing System in WpsService.exe.conf or TS TerminalServer.exe.conf. Applied only for one subsystem and overwrite all other values.
Please, be aware that WebDAV instance cannot be shared across multiple YSoft SafeQ installations . WebDAV might be used by different devices with the same ID and this could lead to mixing unrelated scan jobs between installations because the ID is used to create the hot folder.
Troubleshooting
"The underlying connection was closed: Could not establish trust relationship for the SSL/TLS secure channel."
Please make sure that following is true:
the certificate subject matches the workflowStorageRoot address, i.e. subject is SERVER.DOMAIN and address is http://SERVER.DOMAIN:8080/
the certificate is valid
the CA is trusted on the server with Workflow Processing System and Terminal Server