The YSoft Card Reader Tool
About
This document describes the configuration tool version 1.5.3 for YSoft USB Card Readers v2/v3.

The tool consists of the following parts:
Configuration
A list of connected readers with basic details
Operations on one or multiple selected readers
Configure readers (Custom configuration, Reader protocol, USB mode, Debug setting, etc.)
Update main firmware
Update service firmware
Show full reader details
Download reader log
Reading test
A list of connected readers with the last read card number and card type
Save read logs as a text file
Advanced Configuration
A list of connected readers with the last read of the YSoft Configuration Card label
Format compatible cards as YSoft Configuration Card
Define the configuration content for Configuration Card (import existing configuration, define custom configuration, reader protocol, device configuration, card label, etc.)
Custom configuration can be:
Loaded from a text file
Manually defined
Reused from predefined protocols
Repeatedly evaluated and tested on connected readers
Stored to connected readers
Write the configuration to Configuration Card or export to disk
Advanced configuration is intended for advanced users/experts only and is described in a separate document.
Card testing
Card testing wizard for card type identification
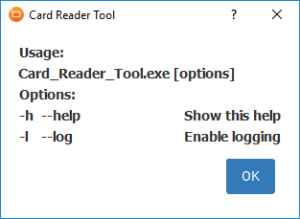
Command Line Parameters Overview
Configuration Page Overview
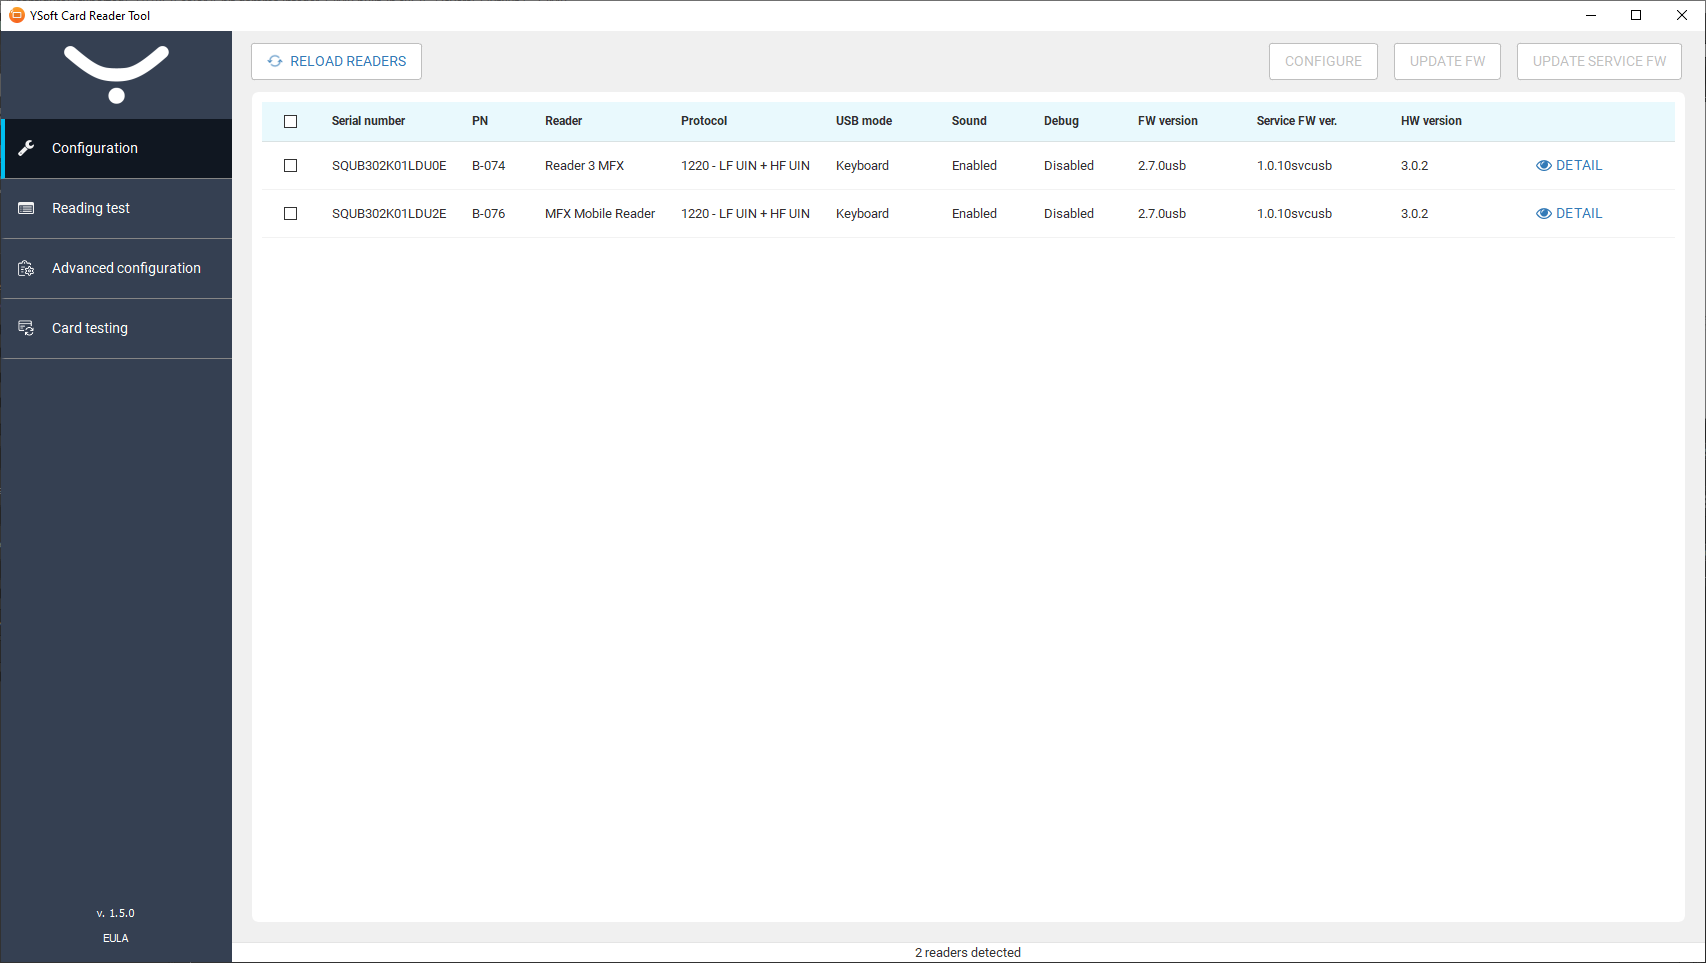
1. Connected Card Readers

The table is sortable. Sort by the desired column by clicking its header.
Operations are performed on selected readers. Select them by clicking the select checkbox, or anywhere on the line (except the detail button).
The checkbox at the upper left-hand side acts as Select/Deselect all
2. Reload readers (F5)
Refresh the list of connected readers using the Reload readers button.
3. Configure Selected Card Readers
Open the configuration dialog for the selected card readers using the Configure button. Card Reader Configuration.
4. Update Firmware on Selected Card Readers
Open the update firmware dialog for the selected card readers using the Update FW button.
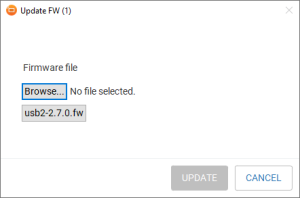
Firmware update
Click Browse.
Select the latest firmware package and click Update. You can also click the button with the name of the embedded firmware.
The embedded firmware file name appears as the selected file.
Starting with firmware 2.3.0, it is necessary to manually update the service firmware of the USB reader at least to version 1.0.9.
With any older versions, 2.3.0 and newer firmware will not be recognized as valid firmware.
5. Update Service Firmware on Selected Card Readers
Open the service update firmware dialog for the selected card readers using the Update Service FW button.
Service firmware update
Click Browse, then select the latest service firmware package. You can also click the button with the name of the embedded service firmware. The embedded firmware file name appears as the selected file.
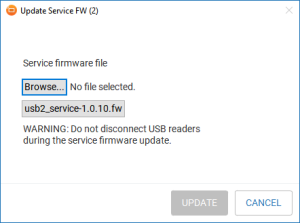
Click Update.
Do not disconnect USB card readers during the update procedure!
6. Card Reader Detail
Click Detail to display the card reader detail page.

On the card detail page, you perform the following actions:
Copy to Clipboard – Copy the reader details to the clipboard or to a text file.
Save to File – Save reader details to a text file.
Download log – Download logs from the card reader and save to a text file. If the log file is empty, then check if debug mode is correctly set in the configuration.
Card Reader Configuration
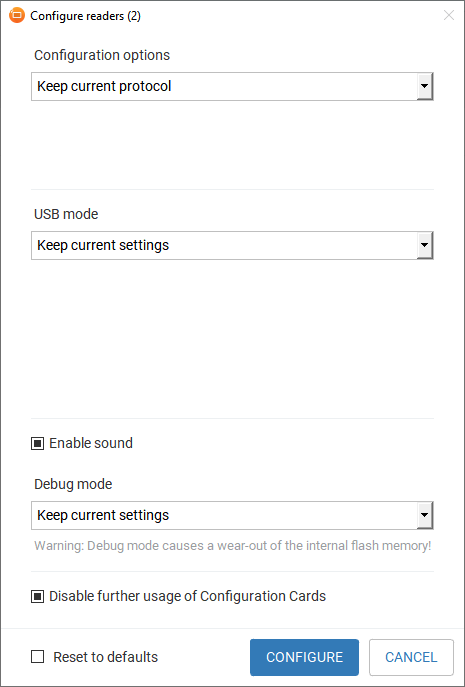
Configuration Options
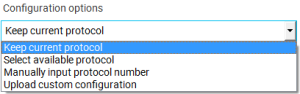
Keep current protocol – Do not change the configured protocol or custom configuration.
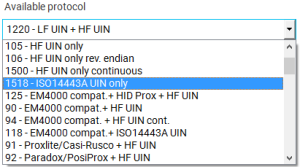
Select available protocol – Select a protocol from the list of available protocols. When you configure more than one type of card reader at once, this mode is not available. You can set the protocol number manually.
Manually input protocol number – Manually set the protocol number.
Upload custom configuration – Upload a binary file with the custom configuration.
USB Mode
Change the mode of the USB interface.
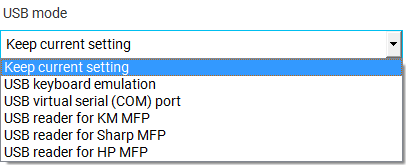
Keep current setting
Do not change the USB mode.
USB keyboard emulation
In this mode, the USB reader works as a standard USB keyboard.
0 - Numpad: The key press is emulated on QWERTY EN/US keyboard layout on standard A-F keys and 0-9 keys on a numeric keypad.
1 - US: The key press is emulated on QWERTY EN/US keyboard layout on standard A-F keys and 0-9 keys in the upper number row.
2 - AZERTY: The key press is emulated on AZERTY keyboard layout on standard A-F keys and 0-9 keys in the upper number row.
If the card number contains any non-alphanumeric characters, they are ignored. Caps-lock and Num-lock are enabled and disabled if necessary and returned to their previous state after the card number is read. The "Shift", "Ctrl", and "Alt" keys must not be held during card placement, or it will collide with Caps-lock and Num-lock settings, and an incorrect card number will be read. If a national keyboard layout is used (Russian, Chinese, or another), a wrong card number will be entered. In such cases, switching to US/EN or AZERTY keyboard layout is necessary before placing the card.
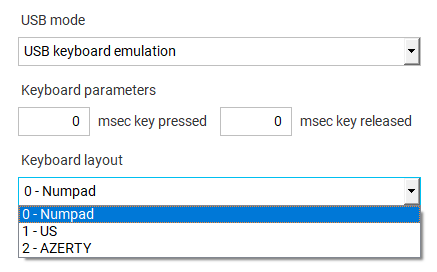
Parameters:
msec key pressed
msec key released
USB virtual serial (COM) port
This mode emulates the operation of a COM port.
On a Windows platform, installation of the USB reader in this mode requires a usb2-reader.inf file. This file is distributed along with the USB reader firmware and should be selected in the "new hardware" wizard after USB reader plugging/reconfiguration.
On a Linux platform, the driver for the serial port is installed automatically.
USB reader for Konica Minolta MFD
This mode is for Konica Minolta (KM) MFDs.
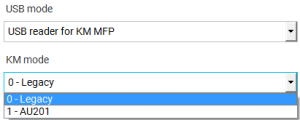
KM mode:
Legacy – ASCII mode
AU201 – binary mode
USB reader for Sharp MFD
This mode is for Sharp MFDs.
USB reader for HP MFD
This mode is for HP MFDs. It is not supported on USB v2 card readers.
USB reader in HID raw mode
This mode is intended for special cases.
Enable sound
Values:
 - Enable Sound
 - Disable sound
 - Do not change the sound configuration
Debug mode
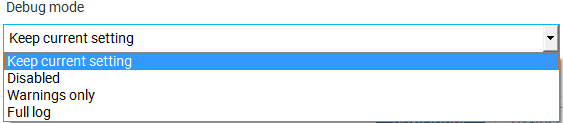
Values:
Keep current setting – do not change the logging configuration
Disabled – logging is disabled
Warnings only – only log warning messages
Full log – debug logging.
Debug logging causes a wear-out of the internal flash memory. For short-term use only.
The log is a 32Kb circular buffer with 10k erase cycles. Card reader operation with worn-out flash memory has not been verified.
Disable further usage of Configuration Cards
Values:
 - Disable further usage of Configuration Cards
 - Enable further usage of Configuration Cards
 - Do not change the configuration setting
Reset to defaults
Values:
 - Do not perform configuration reset
 - Perform configuration reset to manufacturing defaults (Could not be combined with other options)
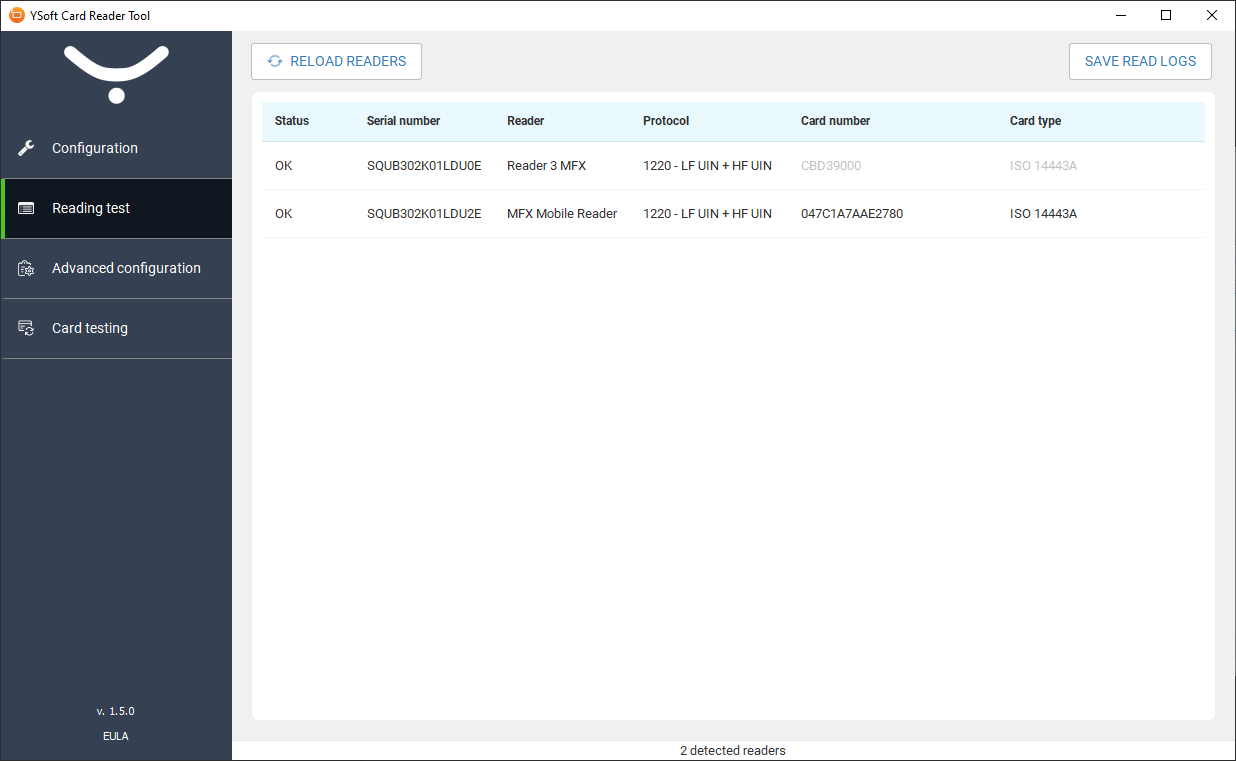
Reading Test
In this section, you can test the reading of your card readers and save testing results to a file. You can test multiple card readers at once.
When the status of the card reader is OK, you can start placing cards on the card reader.
Reload readers (F5)
Refresh the list of connected readers and clean the card reading log.
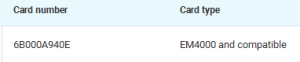
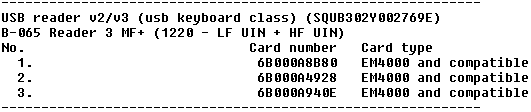
Card number and type
You can find the number and type of the last-placed card.
When using in KM mode, the card number also includes MFP data emitted from a loadable driver (in parenthesis).
Save Read Logs
Download a log of all cards numbers read by the card readers using the Save Read Logs button.
Log example
YSoft Card Reader Tool Advanced Configuration
Starting with version 1.2 of the YSoft Card Reader Tool, it is possible to create or upload an advanced configuration for Y Soft card readers. The advanced configuration includes:
Customized card reading
Device operational parameters
Creation of custom configuration cards
A step-by-step guide for advanced configuration
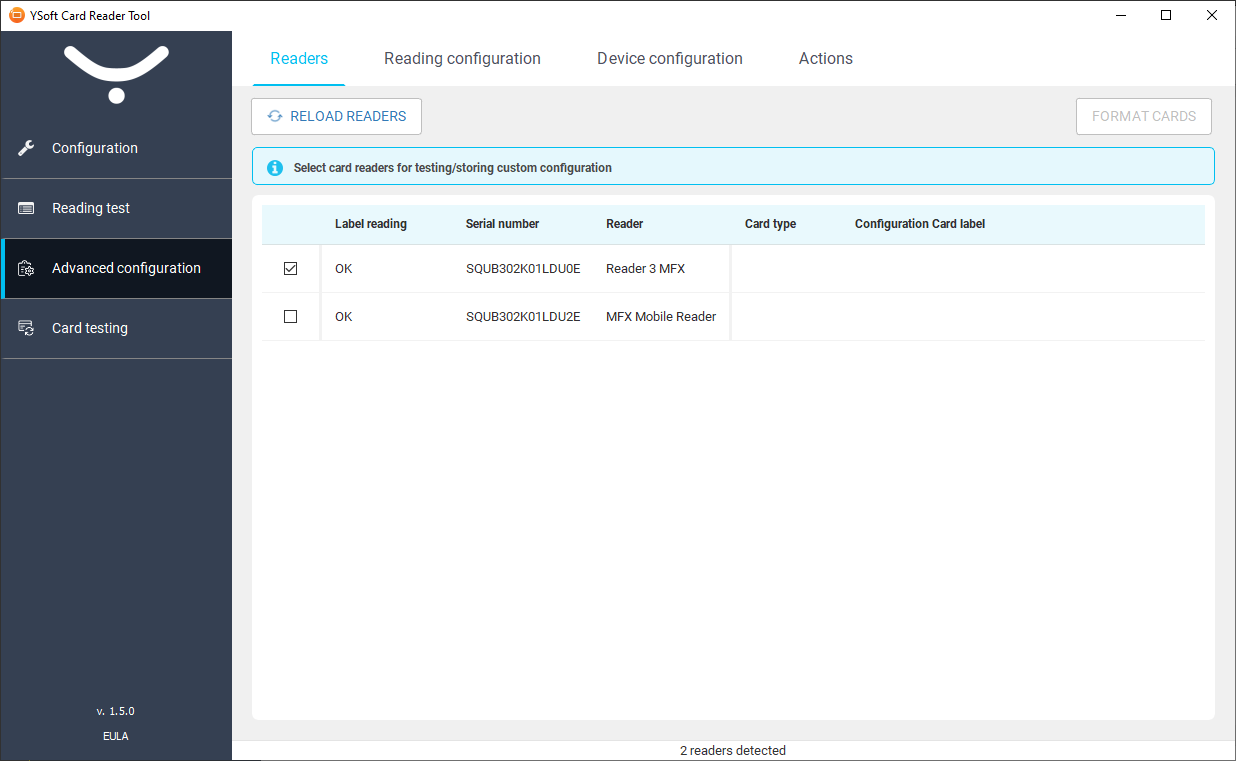
Step 1:
Select which reader you want the advanced configuration tested on in the next reading configuration dialog. This step can be omitted if no testing is required.
Step 2:
Select the card reader configuration either by:
Custom card reader configuration. See below for a custom configuration step-by-step.
Or by protocol selection from the list of protocols.

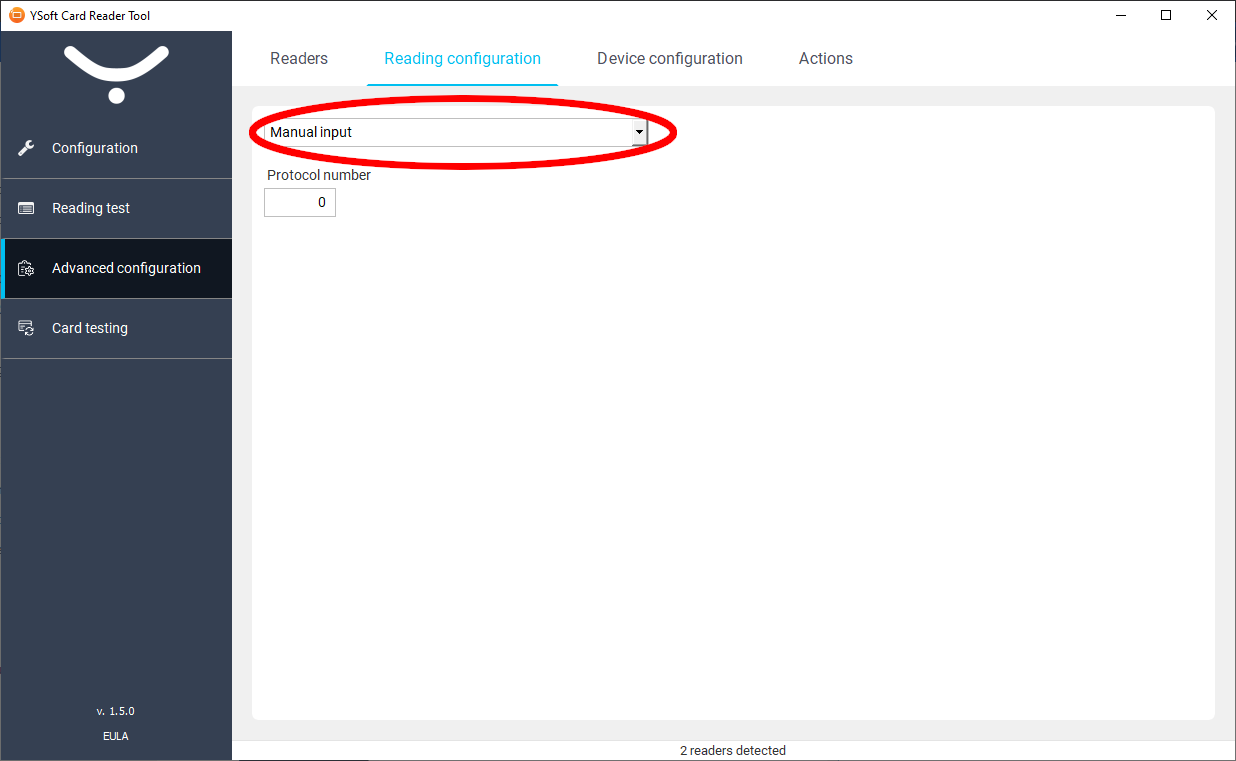
Or by manual protocol selection by protocol number.
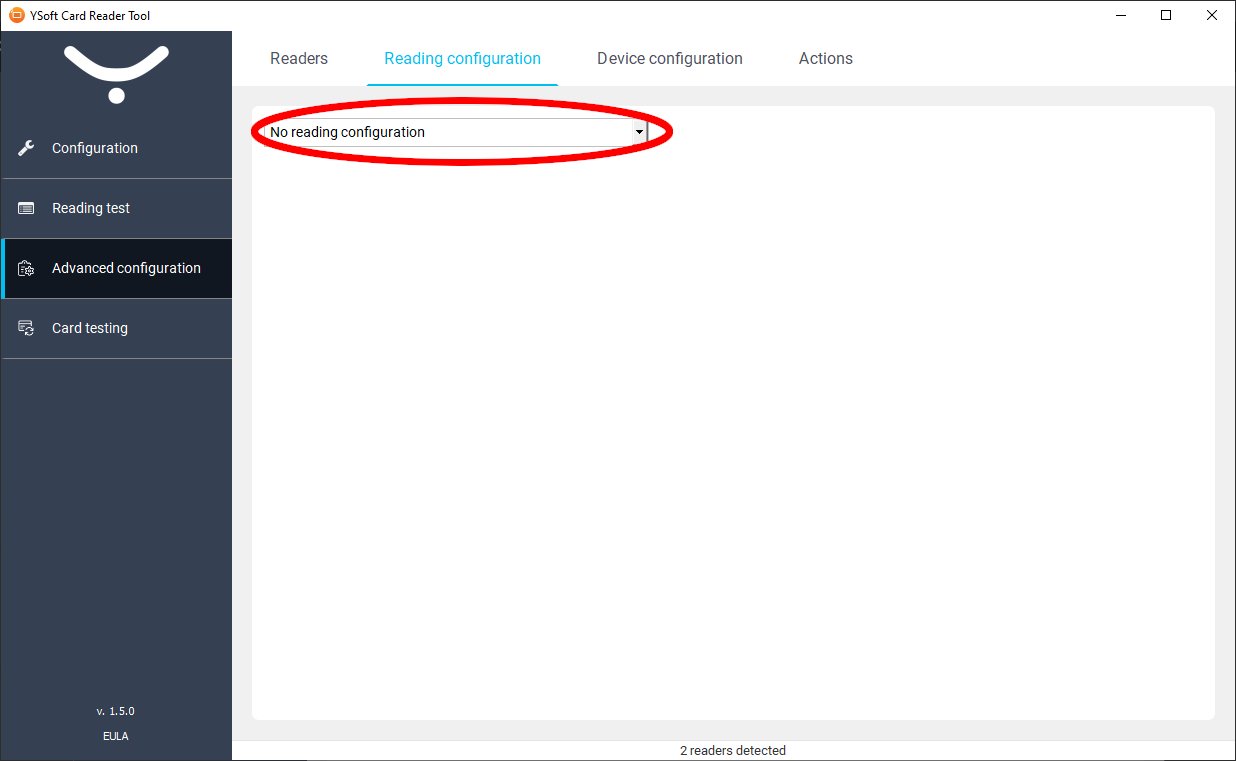
Or set "No reading configuration"
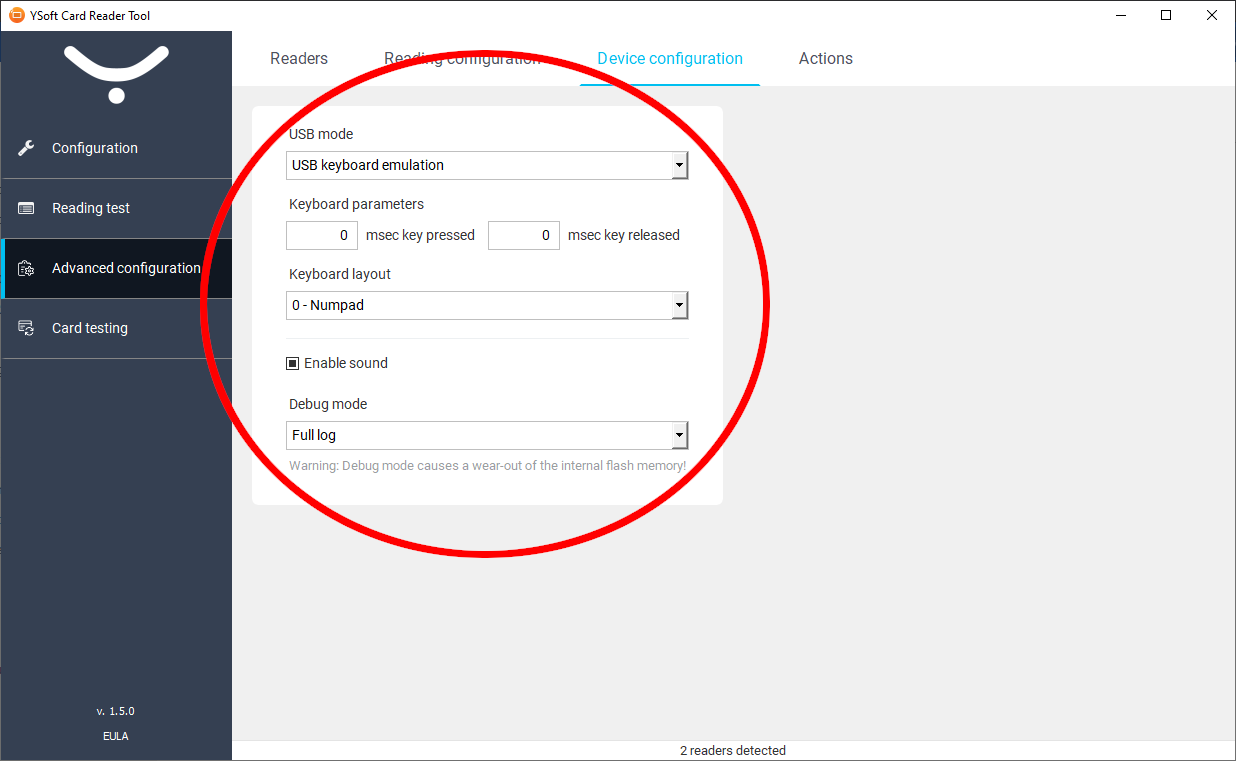
Step 3:
Select device configuration.
May be left without any change if no changes are required. Items correspond to the options in the configuration dialog.
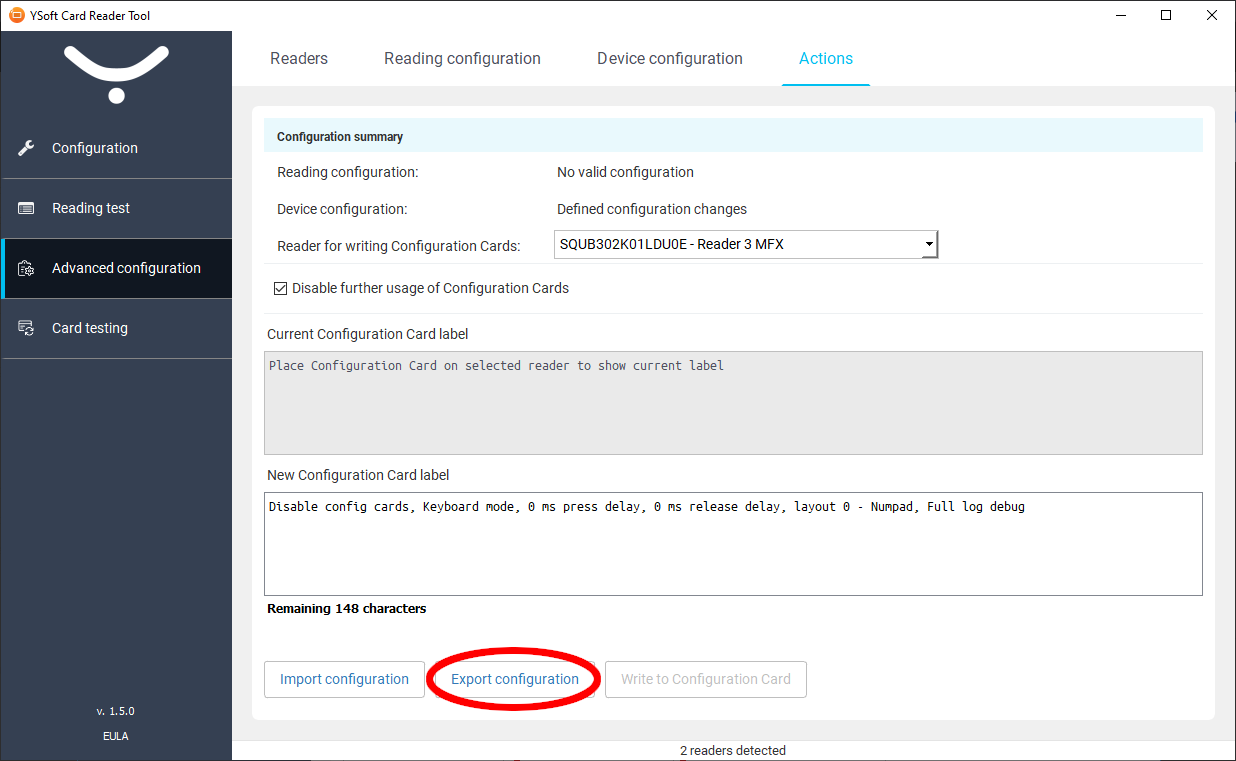
Step 4:
Save the configuration:
Save the configuration to a file by clicking export configuration. The file can be later used in the Configuration > Configure dialog > Upload custom configuration.
Alternatively, you can write the config on a configuration card, see below for step-by-step creation of configuration cards.
Users may start with an already existing custom configuration. Then it is possible to import it and define only the overriding changes. Redefining custom configuration is not supported.
Step-by-step creation of configuration cards
See the "Card Reader Custom Configuration" document for details and limitations about the configuration cards usage. Please ask your sales representative for the document.
Configuration Cards are supported from firmware version 2.4.0 on these readers:
USB Reader 3 MF
USB Reader 3 MF+
USB Reader 3 MF&Legic
USB Reader 3 MF SAM
From firmware version 2.5.0 on this reader:
USB Reader 3 MFX
From firmware version 2.6.0 on this reader:
MFX Mobile Reader
From firmware version 2.7.3 on this reader:
MFX Ultimate Reader
Step 1: Format an empty card.
Place a compatible card on the card reader and click FORMAT CARDS. This step is skipped if the card is already formatted.
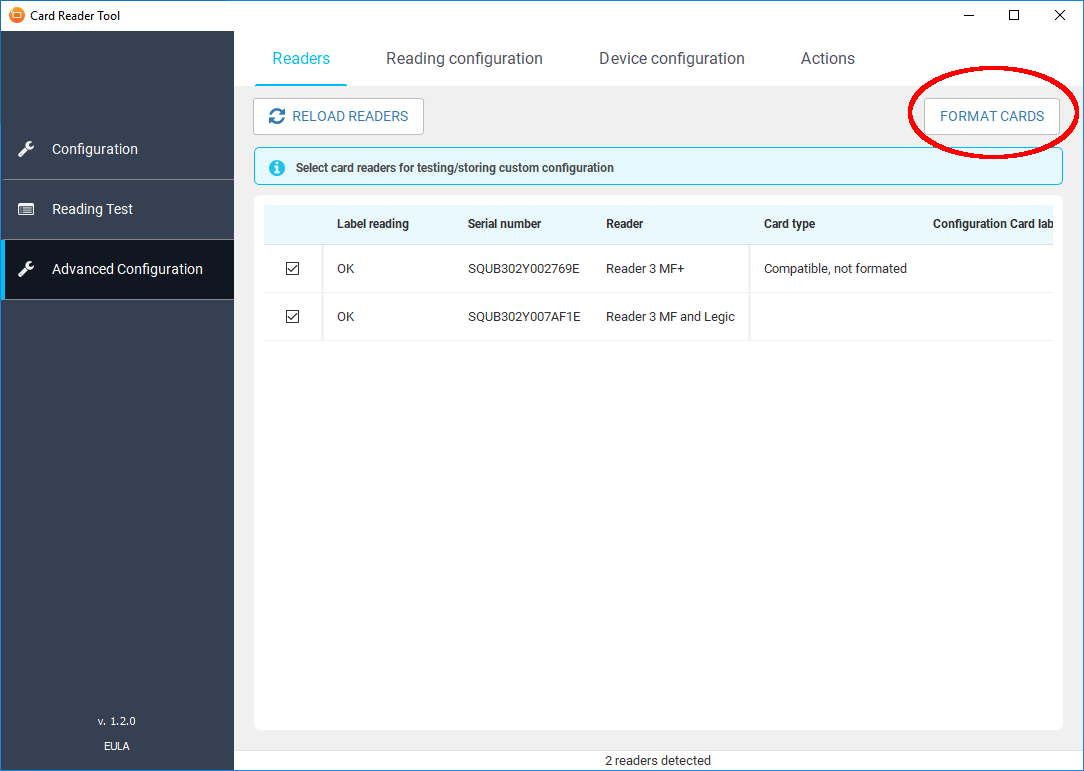
Compatible cards are:
Mifare DESFire EV1 8k
Mifare DESFire EV2 8k
The card must have a default master key (like a blank card) before formatting.
Formatting will erase all data stored on the card.
Step 2: Prepare reading configuration and device configuration (see above)
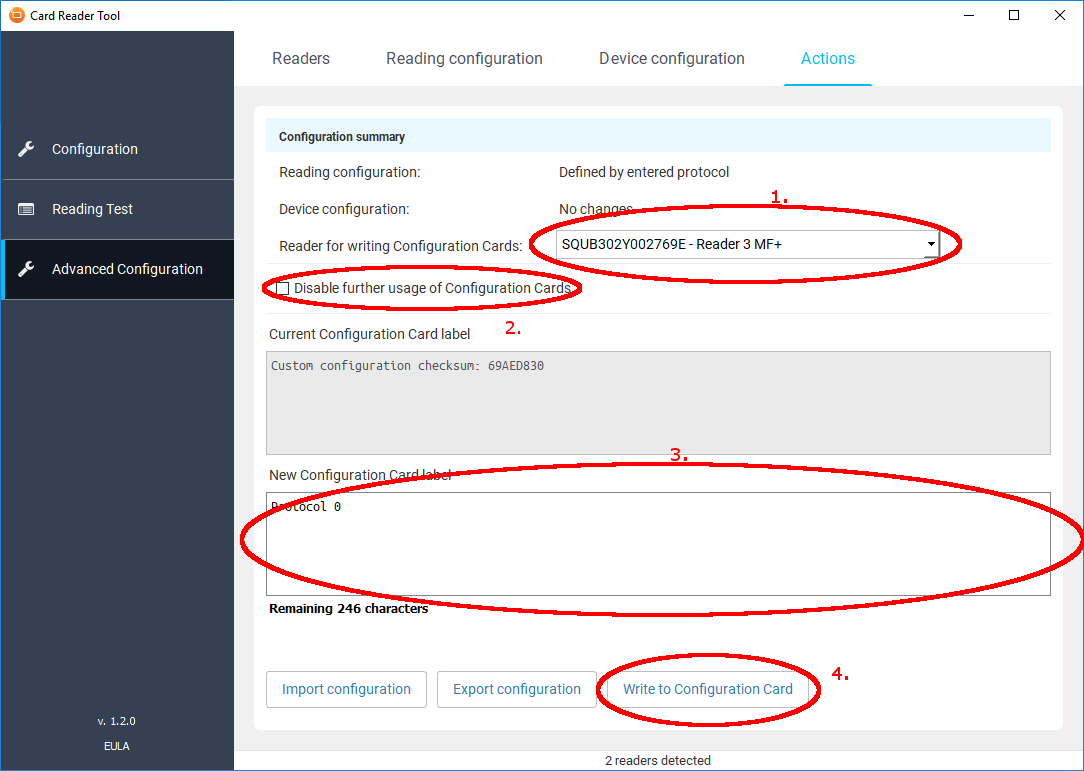
Step 3: Write the configuration onto a card
Select the reader you wish to write the config card on and place the formatted config card on it.
Select if you want to disable the further processing of the configuration cards. Generally, it is not safe to leave it on. However, for debug and testing purposes, it is better to leave it enabled.
Edit the card label. The label is initially generated based on the configuration settings, however, it can be changed to anything to suit customer needs. The label can be read back by an NFC-enabled mobile phone or tablet.
Click Write the configuration card
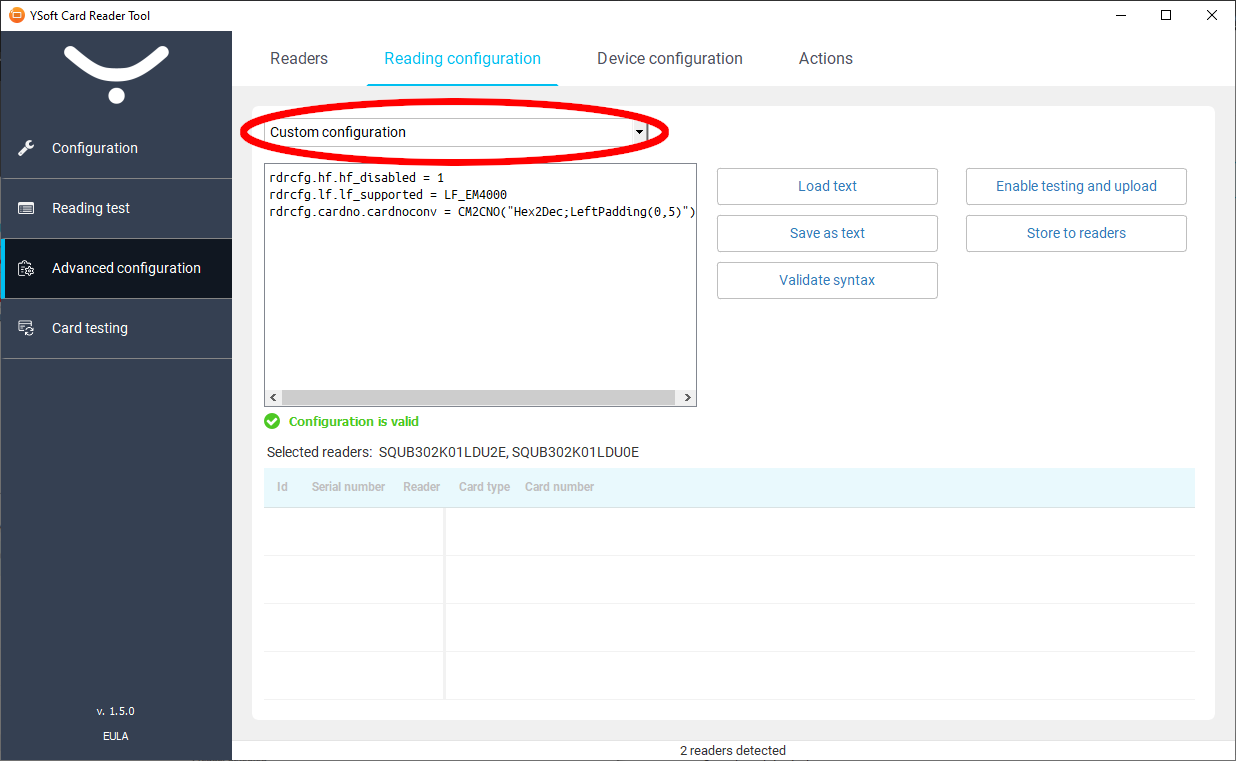
Step-by-step custom card reader configuration
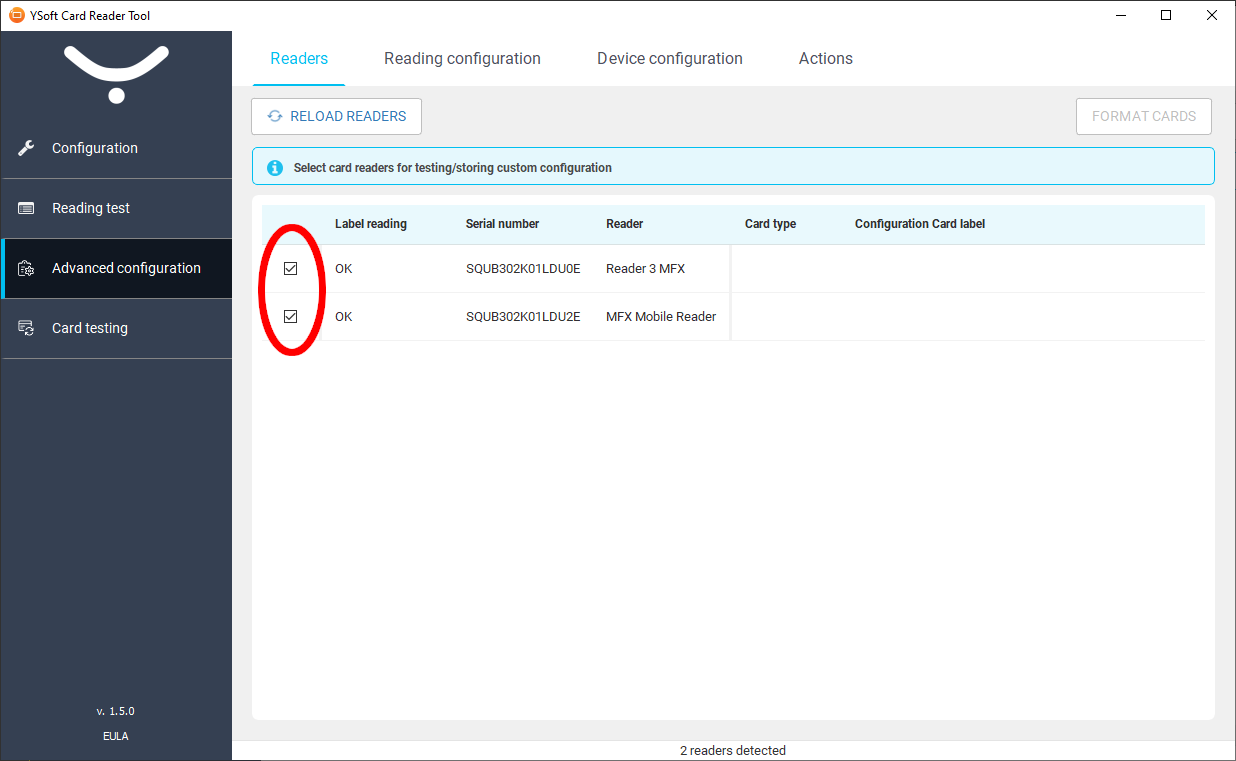
Step 1:
Select the card readers you want the custom configuration tested on:
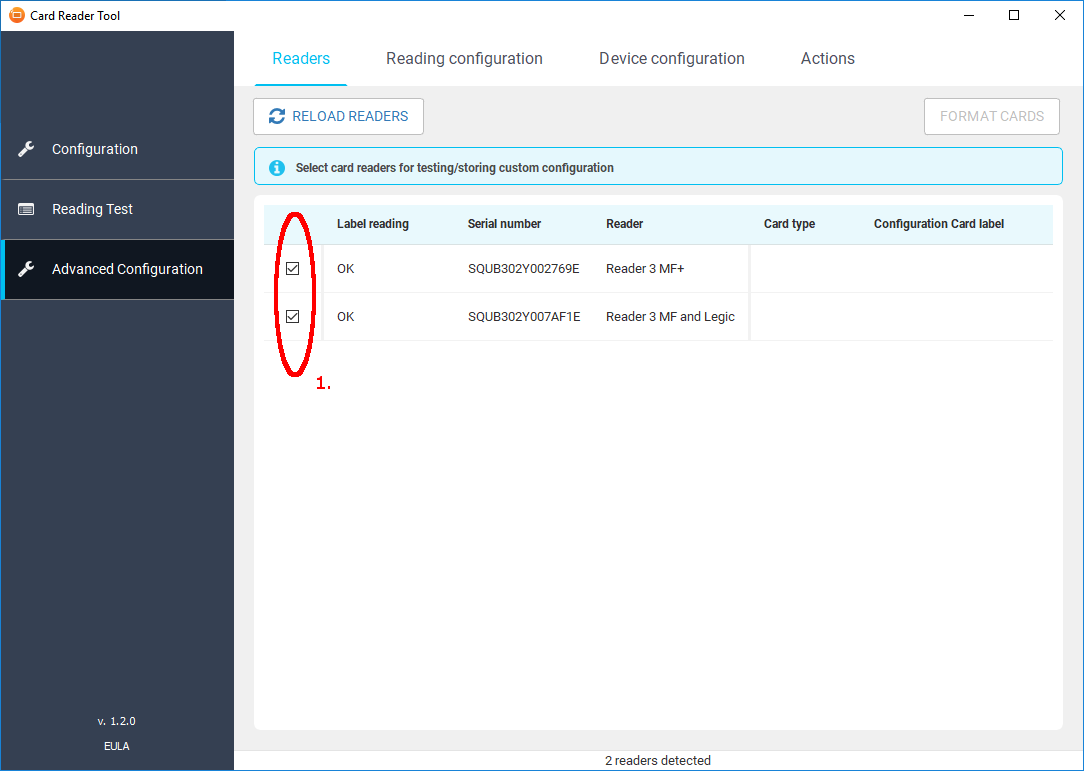
Step 2:
Make sure you have card readers selected.
Load a custom configuration text file, or
Edit the custom configuration in the text box, or
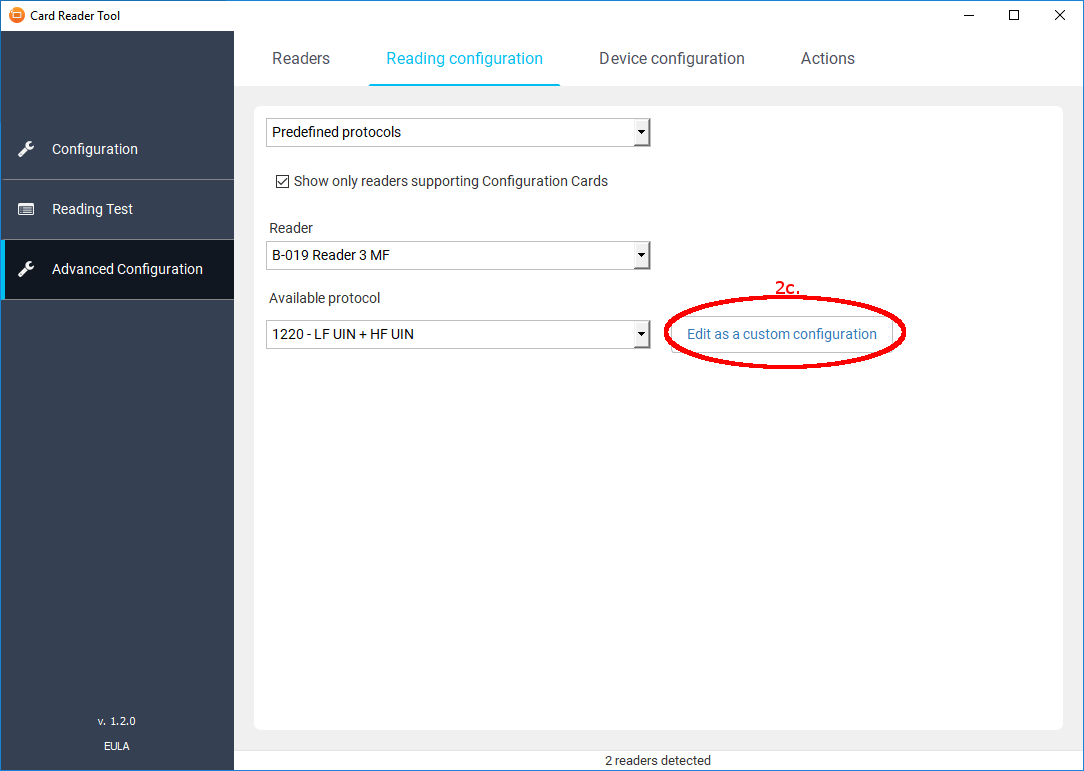
You can use the Edit as custom configuration button on the selection of protocols.
See the "Card Reader Custom Configuration" document for details about what can be used as a custom configuration. Please ask your sales representative for the document.
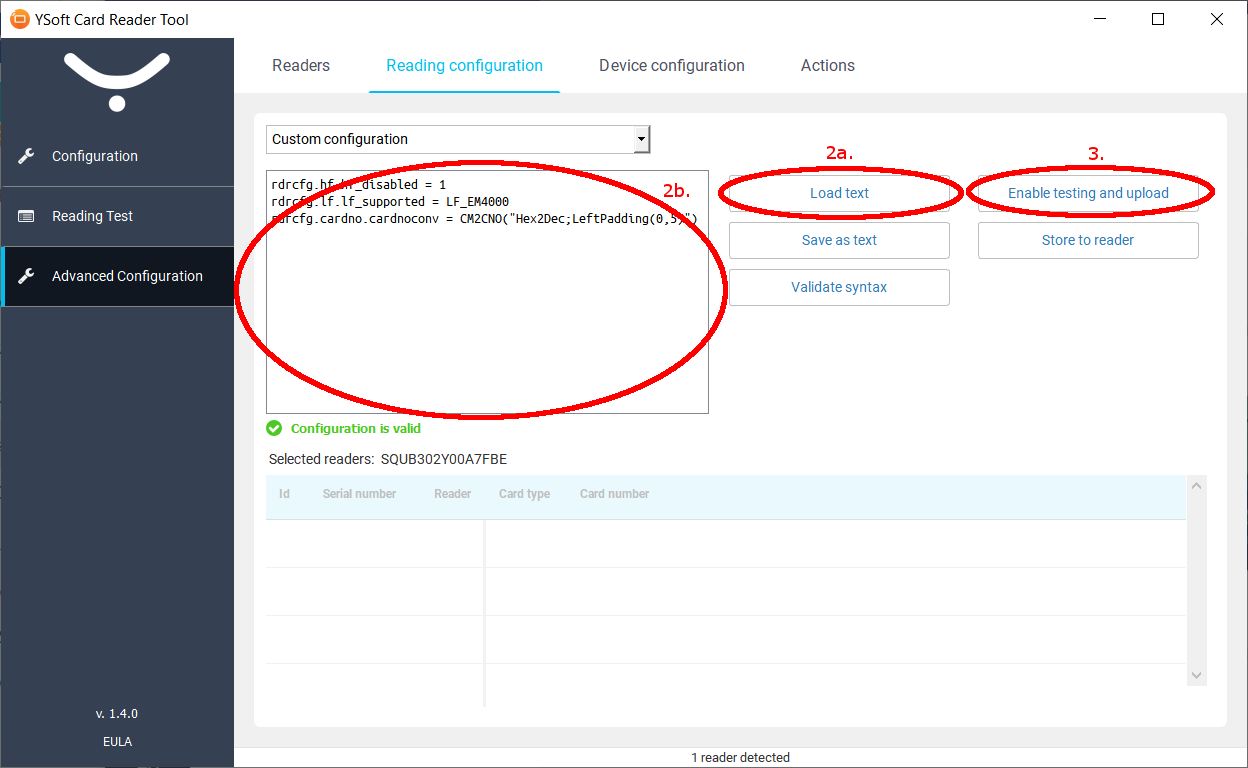
Step 3: Click Enable testing and upload
Place the card and check the result on the list below. If you are not satisfied with the result and want to modify the custom configuration, just edit it and repeat step 3 – click the upload button.
Using configuration card to configure Y Soft USB Card Reader
Supported Card Readers:
Y Soft USB Card Reader 3 MF
Y Soft USB Card Reader 3 MF+
Y Soft USB Card Reader 3 MF&Legic
Y Soft USB Card Reader 3 MF SAM
Y Soft USB Card Reader 3 MFX
Y Soft MFX Mobile Reader
Y Soft MFX Ultimate Reader
Requirements:
Firmware version 2.4.0 or higher
HF technology must be enabled either by protocol selection or in custom card reader configuration (enabled by default, not needed for firmware 2.5.1 or newer)
Configuration cards processing is enabled in device configuration (enabled by default)
Configuration cards work only within 2 minutes from the device power-up or restart
To configure Y Soft USB Card Reader via a configuration card, perform the following steps:
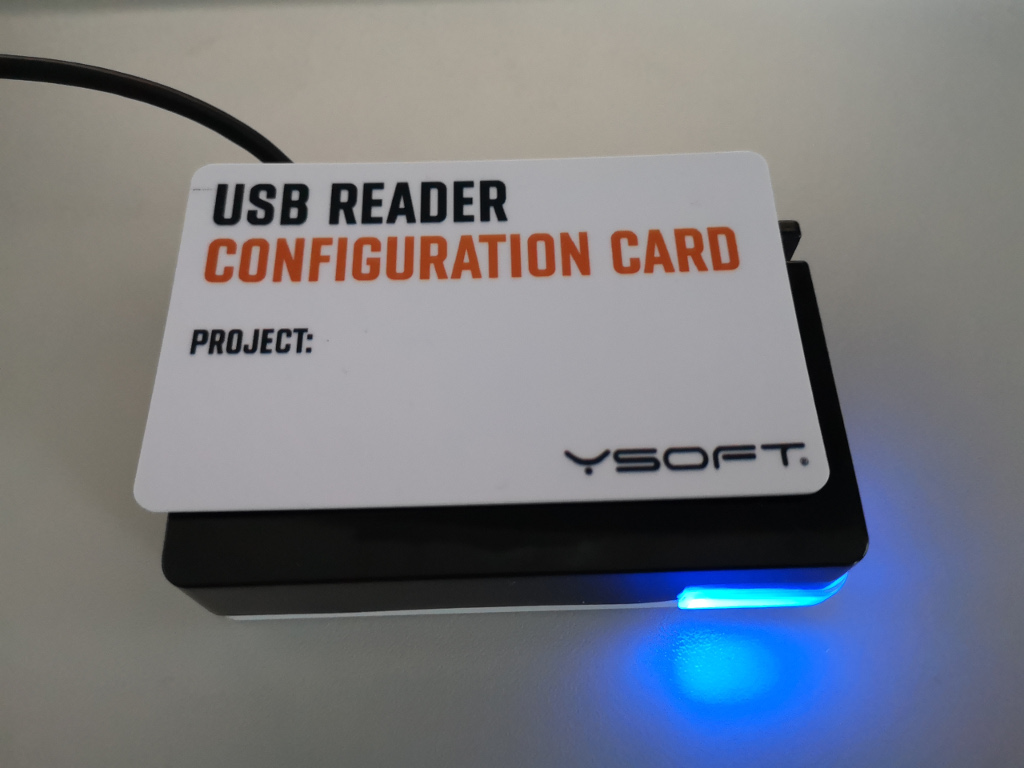
Place the configuration card on a card reader.

Wait 15 seconds.
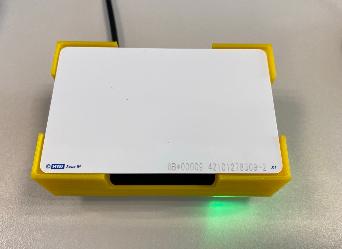
Card reader programming is indicated by blue LED color.
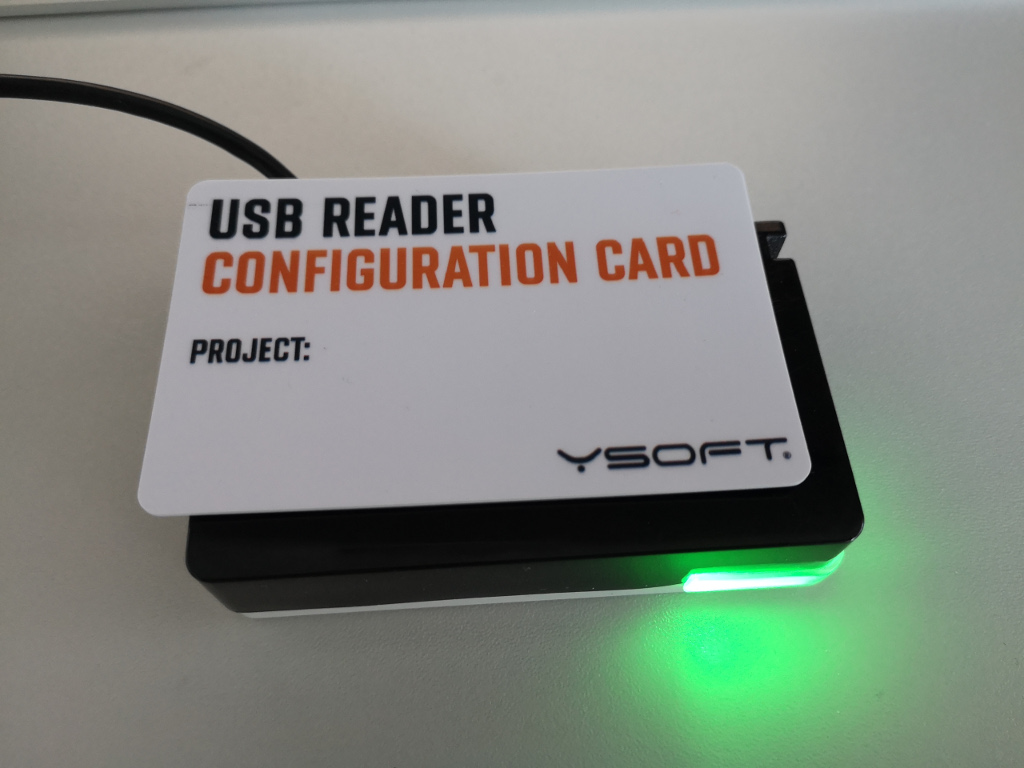
Successful programming is indicated by a green LED color and beep sound.
Remove the configuration card.
The USB reader will reboot and use a new configuration.
Check that MFD and card reader are working properly. Some MFDs might need restart after card reader programming.
Card testing
Starting with version 1.5.0 of the YSoft Card Reader Tool, it is possible to perform detailed card scanning to identify card type.
Card testing is supported on the following readers:
Y Soft USB Card Reader 3 MFX
Y Soft MFX Mobile Reader
Y Soft MFX Ultimate Reader
Card testing results will provide this information:
Card Unique ID
Card type as reported on YSoft card readers
Additional information about the chip type (when applicable)
Content of freely readable data areas or information that the data area is not readable (depending on supported technology and permissions configured on the card)
Compatible YSoft card readers and their protocols which are suitable to read identified card ID
Card testing supports multiple technologies detection. Multiple results can be also shown if the single chip can be read in different ways.
RESULTS PRODUCED BY THIS APPLICATION ARE INDICATIVE ONLY. Before placing an order, it is necessary to test that the recommended card reader and its configuration reads the data required by the customer. If you need help with card identification, please use free-of-charge Y Soft Card Testing Service. (Y Soft Partner Portal > Customer Support Services > Card Testing)
A step-by-step guide for card testing
Card testing checklist:
Get at least two card samples of each card type or each series of cards used by the customer. Two samples are recommended to make sure the card is not damaged also it may be helpful in determining the card number conversion.
Verify that the cards are working with customer readers in a customer environment
If possible get card numbers as recorded in the customer's access or attendance system. This may be helpful in determining the proper card reader
If possible get the expected chip type from the customer
Testing equipment checklist:
A PC with Windows 7 and newer
The latest version of the Card Reader Tool application (Available at Y Soft Partner Portal)
Reader 3 MFX Reader
MFX Mobile Reader
Plastic spacer 20mm (3D printed) or non-metallic object (post-it notes etc.)
OR:
A PC with Windows 7 and newer
The latest version of the Card Reader Tool application (Available at Y Soft Partner Portal)
MFX Ultimate Reader
Plastic spacer 20mm (3D printed) or non-metallic object (post-it notes etc.)
If not using MFX Ultimate Reader, having the cards tested on both Reader 3 MFX Reader and MFX Mobile Reader is necessary in order to check whether the technology is not directly supported on the other reader.
Reader 3 MFX, MFX Mobile, and MFX Ultimate card readers have got the identical LF part (125kHz, 132kHz, 134.2KHz). The main difference is in the NFC/HF part (13.56MHz) supported technologies. See the following table:
Reader 3 MFX | MFX Mobile reader | MFX Ultimate Reader | |
PACS data from HID iClass / SEOS credentials (HID SE Processor) |
|
|
|
Legic Prime / Legic Advant (Legic data reading) |
|
|
|
Less common HF cards (Sielox, Calypso, etc.) |
|
|
|
*obsolete Legic chips not supported
Step 1:
Select the reader you wish to use as a testing reader. Only one reader can be used at a time.
1. Select reader
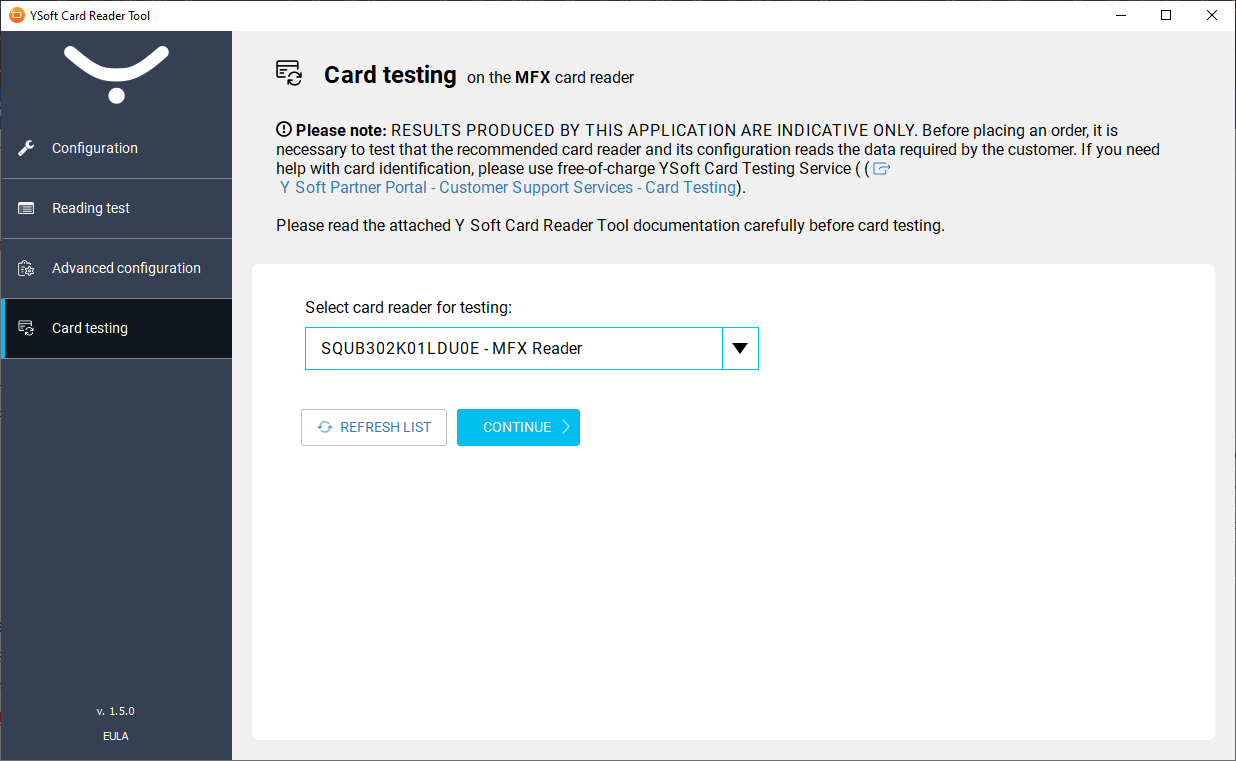
Select the required reader from the drop-down menu and click the Continue button. When there is only one compatible reader then the reader will be already selected.
You may refresh the list of connected readers using the Refresh list button on reader connect. List refresh may take a longer time.
2. No compatible reader detected
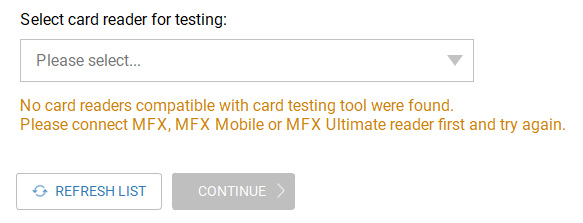
Card testing is available only on supported readers. Please connect one of them. If there is already a reader present try to disconnect it, reconnect it, and refresh the reader list.
3. Incompatible firmware
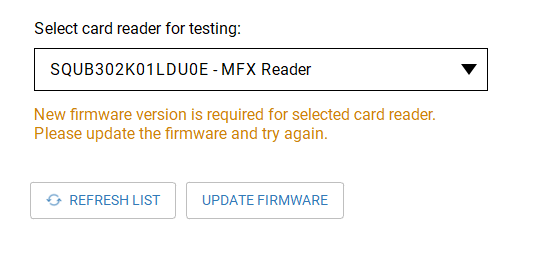
Firmware in the selected reader is not compatible with the used version of the YSoft Card Reader Tool. You can update it directly by clicking on the Update firmware button.
4. Incompatible tool
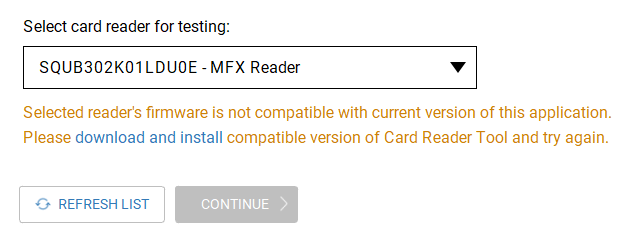
Firmware in the selected reader is not compatible with the used version of the YSoft Card Reader Tool. Firmware is newer so updating the YSoft Card Reader Tool is needed. The download is available on Y Soft Partner Portal.
Another way to solve version incompatibility is to downgrade reader firmware. This is however not recommended as the newer firmware generally contains bug fixes and new features. It may also not be available in some situations when the reader cannot be downgraded under its minimal firmware version.
Step 2:
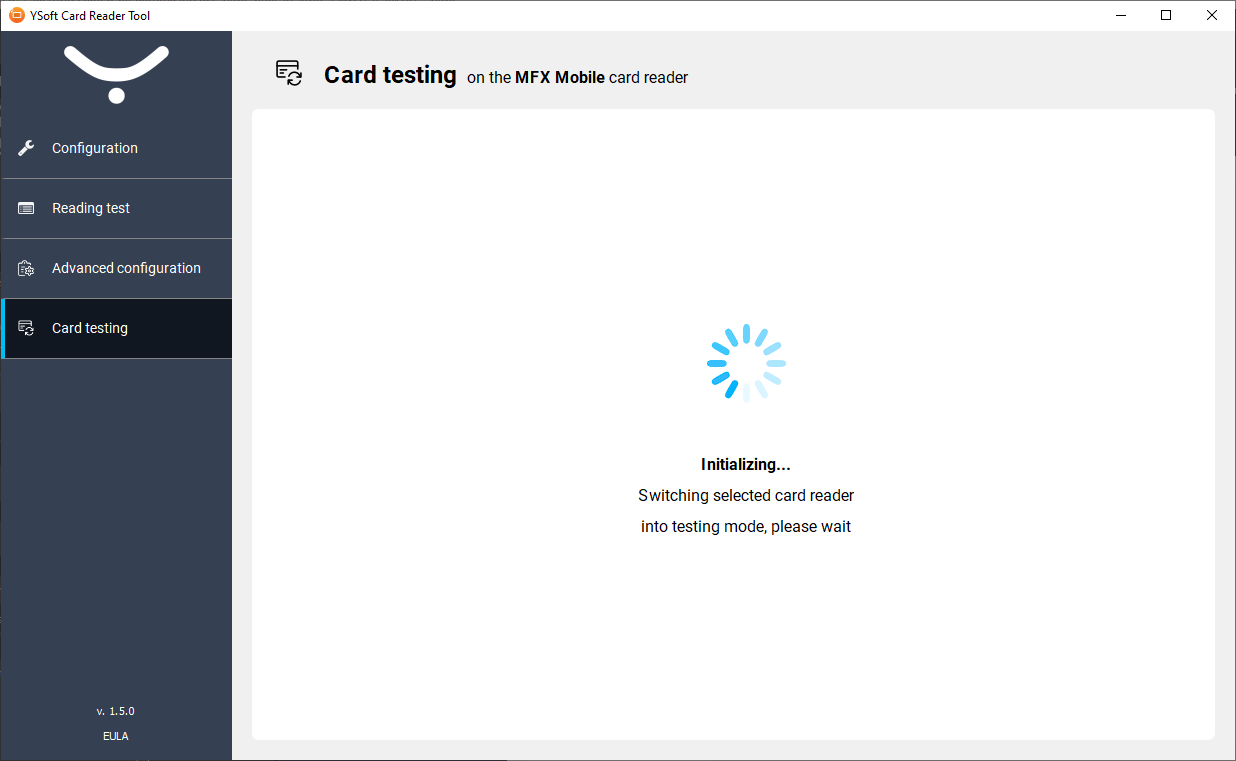
After selecting, the reader is initialized to testing mode, please wait until initialization is complete.
Step 3:
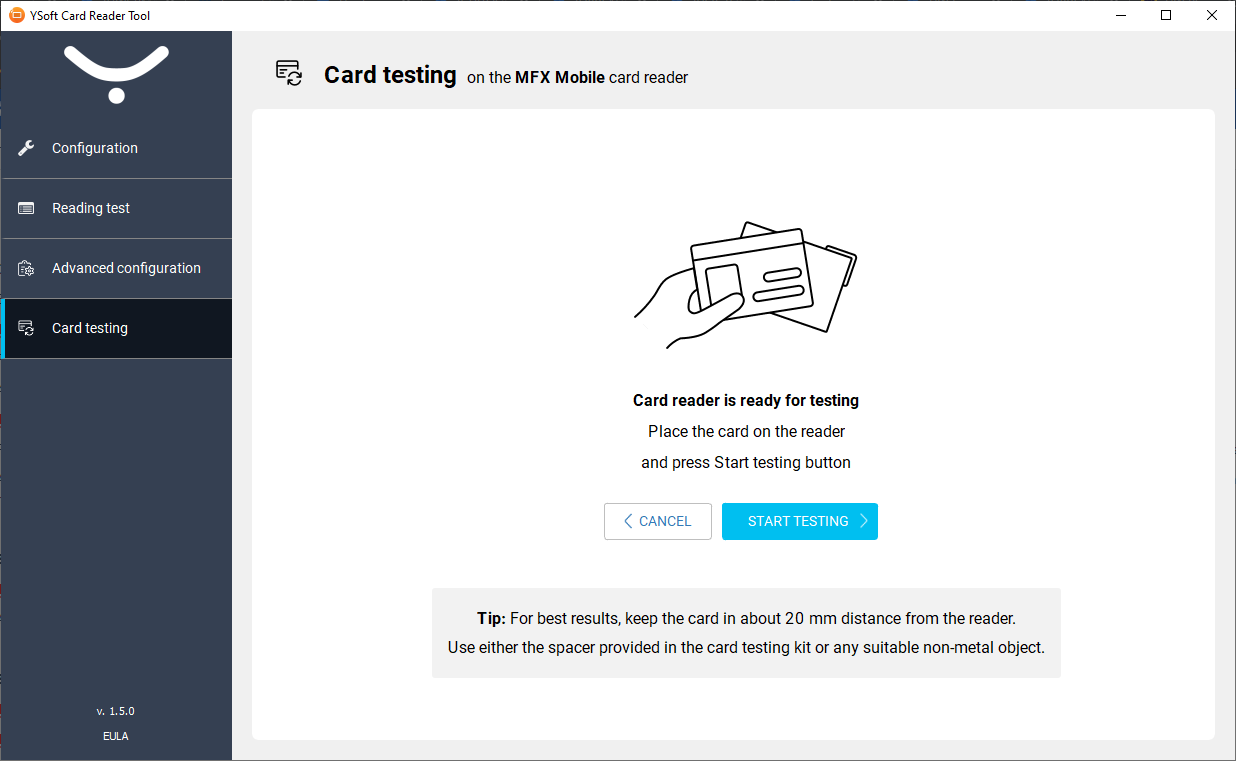
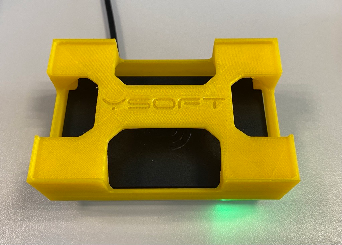
Place the card on the reader. For the best results, keep the card approximately 20mm from the card reader. You may use the 3D printed spacer provided with the card testing kit or any other non-metallic object (post-it notes, paper box, etc.).
Reasons for placing the card at a distance are the following:
While it is ok for just simple authentication to place a card directly at a reader, it may not provide stable results for a complete card scan for some card technologies.
To verify that the card will be read without any problems at this distance.
20mm seems to be ok for the vast majority of cards however in some cases, namely, with some contactless Smart Cards or special key fobs, it may be necessary to place the card closer as those require more energy.
On the other hand, some cards (such as Cotag Active or Tiris) may require to be placed more than 20mm away
Step 4:
Click on Start testing to perform testing.
To return to reader selection and deactivating testing mode, click Cancel.
Step 5:
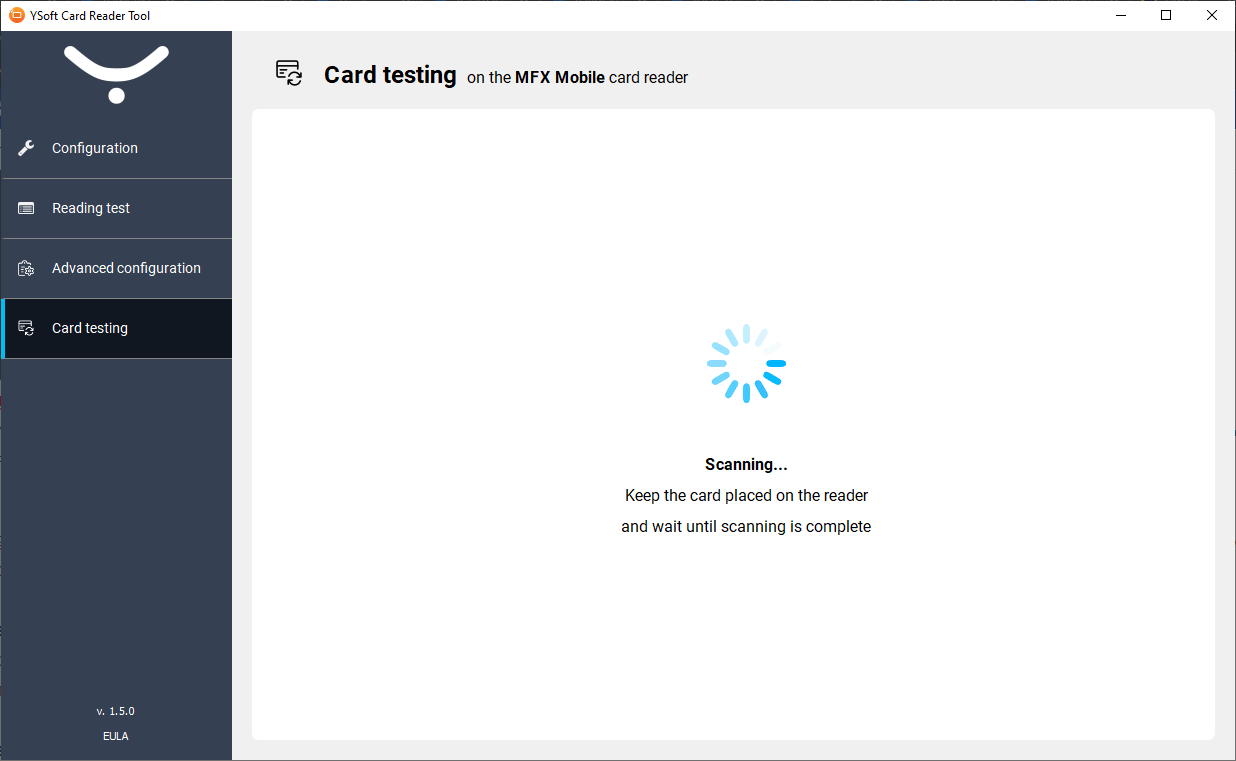
Keep the card on the reader without moving it.
Scanning of a card may take a longer time depending on the card type and data area presence and size. Scanning is performed multiple times to make sure the results are stable.
Once card types are known or could not be determined, the screen changes to the results screen.
Step 6:
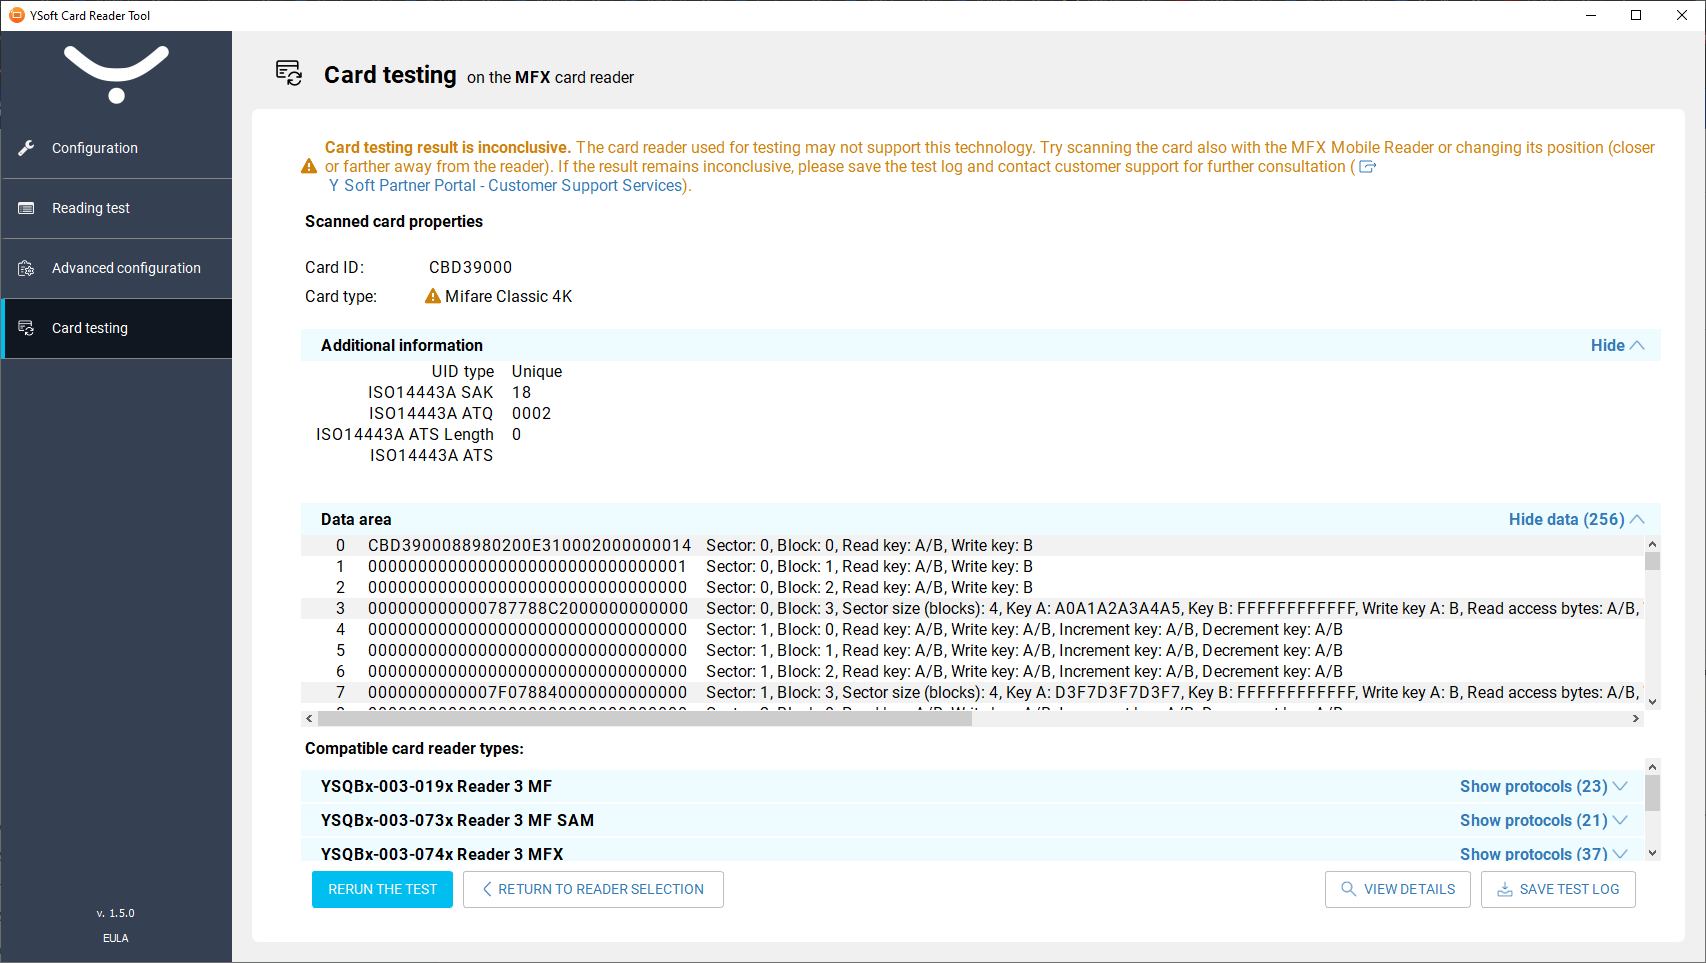
Result screen description
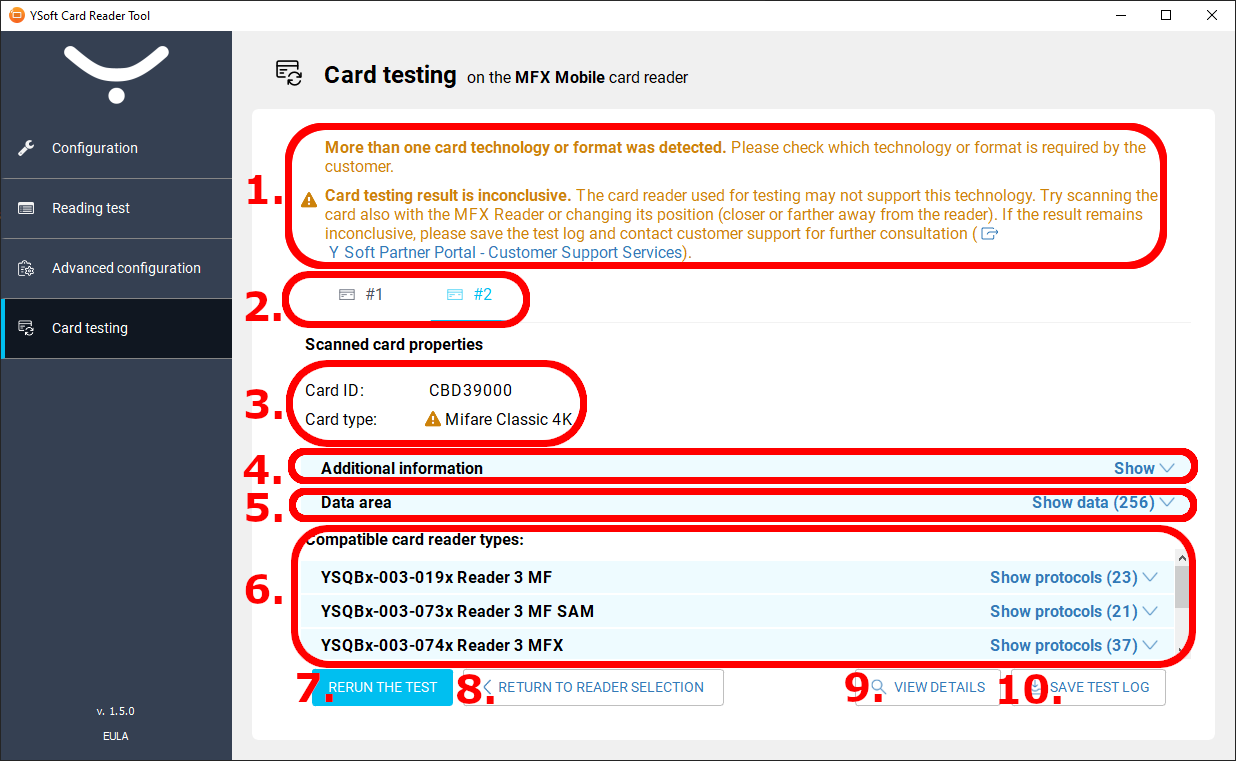
Testing status
Multiple technologies tabs – If multiple chips or multiple ways of reading the card have been detected.
Scanned card properties – Card UIN and Card type.
Additional information – Additional information about the card such as underlying standard information, bit lengths where applicable, hardware/software versions, etc.
Data areas – List of data, keys or applications detected, or other information that can be used to create a card reading customization.
Compatible card readers and protocols – The protocols are listed in the order of preference. Single technology protocols are listed first, universal UIN protocols are listed next and remaining protocols that may also combine other technologies are after that.
Rerun the test – Run the same test again or test another card.
Return to reader selection – Select another reader, for example in case the result is inconclusive.
View Details – View complete card scan JSON file, it may contain more information than displayed on the result screen.
Save test Log – Save the archive with JSON file, cardscan information, and reader information for further analysis by customer support.
Card testing results
1. Unique card reader technology detected

The technology has been uniquely identified and it cannot be anything else. However, validation with numbers requested by the customer is highly recommended as they might require some sort of card number conversion.
If unsure then save the test log and contact customer support for further consultation. Please see sending card testing consultations guide below.
2. Inconclusive results

The detected technology is known to be used as an underlying technology for other technologies. Usually, the card number may be stored on the card's memory and special settings or security keys are required.
Try another reader. If you tested the card on MFX then do the testing again on MFX Mobile and vice versa. This step is necessary is to check whether the technology is not directly supported by the other reader.
If the results are still inconclusive then validation with numbers requested by the customer is required.
If the results are still inconclusive then save the test log from both readers and contact customer support for further consultation. Please see sending card testing consultations guide below.
3. Multiple cards or formats detected

Multiple chips or ways of reading the chip are detected.
The card may be a composite card (also called a hybrid card), which is made up of a high-frequency card and a low-frequency card composite.
Card transmits UIN in multiple formats.
In this case, after consultation with the customer, it is necessary to select the card with the expected result.
4. Unknown card technology or unstable results detected

Something has been detected however it cannot be safely or directly used for user identification. The technology may use random UIN, the card cannot be properly handled by the reader or the data read is unreliable.
If not using the MFX Ultimate reader, try the other reader. If you tested the card on MFX then do the testing again on MFX Mobile and vice versa. You may also try repositioning the card - closer or farther from the reader.
If the results are still unknown then save the test log from both readers and contact customer support for further consultation. Please see sending card testing consultations guide below.
5. No card detected

No card has been detected.
If not using the MFX Ultimate reader, try the other reader. If you tested the card on MFX then do the testing again on MFX Mobile and vice versa. You may also try repositioning the card - closer or farther from the reader.
If it does not help then please use the card testing service (Y Soft Partner Portal > Customer Support Services > Card Testing)
6. Unable to communicate with the card reader

There has been an error in communicating with the reader. Please try reconnecting the reader and restart testing again. It may be also necessary to restart the Card Reader Tool.
If the problem persists then please contact customer support.
Sending card testing consultations
You may enter the consultation request at Partner Portal > Customer Support Services
Consultation checklist:
For each card include testing logs from both MFX and MFX Mobile card readers or MFX Ultimate reader
For each card include hi-resolution photos from both sides so that any technology or card number marking is visible. You may blur other personal information if needed.
For each card include information about the expected type and a card number expected by the customer.
Quick tips: How to get the best card testing results
For the most accurate results, we strongly recommend using both MXF and MXF Mobile readers or the MFX Ultimate reader. Some card technologies are only partially supported by one reader and the other has direct full support.
If the card test results are unexpected or unstable, change the reading distance - some cards require a specific field strength to fully read all features. For the most common cards, we recommend a 20mm 3d printed spacer.
Compare result card number with customer expectations. Some cards require conversions or custom configuration to provide the expected results.