System communication hardening
Right after installation, the most important links (sending jobs to FlexiSpooler in server mode, communication between terminals and the Terminal Server) are encrypted by default using pre-installed certificates (the same are used for every YSoft SafeQ 6 deployment), other links are unencrypted by default. In order to make all the securable paths encrypted and subsystems authenticated, everything (encryption and authentication via certificates) needs to be properly configured. For the scheme of communication paths mentioned in this guide, please refer to Communication paths.
This guide includes guidelines for enabling encrypted and authenticated communication through whole YSoft SafeQ, generating and using own certificates for authentication of YSoft SafeQ subsystems.
Prerequisites
In order to follow this guide, generate certificates for all components and sign them with your certification authority (CA), or even convert your already existing certificates to the appropriate format, you will need the following command line tools:
Keytool
Keytool is a command-line utility provided with any standard Java distribution in <JAVA_HOME>/bin. It is also distributed with YSoft SafeQ Management Service, located in <install_dir>/Management/java/bin folder.
It is expected that the keytool.exe is stored in the PATH environment variable (e.g. <install_dir>/Management/java/bin). If the variable does not exist, it is necessary to specify the full path to keytool.exe in all keytool commands.
OpenSSL
OpenSSL is an open source project containing command line tool for working with the cryptographic algorithms and protocols. Compiled Windows binaries can be obtained e.g. from http://slproweb.com/products/Win32OpenSSL.html.
It is expected that the openssl.exe is stored in the PATH environment variable (e.g.: C:\OpenSSL-Win32\bin). If the variable does not exist, it is necessary to specify the full path to openssl.exe to run OpenSSL commands.
Some of the commands need the path to the file containing configuration options (openssl.cfg or openssl.cnf). Example file is distributed together with the binaries. You can either add this path to each such command in the -config argument, or set the following system variable:
OPENSSL_CONF = c:\OpenSSL-Win32\bin\openssl.cfg (path has to lead to the folder where OpenSSL was installed)
Generating certification authority
The easiest way to achieve proper authentication is to use certificates signed by the same authority. In case you do not have a certification authority (Root CA), perform the following steps:
Open command line and run following keytool command:
keytool -genkeypair -keyalg RSA -keysize 4096 -alias root -keystore root.jks -validity 3650 -ext BC=ca:true,pathlen:1Enter a password for keystore protection.
Answer the questions about organization when you are prompted for them:
Q: What is your first and last name?
A: enter name for your Root CA
Q: What is name of your organizational unit?
A: enter unit name
Q: What is the name of your organization?
A: enter organization name
Q: What is the name of your City or Locality?
A: enter organization city
Q: What is the name of your State or Province?
A: enter organization state
Q: What is the two-letter country code for this unit?
A: enter two-letters code for entered state
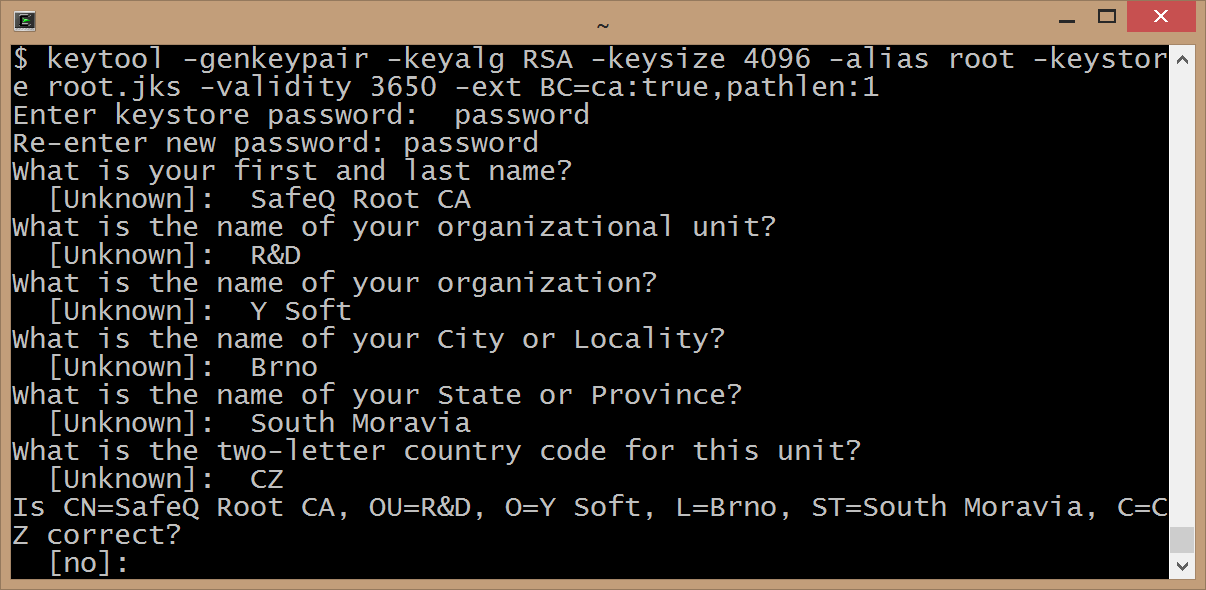
Write yes to confirm correctness of your answers.
Enter a password for key protection.
Your new Root CA key and certificate is stored in root.jks file.
Export public certificate of your Root CA from the root.jks to root.crt file:
keytool -exportcert -rfc -keystore root.jks -alias root -file root.crt
Installing your Root CA to truststores of YSoft SafeQ machines
The certificate of your Root CA needs to be trusted in all subsystem machines in order to make them trust each other (using certificates signed by this Root CA).
Java Truststore
The subsystems using Java keystores and truststores (.jks files), i.e. Management, Spooler Controller, End User Interface and Payment System need a truststore containing public certificate of your root certification authority in order to trust all components, which send certificates signed by this Root CA. To create such a truststore, open command line and run the following keytool command:
keytool -import -keystore truststore.jks -file root.crt -alias rootcaWrite yes to confirm you want to trust this certificate. If import was successful, the following message should appear:
Certificate was added to keystore
Windows Certificate Store
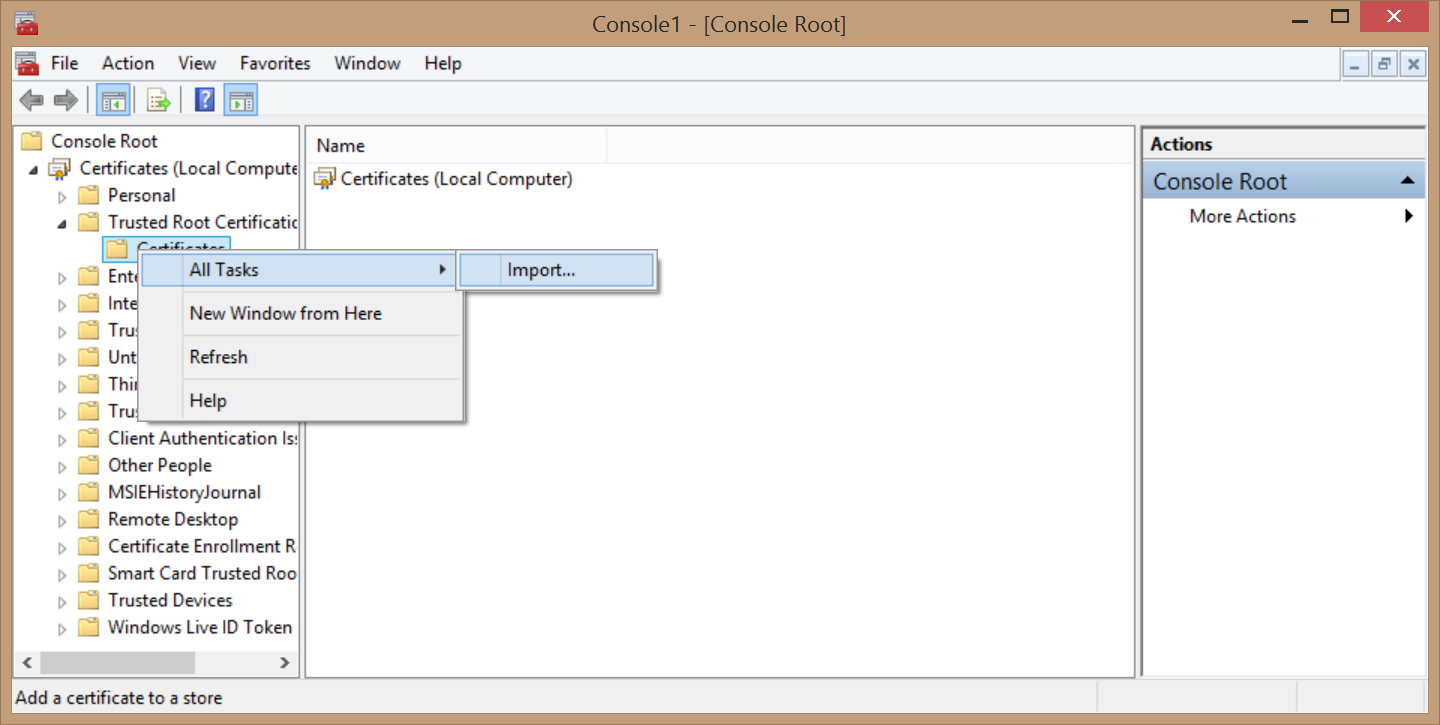
Using the following steps you can install this CA to the Trusted Root Certification Authorities store in Windows Certificate Store.
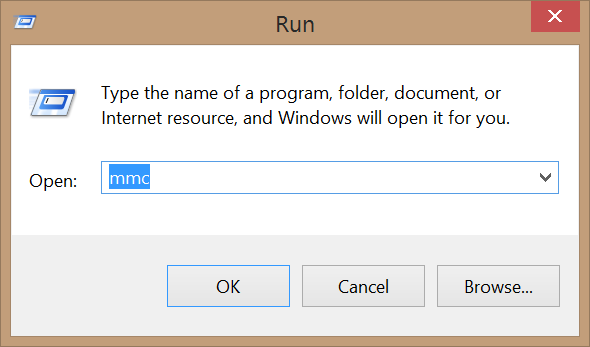
Run mmc (Microsoft Management Console)
Add Certificates snap-in, local computer (Computer Account).
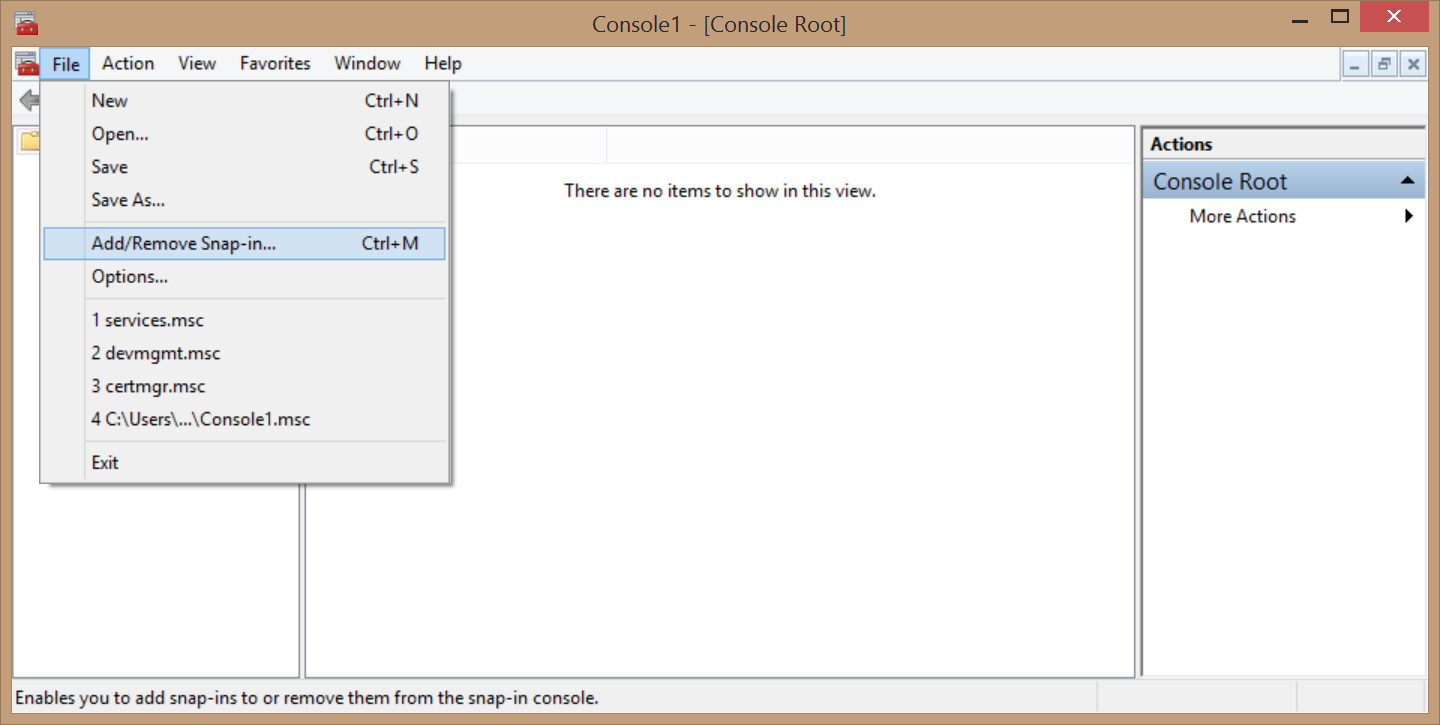
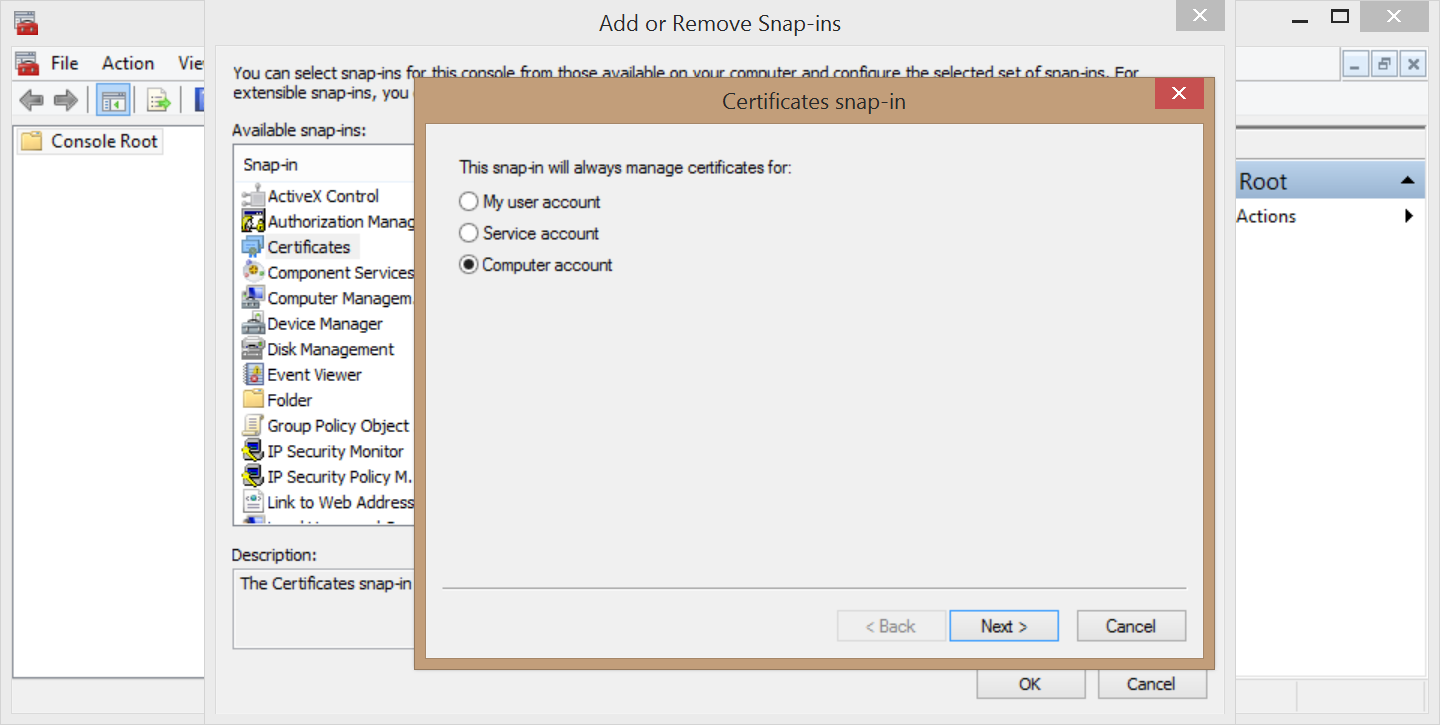
Go to Trusted Root Certification Authorities \ Certificates and import the root.crt file here.
Generating key/certificate in Java Keystore format
Open command line and run the following keytool command. It will generate a key, create a new file safeqkeystore.jks and store the key in it.
keytool -genkeypair -keyalg RSA -keysize 2048 -alias safeq -keystore safeqkeystore.jksEnter a password for keystore protection.
Answer the questions about organization when you are prompted for them:
Q: What is your first and last name?
A: enter name, e.g. IP address of your server
Q: What is name of your organizational unit?
A: enter unit name
Q: What is the name of your organization?
A: enter organization name
Q: What is the name of your City or Locality?
A: enter organization city
Q: What is the name of your State or Province?
A: enter organization state
Q: What is the two-letter country code for this unit?
A: enter two-letters code for entered state
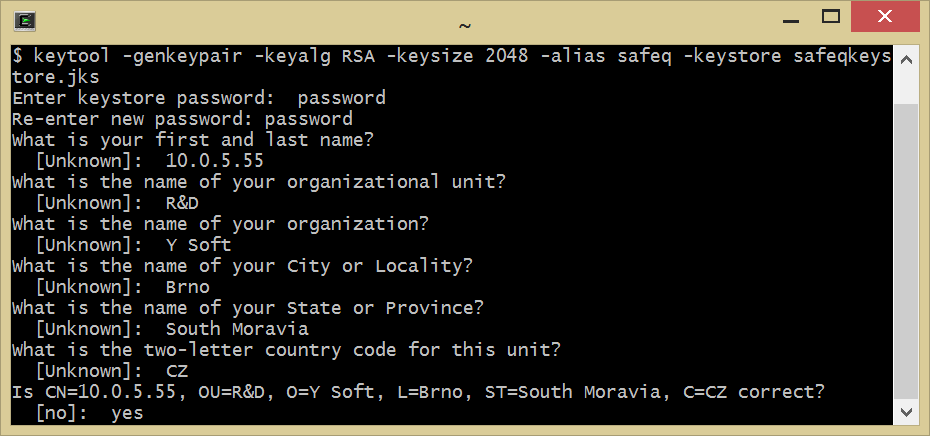
Confirm correctness of your answers by writing yes.
Enter a password for key protection.
This password is usually the same as the keystore password. Note that in case you set different password for key protection, you will have to properly set additional configuration properties on the server.
a) In case you want to use external certification authority, create certificate signing request (safeqcertificate.csr) using following command.
keytool -certreq -keystore safeqkeystore.jks -alias safeq -keyalg rsa -storepass password -file safeqcertificate.csr -ext SAN=ip:10.0.13.31,dn:safeq.myorg.localThis command will create safeqcertificate.csr file, which you need to send to the certificate authority. You will receive your signed certificate (safeqcertificate.crt), along with the certificate of this authority (root.crt). In case only one file (containing all certificates needed) is received, skip the next step.
b) Otherwise, sign the certificate with your CA (root.jks file, e.g. created using the guide in Generating certification authority chapter) using following keytool commands:keytool -certreq -keystore safeqkeystore.jks -alias safeq -keyalg rsa -storepass keystoreprotectingpassword | keytool -gencert -rfc -keystore root.jks -alias root -storepass CAprotectingpassword -validity 365 -outfile safeqcertificate.crt -ext BC=ca:false -ext SAN=ip:10.0.13.31,dn:safeq.myorg.localThe server hostname (domain name or IP address) is usually validated. In SAN extension, specify the IP address and/or domain name of your server.
Copy the content of root.crt file at the end of the safeqcertificate.crt file.
In case you have longer certificate chain containing more than one certification authority, the safeqcertificate.crt file needs to contain certificates of all of them in the specified order. The first certificate is the server's one. Each following certificate belongs to the authority which signed the previous certificate directly. The last one belongs to the root CA.
You can use e.g. a text editor or the following command (in case of longer chain write all the needed files in the above specified order):
type root.crt >> safeqcertificate.crtImport the signed certificate back to the generated keystore. Use the following keytool command:
keytool -import -keystore safeqkeystore.jks -file safeqcertificate.crt -alias safeqWrite yes to confirm you want to import these certificates. If import was successful, the following message should appear:
Certificate reply was installed in keystore
Generating key/certificate in the Personal Information Exchange format
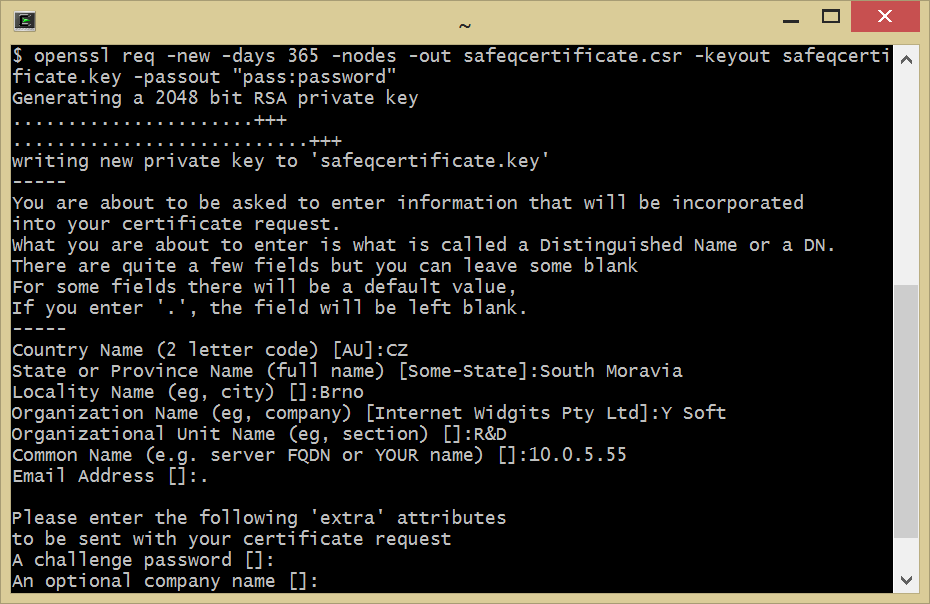
Open command line and run the following OpenSSL command to generate a key and certificate signing request:
openssl req -new -out safeqcertificate.csr -keyout safeqcertificate.key -passout "pass:password"OpenSSL commands should always contain prefix pass:, correct string is "pass:my-secret-password"
The default OpenSSL RSA key size is 2048 bits. However, some older MFDs do not support it and for compatibility reasons you will have to generate a shorter key. Add the following parameter to the aforementioned command:
-newkey rsa:1024
Answer the questions about organization when you are prompted for them:
Q: Country Name (2 letter code) [AU]:
A: enter two-letters code for entered state
Q: State or Province Name (full name) [Some-State]:
A: enter organization state
Q: Locality Name (eg, city) []:
A: enter organization city
Q: Organization Name (eg, company) [YSoft]:
A: enter organization mane
Q: Organizational Unit Name (eg, section) []:
A: enter unit name
Q: Common Name (e.g. server FQDN or YOUR name) []:
A: enter name, e.g. IP address of the server (e.g. 10.0.11.31). This field is compulsory and several (e.g. Xerox) devices require the IP address here
Q: Email Address []:
A: enter e-mail address
Do not fill optional 'extra' attributes.
a) In case you want to use external certification authority, send the created certificate signing request safeqcertificate.csr to them for signing. You will receive your signed certificate (safeqcertificate.crt), along with the certificate of this authority (root.crt).
b) Otherwise, sign your request with your CA (root.jks file, e.g. created using the guide in Generating certification authority chapter) using following keytool command:
keytool -gencert -rfc -keystore root.jks -alias root -storepass CAprotectingpassword -validity 365 -outfile safeqcertificate.crt -infile safeqcertificate.csr -ext BC=ca:false -ext SAN=ip:10.0.5.31,dn:safeq.myorg.localServer hostname (domain name or IP address) is usually validated. In SAN extension, specify the IP address and/or domain name of your server.
The default keytool signature algorithm is SHA256withRSA. However, some older MFDs do not support it and for compatibility reasons you will have to sign certificate using older (not recommended) algorithm. Add the following parameter to the aforementioned command:
-sigalg sha1withRSA
Create a Personal Information Exchange (.pfx) file.
openssl pkcs12 -export -inkey safeqcertificate.key -in safeqcertificate.crt -out safeqcertificate.pfx -chain -CAfile root.crt -caname rootIt is possible to specify a cryptographic provider for the generated Personal Information Exchange file. This is needed for example for the proprietary protocol for secure connection with YSoft SafeQ Spooler Controller, where the Microsoft Enhanced RSA and AES Cryptographic Provider must be used. It can be done by adding the following parameter to the command above:
-CSP "Microsoft Enhanced RSA and AES Cryptographic Provider"
In Windows Server 2012 it is not needed to generate Personal Information Exchange file with a Cryptographic Service Provider (CSP) specified, it is enough to import this file into Windows Certificate Store using this provider. However, in Windows Server 2008 this is a must.