Scanning at a Ricoh Device
Quick Scan Workflows
Scan workflows can be defined in a very simple way for the user to tap and start the scan workflow immediately. These are the quick scan workflows:
Log into the embedded terminal.
You may be asked to select a billing code after successful authentication.
On the Main Menu screen, tap Scan on the left side. Available scan workflows vary based on your permissions and your YSoft SafeQ configuration. To learn more, please contact your system administrator. Quick scan workflows enable you to start a specific workflow without any additional input. These are marked with a quick scan label under the name. To start scanning, tap one of the quick scan workflows. Scanning starts immediately with the selected workflow.
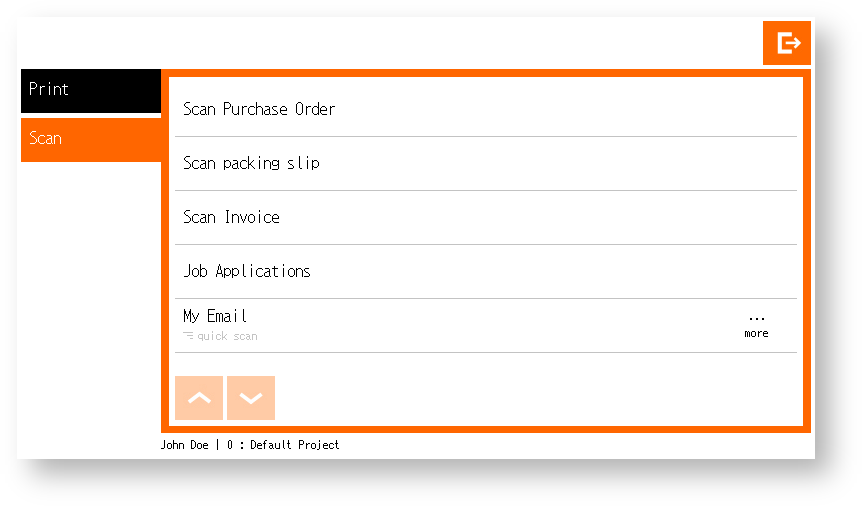
 Tap to change the predefined scan options.
 Display more pages of the scan workflows list.
Scan Workflows with User Input
User input may be required with some scan workflows. This guide will show you how to use them.
Workflows that are not marked with a quick scan label require additional input from users. Tap one of the listed scan workflows, and you will proceed to the Workflow detail screen.
Display more pages of the scan workflows list.The Workflow detail screen displays. If a workflow is not marked with a quick scan label, it is a regular workflow with user input. Selecting such a workflow on the Scan workflows screen always opens the Workflow detail screen.
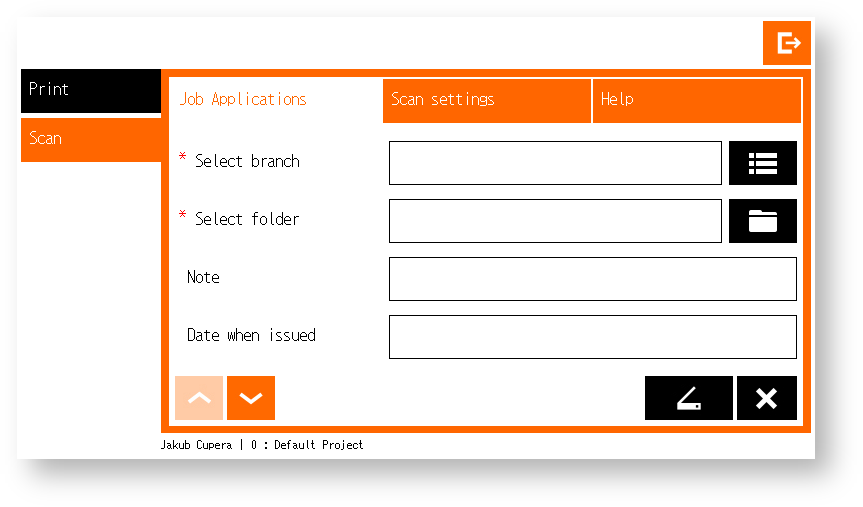
Tap an input field or its icon to set the value of a workflow user input. Required user inputs are marked with a red asterisk ( * ).
 Tap to open the List selection screen.
 Tap to select a target folder.
 After placing a paper document on the glass or in the feeder, start scanning using the Scan button. If any required user input is not filled in, the Scan button is disabled. If user inputs are invalid, a Validation dialog displays and scanning will not start. When scanning starts, the Scan in progress dialog displays.
 Tap to leave the screen and display the Scan workflows screen.
Go to the next/previous page to view and edit user input fields not displayed on the current page.
Tap to leave the screen and display the Scan workflows screen.
Go to the next/previous page to view and edit user input fields not displayed on the current page. Tap to change the predefined scan options for the workflow.
 Tap to display the workflow's description.
On the List selection screen, select one of the options by tapping it.
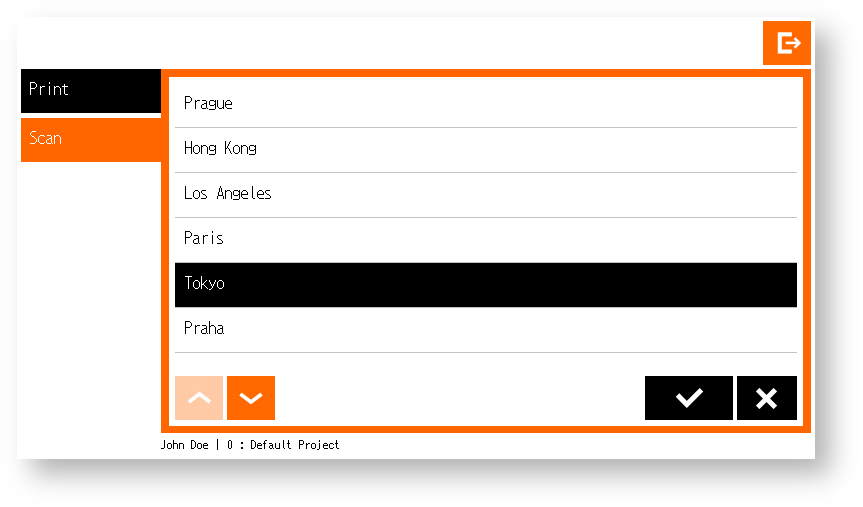 Go to the next/previous page to view other options from the list.
 Tap to confirm your selection. The Workflow detail screen displays with the selected choice set in the list input field.
Tap to leave the screen without a selection change. The Workflow detail screen displays with the original choice set in the list input field.
Tap to confirm your selection. The Workflow detail screen displays with the selected choice set in the list input field.
Tap to leave the screen without a selection change. The Workflow detail screen displays with the original choice set in the list input field.On the Folder browsing screen, you can browse a folder's structure. The folders are listed in alphabetical order. The folder is initially set to the root, and the label at the top of the screen contains Select a destination text. After accessing a folder, the label contains the current folder path.
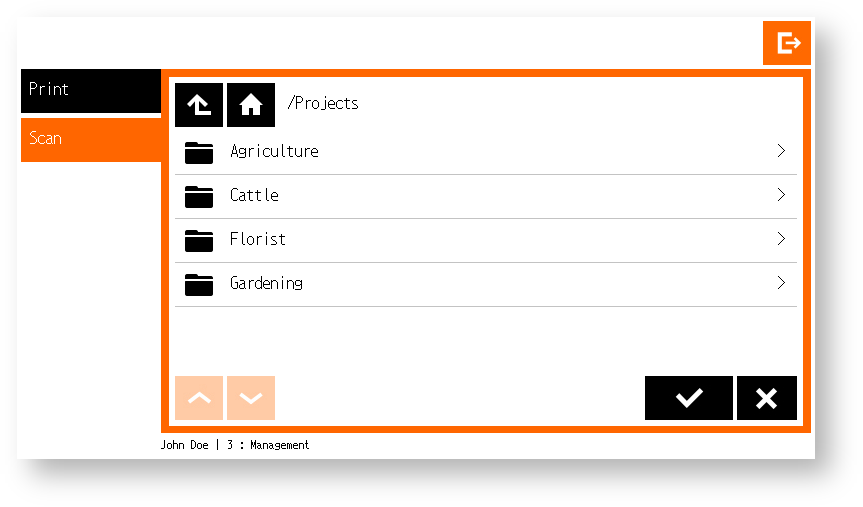
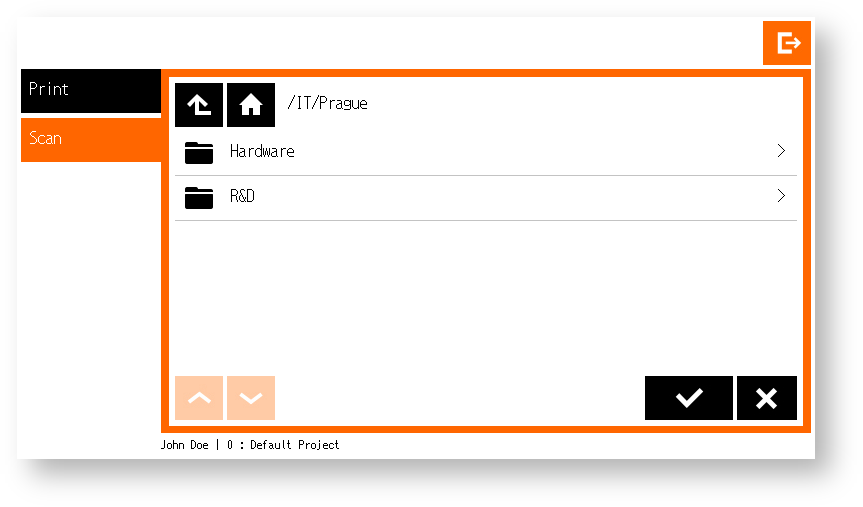 Tap a folder item to browse its content.
 Tap to return to the root folder.
 Tap to return to the parent folder.
Tap to go to the next/previous page to see other folders.
Tap to select the current folder as the target folder (the currently selected folder is the one noted on the label of the tab).
Tap to leave the Folder browsing screen without a selection change.
Tap to return to the parent folder.
Tap to go to the next/previous page to see other folders.
Tap to select the current folder as the target folder (the currently selected folder is the one noted on the label of the tab).
Tap to leave the Folder browsing screen without a selection change.
Additional Scan Settings
Additional scan screens are displayed after tapping their tabs on the detail workflow screen or tapping the quick scan More button.
The Scan settings screen displays after pressing the More button in the quick scan workflow or pressing the Scan settings tab regular workflow detail.
The Scan settings screen displays only if any of the options are modifiable (set by an administrator).
The Scan settings screen contains at least one of following options:
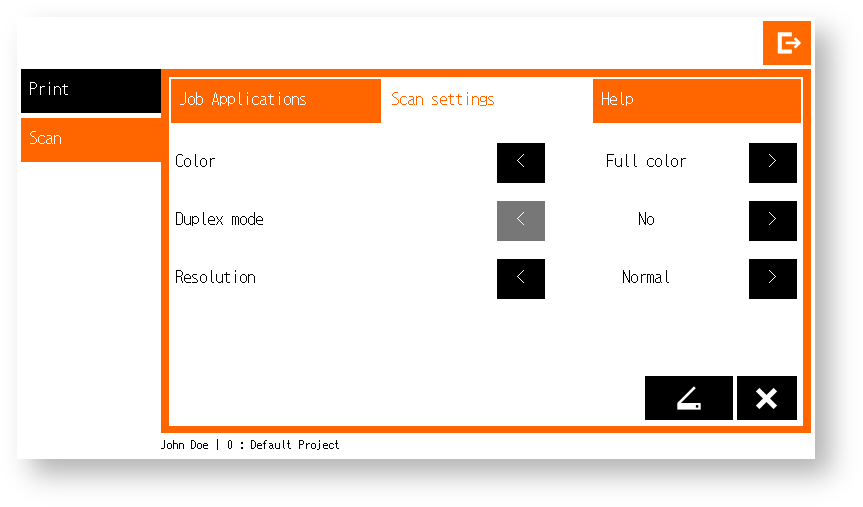
 Set desired scan quality.
 Select from the available colors options.
 Select simplex or duplex scanning.
 Use selection buttons to scroll between available options.
After placing a paper document on the glass or in the feeder, start scanning using the Scan button. If any required user input is not filled in, the Scan button is disabled. If user inputs are invalid, a Validation dialog displays and scanning will not start. When scanning starts, the Scan in progress dialog displays.
Tap to leave the screen and display the main scan workflows screen.
Use selection buttons to scroll between available options.
After placing a paper document on the glass or in the feeder, start scanning using the Scan button. If any required user input is not filled in, the Scan button is disabled. If user inputs are invalid, a Validation dialog displays and scanning will not start. When scanning starts, the Scan in progress dialog displays.
Tap to leave the screen and display the main scan workflows screen.
Scan description
The Scan description screen describes the workflow and how to use it.
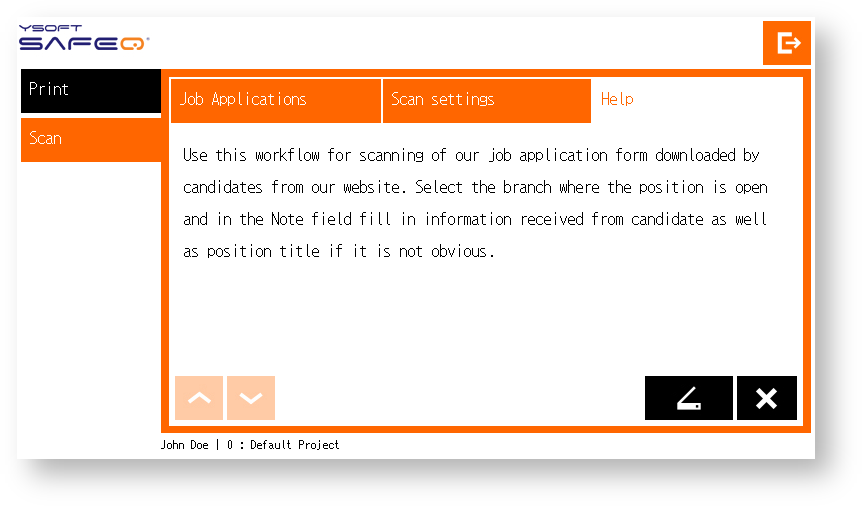 After placing a paper document on the glass or in the feeder, start scanning using the Scan button. If any required user input is not filled in, the Scan button is disabled. If user inputs are invalid, a Validation dialog displays and scanning will not start. When scanning starts, the Scan in progress dialog displays.
Tap to leave the screen and display the main scan workflows screen.
After placing a paper document on the glass or in the feeder, start scanning using the Scan button. If any required user input is not filled in, the Scan button is disabled. If user inputs are invalid, a Validation dialog displays and scanning will not start. When scanning starts, the Scan in progress dialog displays.
Tap to leave the screen and display the main scan workflows screen.