Configuring and Using Shared Queues
Overview
The following administrative tasks are required before configuring Workgroup print sharing (Shared Queues).
Initial Deployment
Make sure the YSoft SafeQ Management Server is currently installed and running.
Properly configure Identity management. By default, YSoft SafeQ 6 rejects all prints initiated by an unknown user (the user who is not in the YSoft SafeQ Identity Database).
Install and configure YSoft SafeQ terminals.
Be sure that every device, where the copy is supposed to be monitored by YSoft SafeQ 6, is equipped with some type of YSoft SafeQ terminal.
Embedded Terminals: device must be properly configured and the terminal must be deployed to the MFD. Embedded Terminals cannot be installed unless the device is registered in YSoft SafeQ 6.
For network attached printers, (re)configure all workstations or print servers to print via YSoft SafeQ server (or use Windows print spooler monitoring). YSoft SafeQ Desktop Interface can be used for configuration of workstations. For a vast majority of the installations, configured printer ports must point to the YSoft SafeQ server. See Printer configuration for Workstation and Server for more information.
Configuring Shared Queues via YSoft SafeQ Management Interface
Navigate to the Devices > Shared queues and click on ADD SHARED QUEUE button.
Fill in Shared queue name.
The name of the shared queue must be unique across the YSoft SafeQ system (secure queue, device direct queues or other shared queues).
The administrator can manage the list of users that can access shared queue's print jobs. The users are added from the dialog opened after you click on ADD USER TO SELECTED QUEUE. The desired queue must be selected beforehand. Additionally, the administrator can remove any user's access to the queue.
Current Behavior
Shared queues currently work only in a manager-secretary scenario (job is always accounted to the user who sent the job to YSoft SafeQ 6).
The manager sends a job to YSoft SafeQ 6.
Secretary logs in on a terminal and releases the print job.
The job is accounted for on the manager's account.
However, there are limitations for this scenario to work properly. See further details below in section Limitations.
Workstation Configuration
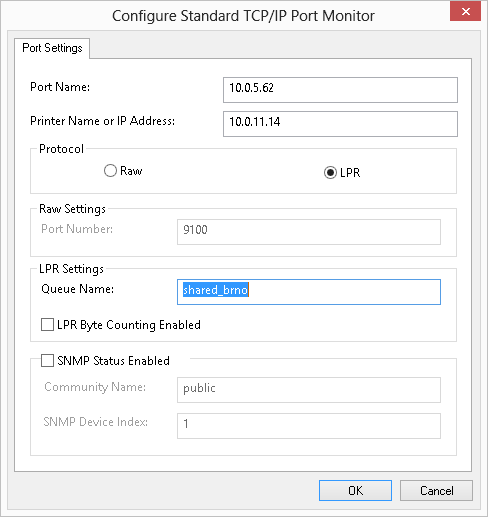
Configure the workstation as described at printer configuration for workstation and server, and use the Shared Queue Name created in previous steps.

Limitations
Functionality supported on Konica Minolta devices with YSoft SafeQ Embedded Terminal. Other vendors may have unknown issues which could be considered as limitations
Batch accounting is not supported with shared queues
VPSX integration is not supported with shared queues
When a secretary does not have access rights for a color job, a manager's color job sent to the shared queue can not be printed by the secretary
Implementation requires Unlimited access entitlement when the shared queues are used with the YSoft SafeQ Payment System or must have a sufficient balance/quota for both the manager and the secretary. If the secretary does not have Unlimited access entitlement and has depleted quotas or insufficient balance for the job, the manager's job cannot be printed by the secretary even though the job would be accounted to the manager's account.
YSoft SafeQ Desktop Interface does not provide the list of available shared queues for the user. To send a print job to a shared queue, follow Workstation configuration section.